Keto Turkey Meatloaf with Zucchini Ingredients That boost Flavor and Nutrition
Keto turkey meatloaf with zucchini offers a tasty and nutritious twist on a classic comfort food, perfectly tailored for low-carb lifestyles. This recipe marries lean turkey with fresh zucchini,creating a moist and tender meatloaf bursting with natural flavors and enhanced nutrition. Drawing inspiration from wholesome family dinners and modern ketogenic needs, this dish is both satisfying and healthful-ideal for those craving a hearty meal without the carb overload.
Prep and Cook Time
- Planning Time: 15 minutes
- Cooking Time: 50 minutes
- Total Time: 65 minutes
Yield
Serves 6 generous portions
Difficulty Level
Easy to Medium – perfect for home cooks aiming for comfort without fuss
Ingredients
- 1 ½ pounds lean ground turkey
- 1 medium zucchini (about 8 ounces), grated and excess moisture squeezed out
- 2 large eggs, lightly beaten
- ½ cup almond flour (for optimal keto binding)
- ¼ cup grated Parmesan cheese (adds richness and umami)
- ¼ cup finely chopped onion
- 2 cloves garlic, minced
- 2 tablespoons fresh parsley, chopped
- 1 teaspoon dried oregano
- 1 teaspoon smoked paprika
- ½ teaspoon salt
- ½ teaspoon freshly ground black pepper
- ¼ cup tomato paste (for topping)
- 1 tablespoon dijon mustard
- 1 tablespoon olive oil (optional, for drizzling before baking)
instructions
- Preheat your oven to 375°F (190°C) and line a loaf pan with parchment paper or lightly grease it to prevent sticking.
- Prepare the zucchini: Grate the zucchini and then gently squeeze out excess water using a clean kitchen towel or cheesecloth. This step is crucial to maintain a moist but firm meatloaf texture.
- In a large mixing bowl, combine: ground turkey, grated zucchini, beaten eggs, almond flour, Parmesan, onion, garlic, parsley, oregano, smoked paprika, salt, and pepper. Use your hands or a sturdy spoon to mix just until evenly combined-avoid overmixing to prevent a dense loaf.
- Transfer the mixture into the prepared loaf pan, pressing gently but firmly to shape the meatloaf evenly.
- Mix the tomato paste and Dijon mustard in a small bowl, then spread this glaze evenly over the top of the meatloaf. This keto-amiable topping adds tang and a stunning glossy finish.
- Optionally,drizzle olive oil over the topping for extra moisture and a golden crust.
- Bake for 45-50 minutes, or until the internal temperature reaches 165°F (74°C) and the topping is set and slightly caramelized.
- let the meatloaf rest for 10 minutes before slicing-this step locks in juices and ensures each slice stays tender.
Tips for Success: Mastering the Perfect Texture

- Don’t skip squeezing the zucchini: Excess moisture leads to a soggy meatloaf rather than a tender one.
- Almond flour is the key to binding and keeping carbs low; coconut flour dries out the loaf-use sparingly if at all.
- Let the loaf cool before cutting: This prevents crumbling and improves slice presentation for a polished look.
- Use a meat thermometer: Ensures perfectly cooked meatloaf without drying out.
- Feel free to swap parsley with fresh basil or thyme for a different herbaceous note while keeping nutrition intact.
- For make-ahead convenience, prepare up to the baking step and refrigerate overnight, then bake fresh.
Creative Keto-Friendly Toppings and Sides to Elevate Your Meal
Enhance this keto turkey meatloaf with zucchini by pairing it with inventive, low-carb accompaniments.Consider a dollop of creamy avocado chimichurri or smashed garlic butter atop warm slices for added richness and vibrancy. Roasted cauliflower florets drizzled with lemon and herbs, sautéed garlic spinach, or a crisp cucumber and radish salad also balance the hearty meatloaf beautifully.
For toppings, experiment with a keto-friendly basil pesto glaze or a sharp aged cheddar crumble melted on top in the final 5 minutes of baking for a sophisticated twist.Garnish with fresh microgreens or vibrant edible flowers for an Instagram-worthy plate that tastes as good as it looks.
Storing and Reheating Your Meatloaf for Maximum Freshness and Convenience
After enjoying your flavorful turkey meatloaf, storing leftovers properly helps maintain texture and taste. Wrap cooled meatloaf tightly in plastic wrap or transfer to an airtight container, then refrigerate for up to 4 days. When ready to reheat, slice individual portions and warm gently in a microwave or oven at 325°F (160°C) covered with foil to prevent drying.
For longer storage, freeze slices individually on a baking sheet, then transfer to freezer bags for up to 3 months. Thaw overnight in the fridge before reheating. This makes weeknight meals effortless without sacrificing flavor or nutrition.
| Nutrient | Per serving (approx.) |
|---|---|
| Calories | 260 kcal |
| Protein | 32 g |
| Net Carbs | 4 g |
| Fat | 12 g |
Explore more creative keto meals like our Keto Chicken Stir Fry for a diverse low-carb menu. For deeper insights on ketogenic nutrition, visit the Healthline ketogenic Diet Guide.

Q&A
Q&A: Keto Turkey Meatloaf with Zucchini – A low-Carb delight
Q1: What makes this turkey meatloaf keto-friendly?
A1: This turkey meatloaf is keto-friendly primarily as it swaps traditional high-carb fillers like breadcrumbs with low-carb zucchini. By incorporating zucchini, the meatloaf stays moist and tender without adding unnecessary carbs, making it perfect for a ketogenic lifestyle.
Q2: Why choose turkey over beef for this meatloaf?
A2: Turkey is naturally leaner than beef,wich complements the zucchiniS moisture beautifully without making the dish greasy. It’s a lighter protein choice, providing a clean flavor that allows the herbs and seasonings to shine through.
Q3: How does zucchini influence the texture of the meatloaf?
A3: Zucchini adds a subtle moisture and slight crunch to the meatloaf. Its natural water content keeps the loaf juicy and prevents it from drying out during baking – a common challenge with lean meats like turkey.
Q4: Can I prepare this meatloaf ahead of time?
A4: Absolutely! This meatloaf can be mixed the night before and stored in the fridge, allowing flavors to meld. It also reheats beautifully, making it perfect for meal prep or busy weeknight dinners.
Q5: What seasonings work best in this keto turkey meatloaf?
A5: Aromatics like garlic, onion powder, fresh thyme, and rosemary elevate the flavor profile. A touch of smoked paprika or cumin can add warmth, while salt and pepper balance out the natural sweetness of zucchini and turkey.
Q6: Is this recipe suitable for someone new to low-carb cooking?
A6: Definitely.The ingredients are simple, and the cooking process straightforward. Even beginners will appreciate how this meatloaf delivers traditional comfort food vibes with a low-carb twist.
Q7: How should I serve this turkey meatloaf to keep it keto-compliant?
A7: Pair it with keto-friendly sides like roasted cauliflower mash, sautéed greens, or a crisp arugula salad. Avoid starchy sides to maintain low-carb integrity and keep the meal light and satisfying.
Q8: Can I substitute zucchini with other vegetables?
A8: While zucchini is ideal for its moisture and mild flavor, other low-carb veggies like shredded cauliflower or grated eggplant could work in a pinch. However, zucchini offers the best balance of texture and subtlety.
Q9: Does the turkey meatloaf freeze well?
A9: Yes! this meatloaf freezes wonderfully. Slice it after cooling,portion into airtight containers or freezer bags,and thaw in the fridge before reheating. It’s a convenient way to enjoy a homemade keto meal anytime.
Q10: How long does it typically take to bake this meatloaf?
A10: Baking usually takes about 45 to 55 minutes at 350°F (175°C), depending on your oven and loaf size. It’s done when the internal temperature reaches 165°F (74°C) and the top is golden brown.
This Q&A dives into the essentials of creating a delicious, keto-approved turkey meatloaf with zucchini, ensuring you have all the tips to make it a standout low-carb dish!
Key Takeaways
Whether you’re a seasoned keto enthusiast or simply exploring low-carb options, this Keto Turkey Meatloaf with Zucchini offers a perfect harmony of flavor, nutrition, and simplicity. Its moist, savory profile paired with the subtle freshness of zucchini makes it a guilt-free comfort food that fuels your goals without sacrificing taste. Give this recipe a try and discover how easy-and delicious-staying low-carb can be. Your kitchen (and your waistline) will thank you!

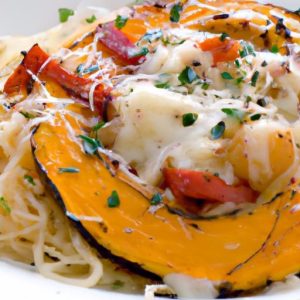
Spaghetti Squash with Marinara offers a fresh and vibrant twist on classic pasta that’s both nourishing and bursting with flavor.This dish captures the essence of Italian comfort food while embracing a lighter, vegetable-forward approach-perfect for anytime you crave something hearty yet wholesome.The naturally stringy flesh of the spaghetti squash creates the perfect canvas for a rich, tangy homemade marinara sauce, marrying texture and taste in every bite.

Prep and Cook Time
- Readiness: 15 minutes
- Cooking: 45 minutes
- Total Time: 1 hour
Yield
Serves 4 generous portions
Difficulty Level
easy to Medium - ideal for both kitchen novices and seasoned home cooks
Ingredients
- 1 medium spaghetti squash (about 3 pounds)
- 2 tbsp olive oil, divided
- 1 medium yellow onion, finely chopped
- 4 garlic cloves, minced
- 1 can (28 oz) whole peeled tomatoes, crushed by hand or with a blender
- 1 tsp dried oregano
- 1 tsp dried basil
- 1/2 tsp red pepper flakes (optional, for a subtle kick)
- Salt and freshly ground black pepper, to taste
- Fresh basil leaves, for garnish
- Grated Parmesan cheese or vegan alternative, for serving
- Optional toppings: sautéed mushrooms, roasted cherry tomatoes, sliced olives, fresh baby spinach
Instructions
- choose the perfect Spaghetti Squash: Pick a firm, medium-sized spaghetti squash with a pale yellow hue and no soft spots. the weight should feel heavy for its size, promising moisture and flavor.
- Preheat oven to 400°F (200°C). Using a sharp chef’s knife, carefully cut the squash in half lengthwise. Scoop out the seeds and stringy pulp with a spoon.
- Brush the cut sides of the squash with 1 tablespoon of olive oil. Place the halves cut-side down on a baking sheet lined with parchment paper or a silicone mat.
- roast for 40 minutes, or until the flesh is tender and easily strands with a fork. The squash should be golden at the edges but still moist inside for that perfect al dente bite.
- Prepare the marinara Sauce: While the squash roasts, heat the remaining 1 tablespoon of olive oil in a large skillet over medium heat. Add the chopped onion and sauté until soft and translucent, about 6-7 minutes.
- Add the minced garlic and cook 1 more minute until fragrant. Pour in the crushed tomatoes, then stir in the oregano, basil, red pepper flakes, salt, and pepper.
- Simmer the sauce gently on low heat for 20-25 minutes, stirring occasionally to develop a deep, rich flavor. Adjust seasoning to taste.
- When the squash is done, use a fork to rake through the flesh, creating long, noodle-like strands.Transfer the strands to serving plates.
- Ladle warm marinara sauce over the spaghetti squash strands, allowing the vibrant red sauce to coat the tender vegetable “noodles.”
- Add creative toppings such as sautéed mushrooms or roasted cherry tomatoes for bursts of umami and color. Garnish with fresh basil leaves and a sprinkle of Parmesan or nutritional yeast.
Tips for Success
- Roasting Tips: For deeper caramelization, rotate the baking sheet halfway through roasting. If pressed for time, microwave the squash halves cut-side down for 10 minutes before roasting to soften faster.
- Marinara variations: Use fresh tomatoes in season for a brighter, fresher flavor. Add a splash of high-quality balsamic vinegar to enrich the sauce’s tanginess.
- Storage: Leftover spaghetti squash and marinara sauce can be stored separately in airtight containers in the refrigerator for up to 3 days. Reheat gently to maintain texture.
- Vegan & Gluten-Free: This recipe is naturally gluten-free and can be vegan with plant-based cheese alternatives.
Serving Suggestions
Serve the spaghetti squash with marinara on warm, shallow bowls to showcase the vibrant sauce against the pale squash strands. For a pop of contrast and freshness, drizzle some extra virgin olive oil and scatter torn fresh basil or parsley atop. Add crunchy toasted pine nuts or a handful of baby spinach quickly wilted in the marinara for added texture and nutrition. Pair with a crisp green salad or garlic-roasted vegetables on the side for a well-rounded, colorful meal.
Nutritional details
| Nutrient | Per Serving |
|---|---|
| Calories | 220 kcal |
| Protein | 5 g |
| Carbohydrates | 30 g |
| Fat | 7 g |
Looking for more vegetable-forward Italian inspiration? Check out our Zucchini Noodle Primavera recipe for another fresh take on pasta night. For detailed information on the nutritional benefits of spaghetti squash,visit the Healthline nutrition guide.
Q&A
Q&A: Spaghetti Squash with Marinara – A Vibrant Twist on Pasta
Q1: What makes spaghetti squash a great alternative to traditional pasta?
A1: Spaghetti squash transforms beautifully when cooked, yielding tender, noodle-like strands that perfectly mimic the texture of spaghetti. It’s naturally low in carbs and calories, making it an excellent choice for those looking to enjoy a pasta-like dish without the heaviness of flour-based noodles. Plus, its mild, slightly sweet flavor provides a fantastic blank canvas that lets vibrant sauces like marinara really shine.
Q2: how do you prepare spaghetti squash so that it has the ideal texture?
A2: The key is roasting or steaming the squash until it’s tender but not mushy. after halving and removing the seeds, bake it cut-side down at about 400°F (200°C) for 40-45 minutes. Once cooled slightly, use a fork to gently scrape the flesh into spaghetti-like strands.This method keeps the strands intact and gives a satisfyingly al dente bite.
Q3: Can you customize the marinara sauce to complement the squash?
A3: Absolutely! A homemade marinara bursting with ripe tomatoes, garlic, basil, and a hint of chili flakes elevates the dish. For a unique twist,try adding roasted red peppers or sun-dried tomatoes into the sauce. The natural sweetness of the spaghetti squash pairs beautifully with these layers of rich, savory tang.
Q4: is spaghetti squash with marinara suitable for special diets?
A4: Yes,this dish is naturally gluten-free,vegetarian,and vegan if prepared without dairy toppings. It fits perfectly into low-carb and paleo lifestyles as well. Since the squash itself is nutrient-dense, it adds vitamins and fiber without excess calories, creating a wholesome, satisfying meal.
Q5: What are some fun toppings or mix-ins to jazz up spaghetti squash with marinara?
A5: Sprinkle toasted pine nuts or chopped fresh herbs like parsley or oregano for a fresh crunch and aroma. Nutritional yeast offers a cheesy, nutty kick for those avoiding dairy. You can also toss in sautéed mushrooms, roasted eggplant, or sautéed spinach for added texture and nutrition. The possibilities are endless and exciting!
Q6: How can you make spaghetti squash with marinara a kid-pleasant meal?
A6: Keep the marinara sauce smooth and mildly seasoned to appeal to younger palates, then add a sprinkle of shredded mozzarella or a handful of finely grated vegetables hidden in the sauce. Serving it with fun, colorful sides like steamed carrots or sweet peas can make the plate more inviting. Kids frequently enough enjoy the novelty of ”spaghetti” that comes from a vegetable, making mealtime a playful experience.
Q7: Can spaghetti squash be prepared ahead of time for busy weeknights?
A7: Definitely! Roast or steam your spaghetti squash in advance and store the strands in the fridge for up to 4 days. The marinara sauce can also be made in large batches and refrigerated or frozen in portions. When ready to eat,simply warm the squash and sauce together,and you have a quick,vibrant,and healthy meal that feels homemade.
Q8: What’s the best way to serve spaghetti squash with marinara for an notable presentation?
A8: Serve the squash strands twirled around a fork like traditional pasta on each plate, topped generously with vibrant marinara. Garnish with fresh basil leaves and a drizzle of high-quality extra virgin olive oil.A scattering of colorful bell pepper strips or a handful of microgreens adds a cheerful pop, turning a simple dish into a feast for the eyes as well as the taste buds.
To Wrap It Up
Whether you’re seeking a lighter alternative to traditional pasta or simply craving a dish bursting with color and nutrition, spaghetti squash with marinara offers a vibrant twist that satisfies both the palate and the body. Its naturally tender strands provide the perfect canvas for rich, tangy tomato sauce, creating a harmony of flavors that feels comforting yet refreshingly new. Next time you want to reinvent your dinner routine, let this stunning, versatile vegetable take center stage-proving that wholesome eating can be deliciously simple and brilliantly bright.

Crisp & Fresh: Mastering Fish Tacos with Cabbage Slaw
Crisp & fresh fish tacos with cabbage slaw embody the vibrant flavors and textures that celebrate coastal cuisine’s zest and simplicity. Inspired by sunny street markets and beachside shacks, this beloved dish offers more than just food-it’s an experience of contrast and harmony. Selecting the right fish is the cornerstone; its firm, delicate freshness shines through crispy, golden coatings that aren’t weighed down by excess grease. Paired with zesty, luminous sauces and herbaceous garnishes, every bite bursts with bold notes and satisfying crunch.

Prep and Cook Time
- Preparation: 20 minutes
- Cooking: 15 minutes
- Total Time: 35 minutes
Yield
- Serves 4 generously
Difficulty Level
- Medium: approachable for cooking enthusiasts looking to master texture and flavor balance
Ingredients
-
- For the fish:
- 1 lb fresh white fish fillets (cod, halibut, or mahi-mahi), skin removed
- 1 cup all-purpose flour, sifted
- 1 tsp smoked paprika
- 1 tsp garlic powder
- 1 tsp kosher salt
- 1/2 tsp black pepper
- 1 large egg, beaten
- 1/2 cup sparkling water or cold club soda
- 2 tbsp olive oil (for pan-frying)
- For the Tangy Cabbage slaw:
- 3 cups shredded green cabbage
- 1 cup shredded red cabbage
- 1/2 cup shredded carrot
- 1/4 cup finely chopped fresh cilantro
- 2 tbsp fresh lime juice
- 1 tbsp apple cider vinegar
- 1 tbsp honey
- 1 tsp Dijon mustard
- Salt and pepper to taste
- for the Zesty Sauce & Garnishes:
- 1/2 cup Greek yogurt
- 1 tbsp mayonnaise
- 1 tsp chipotle in adobo (minced)
- 1 garlic clove, grated
- 1 tbsp fresh lime juice
- Fresh cilantro leaves for garnish
- Thin slices of radish for crunch (optional)
- 4 small corn or flour tortillas, warmed
- For the fish:
The Art of Selecting the Perfect Fish for Ultimate Freshness
Start with firm, translucent fillets with no fishy odor-freshness is evident when the flesh bounces back lightly under finger pressure. choosing wild-caught over farmed elevates taste and texture, especially for fish like cod or mahi-mahi, which flake delicately while holding moisture within. When buying,ask your fishmonger about the catch date or opt for sashimi-grade if possible to ensure the highest quality. This foundation is key to building crisp & fresh fish tacos with cabbage slaw that shine from the inside out.
Crafting Tangy Cabbage slaw That Brightens Every Bite
The crisp freshness of the slaw provides essential contrast against the hearty fish. A vibrant combination of green and purple cabbage, shredded finely alongside carrots, invites color and crunch. Dressing the slaw with a simple vinaigrette featuring lime juice and honey harmonizes acidity with a touch of natural sweetness. Whisk in Dijon for subtle depth, with apple cider vinegar enhancing brightness. Toss the slaw gently just before serving to keep it crisp and lively.
Secrets to Achieving Crispy, Golden Fish Coating Without Grease
For that coveted crispy exterior, a light batter infused with sparkling water creates a delicate crust that is satisfyingly crunchy yet never heavy. The carbonation aerates the batter, allowing it to puff and seal moisture in the fish. Combining flour with smoky paprika and garlic powder layers the flavor. Pan-frying with minimal olive oil over medium heat ensures golden browning without soaking the fish in grease; use a non-stick skillet and flip carefully once edges turn crisp. Rest on paper towels briefly to drain any excess oil while preserving crunch.
Balancing Flavors with Zesty Sauces and Fresh Herb Garnishes
A creamy chipotle-lime sauce adds just the right hint of heat and tang, brightening the tacos without overpowering the delicate fish.Greek yogurt lends a cooling tang, balanced by the smoky warmth of minced chipotle and fresh lime juice for vibrancy. Dollop thinly over each taco and finish with scattered cilantro leaves and optional radish slices for peppery crunch. These final touches transform every bite into a layered, harmonious flavor experience.
Instructions
-
-
- Prepare the batter: In a bowl, whisk flour, paprika, garlic powder, salt, and pepper. In a separate bowl, beat the egg with sparkling water.Slowly combine wet into dry ingredients, stirring until just combined; some lumps are fine. Chill 10 minutes for best results.
- Prepare the slaw: In a large bowl, combine shredded cabbages, carrot, and cilantro. In a small bowl, whisk lime juice, vinegar, honey, Dijon, salt, and pepper. Pour dressing over slaw and toss gently. Refrigerate until ready to serve.
- Make the sauce: Mix Greek yogurt, mayonnaise, chipotle, grated garlic, and lime juice in a small bowl. Adjust seasoning and refrigerate.
- Cook the fish: Pat fish dry with paper towels, cut into taco-sized strips. Heat olive oil in a skillet over medium heat.Dip each piece of fish into batter, letting excess drip off, then place in skillet. Fry 3-4 minutes per side until golden and crisp. Transfer to paper towels to drain.
- Warm tortillas: Heat tortillas in a dry skillet or wrap in foil and warm in oven.
- Assemble tacos: place fish on each tortilla, add a generous spoonful of cabbage slaw, drizzle with chipotle-lime sauce, and garnish with fresh cilantro and radish slices.
-
Tips for Success
-
-
- Fish substitutions: Opt for any firm white fish like snapper or tilapia if halibut or cod aren’t available.
- batter variations: For extra crunch, add a tablespoon of cornstarch or substitute half the flour with rice flour.
- Make-ahead slaw: Prepare slaw up to 2 hours in advance but toss with dressing just before serving to maintain crispness.
- Oiling the pan: Use just enough olive oil to coat the skillet lightly-too much will make the coating soggy.
- Serving insight: Warm tortillas on a cast-iron griddle for subtle smoky flavor and pliability.
-
Serving Suggestions
Serve your fish tacos with wedges of fresh lime for an added squeeze of brightness. Pair with a side of cilantro-lime rice or black beans for a complete meal. for an extra pop of freshness, sprinkle chopped green onions and thinly sliced jalapeños atop. A crisp Mexican-style beer or sparkling water with lime complements the dish beautifully.

| Nutrient | Per Serving |
|---|---|
| Calories | 420 kcal |
| Protein | 35 g |
| Carbohydrates | 32 g |
| Fat | 14 g |
For more ways to upgrade your seafood dishes, check out our Ultimate Seafood Guide. Learn about enduring fish sourcing and best storage practices at the NOAA FishWatch.
Q&A
Q&A: Crisp & Fresh – Mastering Fish Tacos with Cabbage Slaw
Q1: What makes fish tacos notably tasty when paired with cabbage slaw?
A1: Fish tacos deliver a burst of tender, flaky texture paired with vibrant spices, but it’s the cabbage slaw that truly elevates the experience. The slaw adds a refreshing crunch and a zesty brightness,balancing the rich flavors of the fish. Together, they create a harmonious dance of textures and tastes – crisp, fresh, and utterly addictive.
Q2: Which fish varieties work best for making crispy fish tacos?
A2: White, flaky fish like cod, halibut, or mahi-mahi shine brightest in fish tacos. Their mild flavor acts as a blank canvas, letting your seasonings and the cabbage slaw’s tang sing through. Plus, these types of fish crisp up beautifully when fried or baked, delivering that coveted crunch.
Q3: How do you achieve the perfect crunch on your fish without overpowering the flavors?
A3: The secret lies in the batter and cooking method. A light, beer-based batter or a cornmeal crust can give your fish a golden, crispy exterior without masking the delicate fish inside. Maintaining hot oil at the right temperature ensures a rapid fry,locking in moisture while producing that irresistible crisp.
Q4: What’s the best way to prepare cabbage slaw for fish tacos?
A4: Aim for a slaw that’s bright, tangy, and slightly creamy but never soggy.thinly slice green and purple cabbage for color and texture, then toss with fresh lime juice, a hint of sweetness like honey or agave, a touch of crunchy red onion or jalapeño for some bite, and a drizzle of creamy mayo or Greek yogurt to bind it all. Let it rest a bit so flavors meld but stay crisp.
Q5: Can the slaw be made ahead of time?
A5: Absolutely! The flavors actually deepen when the slaw rests for at least 30 minutes and up to a few hours in the fridge. Just give it a quick toss before serving to redistribute any dressing that settles at the bottom. For best texture, add more delicate herbs or avocado just before assembly.
Q6: Are there any seasoning tips for the fish that complement the cabbage slaw?
A6: Keep it simple and fresh. A mix of cumin,smoked paprika,garlic powder,salt,and pepper adds warmth and depth without overpowering the fish. A splash of lime juice or a sprinkle of fresh cilantro just before serving ties the whole taco together beautifully alongside the tangy slaw.
Q7: Besides the cabbage slaw, what toppings or sauces can enhance fish tacos?
A7: Slices of ripe avocado, chopped fresh cilantro, and thinly sliced radishes add layers of texture and freshness. A drizzle of chipotle crema – made from blending chipotle peppers with sour cream or a plant-based alternative – adds creamy smoky heat. Alternatively, a simple squeeze of fresh lime juice can brighten every bite.
Q8: How do fish tacos with cabbage slaw fit into a healthy eating plan?
A8: fish tacos strike a perfect balance of nutrition and flavor. Fish offers lean protein and heart-healthy omega-3s, while the cabbage slaw contributes fiber, vitamins, and a satisfying crunch with minimal calories.When crafted with fresh ingredients and mindful cooking methods, they’re a vibrant and nourishing meal any day of the week.
Q9: What sides pair well with fish tacos to complete the meal?
A9: Think bright and fresh – cilantro-lime rice, black bean salad, or a simple mango salsa are great companions. Corn tortillas toasted on a dry skillet add authenticity and a toasty aroma.For an extra touch, a side of grilled corn with a sprinkle of chili powder and lime boosts the fiesta vibe.
Q10: any final tips for mastering fish tacos with cabbage slaw at home?
A10: Balance is key – between crispy and tender, spicy and tangy, creamy and crunchy. Use fresh, quality ingredients, don’t rush your fish frying or baking, and let your slaw sit just long enough to develop flavor without losing its snap. Most importantly, have fun assembling each taco – it’s as much about the experience as the taste!
Final Thoughts
As you wrap up your perfect fish taco, the vibrant crunch of cabbage slaw reminds you that balance is key-melding fresh textures with bold flavors to create a truly unforgettable bite. Mastering this dish isn’t just about following a recipe; it’s about embracing the harmony between crispness and freshness, sea-kissed fish and garden-picked slaw. Whether you’re cooking for a casual weeknight or a festive gathering,these fish tacos with cabbage slaw promise a festivity of taste that’s as lively as it is satisfying. So grab your tortillas, pile on the slaw, and let every mouthful transport you to a coastal breeze and sun-drenched moments-because the art of the fish taco is, ultimately, a delicious journey worth savoring.

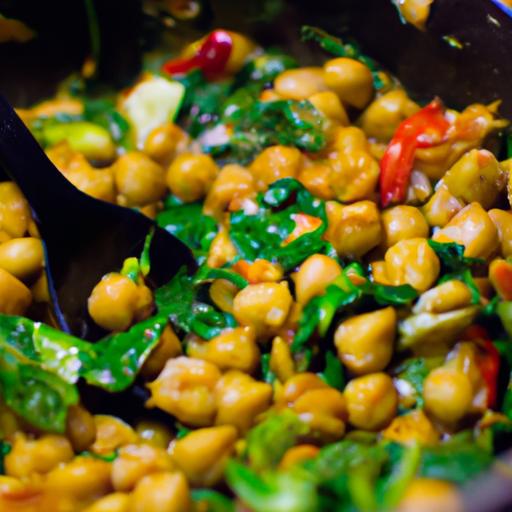
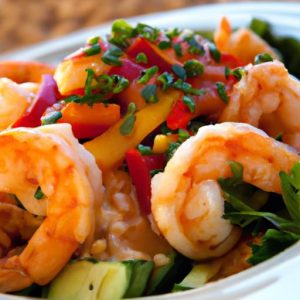
Ingredients that Bring the buffalo Shrimp Bowl to Life
Spice Up Dinner with a Zesty Buffalo Shrimp Bowl Recipe by harnessing the perfect medley of bold flavors and the invigorating heat of classic buffalo sauce. This vibrant dish captures the spirit of Southern-inspired American cuisine with a fresh, modern twist. The blend of crispy shrimp, crunchy veggies, and a luminous, tangy dressing brings color and vibrancy not just to your plate but to your entire meal experience.
Prep and Cook Time
- Preparation: 15 minutes
- Cooking: 10 minutes
- Total Time: 25 minutes
Yield
Serves 4 hungry diners, perfect for an easy weeknight dinner or casual weekend gathering.
Difficulty Level
Easy to Medium - ideal for cooks looking to add a punch of flavor without fuss.
ingredients
- 1 lb large shrimp, peeled and deveined
- 1/2 cup all-purpose flour
- 1 teaspoon smoked paprika
- 1/2 teaspoon garlic powder
- 1/2 teaspoon cayenne pepper (adjust for heat preference)
- Salt and freshly ground black pepper, to taste
- 2 tablespoons olive oil, for sautéing
- 1/3 cup buffalo hot sauce (choose your favorite brand for authentic flavor)
- 1 cup cooked brown rice or quinoa, for base
- 1 cup shredded romaine lettuce
- 1/2 cup shredded carrots
- 1/2 cup diced cucumbers
- 1/4 cup sliced green onions
- 1/4 cup crumbled blue cheese or dairy-free choice
- 1/4 cup ranch dressing or vegan ranch dressing
- Fresh chopped cilantro or parsley, for garnish
- Optional: lemon wedges, for a citrusy brightness
Step by Step Guide to Creating Your Zesty Dinner Bowl
- Prepare the shrimp: in a medium bowl, whisk together the flour, smoked paprika, garlic powder, cayenne pepper, salt, and black pepper. Toss the shrimp in the flour mixture until well coated, shaking off any excess.
- Cook the shrimp: Heat olive oil in a large skillet over medium-high heat. Add the shrimp in a single layer, sautéing until golden and cooked through-about 2-3 minutes per side. Stir occasionally to ensure even browning.
- Toss in buffalo sauce: Transfer cooked shrimp to a clean bowl and immediately toss with buffalo hot sauce for a glossy, spicy coating. Adjust sauce amount to taste-add more for piquant heat, less for mild kick.
- Assemble the bowl: In serving bowls, start with a base of warm brown rice or quinoa. Layer on shredded romaine, carrots, diced cucumbers, and green onions for freshness and crunch.
- Top with shrimp: Arrange the buffalo shrimp over the veggies and rice, then drizzle with ranch dressing. sprinkle crumbled blue cheese across the top for tangy, creamy contrast.
- Garnish and serve: Finish with freshly chopped cilantro or parsley and optional lemon wedges for a bright, aromatic zing. Serve immediately to enjoy the balance of textures and bold flavors.
Chef’s notes & Tips for Success
- Substitution tip: For gluten-free bowls,swap all-purpose flour with chickpea flour or rice flour for crispy coating without compromise.
- Heat Adjustment: Control the spice by choosing milder hot sauce or reducing cayenne in the flour mix if preferred.
- Make-Ahead Hack: Cook shrimp and prepare vegetables in advance but toss shrimp in buffalo sauce just before serving to maintain crispness.
- Alternate bases: Cauliflower rice or mixed greens work beautifully for a lighter variation.
- Storage: Store components separately in airtight containers and assemble fresh to preserve texture and freshness.
Creative Serving Suggestions to Elevate Your Meal Experience
Bring this dish to life beyond the bowl! Serve with crunchy tortilla chips for a fun finger food approach or wrap the buffalo shrimp and veggies inside a warm tortilla for spicy shrimp tacos. For a shared dining vibe, create a colorful DIY bar where guests build their own bowls, layering up rice, shrimp, veggies, and toppings.
For added creaminess, dollop guacamole or a cool avocado crema alongside your bowl. Garnishing with toasted pepitas brings irresistible crunch and nutty depth. Pair the meal with a crisp cucumber salad or a chilled glass of sparkling water infused with fresh herbs for a refreshing complement.

| Nutrient | Per Serving (Approx.) |
|---|---|
| Calories | 420 kcal |
| Protein | 35 g |
| Carbohydrates | 32 g |
| Fat | 15 g |
Discover more vibrant bowl recipes like this on our Spicy Dinner Bowls Collection, and for an expert deep dive on hot sauces and their heat scales, visit PepperScale’s authoritative guide.
Q&A
Q&A: Spice Up Dinner with a Zesty Buffalo shrimp bowl Recipe
Q1: What makes the Buffalo Shrimp Bowl recipe zesty and exciting?
A1: The magic lies in the bold buffalo sauce-a fiery blend of hot sauce, butter, and spices that coats the shrimp in a tangy kick. Paired with crisp veggies, creamy dressings, and fluffy rice or grains, each bite bursts with flavor and texture, turning an ordinary dinner into a thrilling culinary adventure.
Q2: How can I prepare shrimp so they stay juicy and tender in the bowl?
A2: Start with fresh or properly thawed shrimp, peeled and deveined. Marinate them briefly in a bit of lemon juice and garlic for added brightness, then sauté or grill them quickly over medium-high heat.Avoid overcooking-they only need a few minutes until pink and opaque, ensuring a perfect tender bite.
Q3: What are the best sides or toppings to assemble alongside the Buffalo Shrimp?
A3: Think vibrant and fresh: shredded lettuce or kale,crunchy celery sticks,diced cucumbers,cool avocado slices,and shredded carrots create a refreshing balance. Add a drizzle of creamy ranch or blue cheese dressing to mellow out the heat, plus a sprinkle of chopped green onions or cilantro for an herbal punch.
Q4: Can I customize this bowl to suit different dietary needs?
A4: Absolutely! Swap out rice for quinoa or cauliflower rice to lower carbs or boost fiber. For dairy-free options,use a vegan ranch dressing or a tangy avocado-lime crema. If you want extra crunch, toasted nuts or seeds like pumpkin or sunflower can enhance texture without overpowering the flavors.
Q5: Is this recipe suitable for a quick weeknight dinner?
A5: Yes, it’s perfect for busy evenings! With shrimp cooking in under 5 minutes and simple chopping of fresh veggies, you can have a flavorful, balanced meal on the table in about 20-25 minutes. Plus, it’s easily scalable if you’re feeding a crowd or prepping for lunches ahead.
Q6: How can I make the buffalo sauce at home without using store-bought sauces?
A6: Whip up your own buffalo magic by combining hot sauce (like a classic cayenne-based wing sauce),melted butter or a plant-based alternative,a splash of apple cider vinegar,garlic powder,and a pinch of smoked paprika. mix well and adjust the heat level to taste-this homemade sauce is fresher and customizable!
Q7: what beverage pairing would complement the spicy and tangy flavors of the Buffalo shrimp Bowl?
A7: To counterbalance the heat and tang, consider refreshing options like iced herbal teas with hints of mint or citrus, sparkling water infused with cucumber and lime, or a chilled ginger lemonade. These drinks cool the palate and enhance the vibrant flavors of the bowl.
Q8: Can I prepare parts of the Buffalo shrimp Bowl in advance?
A8: Definitely! Cook the rice or grains and chop the veggies ahead of time, storing them separately in airtight containers. You can also make the buffalo sauce in advance and keep it refrigerated. When ready to serve, quickly cook the shrimp and assemble-saving both time and effort on busy days.
This Q&A reveals how to transform a simple shrimp dish into a tantalizing,colorful meal that livens up any dinner table. The zesty sauce, fresh produce, and quick prep come together to inspire your next flavorful feast!
Wrapping Up
Ready to ignite your taste buds and bring a burst of bold flavor to your dinner table? This zesty Buffalo shrimp bowl recipe isn’t just a meal-it’s an experience, blending spicy, tangy, and fresh ingredients into one unforgettable bite. Whether you’re cooking for a crowd or craving a quick weeknight feast, this dish promises to elevate your dinner game with minimal effort and maximum zest. So grab your shrimp, fire up your skillet, and dive into a bowl that’s as vibrant and lively as your appetite. Your next flavorful adventure awaits!

Exploring the Vibrant Flavors of Roasted Vegetables in Quinoa Salad
Zesty Roasted Veggie Quinoa Salad with Fresh Lemon Dressing is a celebration of bold, colorful ingredients coming together in perfect harmony. This dish embodies both nutrition and flavor, offering roasted vegetables with a caramelized depth that effortlessly contrasts with the fresh, citrusy brightness of the lemon dressing. Inspired by Mediterranean and global influences, this salad is not just about taste-it’s about experiencing textures and aromas that awaken your palate.
Roasting vegetables like sweet bell peppers, earthy carrots, and smoky zucchini amplifies their natural sugars, creating a delightful caramelization that bursts in every bite. The quinoa acts as the perfect foundation, providing nuttiness and a protein punch, while the fresh lemon dressing delivers a zingy, refreshing finish that pulls all elements together.
Prep and Cook Time
- Preparation: 15 minutes
- Roasting: 25 minutes
- Total Time: 40 minutes
Yield
Serves 4 as a main or 6 as a vibrant side dish.
Difficulty Level
Easy - perfect for beginners and seasoned home cooks alike.
Ingredients
- 1 cup quinoa, rinsed thoroughly
- 2 cups water or vegetable broth
- 1 large red bell pepper, diced
- 1 medium zucchini, sliced into half-moons
- 2 medium carrots, peeled and chopped into bite-sized pieces
- 1 small red onion, cut into wedges
- 1 cup cherry tomatoes, halved
- 3 tbsp olive oil, divided
- Salt and freshly ground black pepper, to taste
- 1/4 cup fresh parsley, chopped
- 1/4 cup toasted pine nuts (optional)
Fresh Lemon Dressing
- 1/4 cup freshly squeezed lemon juice (about 2 lemons)
- 1/4 cup extra virgin olive oil
- 1 garlic clove, minced
- 1 tsp Dijon mustard
- 1 tsp honey or maple syrup
- salt and pepper, to taste
Instructions
- Cook the Quinoa: In a medium saucepan, combine rinsed quinoa and water (or vegetable broth for added flavor). Bring to a boil, then reduce heat to low, cover, and simmer for 15 minutes or until quinoa is fluffy and water is absorbed. Remove from heat and fluff with a fork. Let it cool slightly.
- Prepare the Vegetables: Preheat your oven to 425°F (220°C). on a large baking sheet,toss the bell pepper,zucchini,carrots,red onion with 2 tablespoons of olive oil,salt,and pepper.Spread them in a single layer for even roasting.
- Roast the Veggies: Place the baking sheet in the oven and roast for 20-25 minutes,stirring halfway through,until vegetables are tender and slightly charred around the edges. In the last 5 minutes, scatter the cherry tomatoes on top to soften without losing their shape.
- Make the Dressing: In a bowl, whisk together lemon juice, olive oil, minced garlic, Dijon mustard, honey, salt, and pepper until fully emulsified. Taste and adjust seasoning as needed for that zesty balance.
- Assemble the Salad: In a large serving bowl, combine the cooked quinoa, roasted vegetables, and drizzle the fresh lemon dressing over the top.Toss gently to coat everything evenly.
- Finish and Garnish: Sprinkle chopped parsley and toasted pine nuts for texture and added nuttiness. Serve promptly or chill for 30 minutes to let flavors meld beautifully.
Tips for Preparing and Serving Your Quinoa Salad Like a Pro
Selecting the Perfect Veggies: The magic of this salad lies in your choice of vegetables. Opt for fresh, colorful, and seasonal veggies-bell peppers bring sweetness and crunch, zucchini offers a mild earthiness, while carrots add natural sweetness and vibrant color. Red onions caramelize beautifully when roasted, adding subtle sharpness that enhances the dish.
Mastering the Art of the Fresh Lemon Dressing: Balancing acidity with a bit of sweetness transforms simple lemon juice into a bright, lively dressing. Using freshly squeezed lemon juice rather than bottled ensures vibrancy, while the Dijon mustard acts as a natural emulsifier creating a silky texture. Whisk continuously to avoid separation.
Roasting Technique: Spread vegetables evenly and avoid overcrowding the pan, enabling them to roast rather than steam. stir halfway to ensure golden, caramelized edges. This adds depth and a smoky note that complements the quinoa perfectly.
Make-Ahead Tips: Both quinoa and roasted vegetables keep well in the fridge for up to 3 days. Store dressing separately and toss just before serving to maintain freshness. This makes it an excellent recipe for meal prep or entertaining.
Serving Suggestions: Present your salad in a wide shallow bowl to showcase the vibrant colors. Garnish with a few lemon wedges and a sprinkle of microgreens or fresh herbs like basil or mint for a fragrant lift. pair with warm pita bread or a light soup for a wholesome meal.
| Nutrient | Per Serving |
|---|---|
| Calories | 280 kcal |
| Protein | 8 g |
| Carbohydrates | 38 g |
| Fat | 9 g |

For more wholesome salad inspiration,check out our Mediterranean Chickpea Salad. To dive deeper into the nutritional benefits of quinoa, visit Harvard T.H. chan School of Public Health.
Q&A
Q&A: Zesty Roasted Veggie Quinoa Salad with Fresh Lemon Dressing
Q: What makes this quinoa salad “zesty” and uniquely flavorful?
A: The star of this salad’s zing is the fresh lemon dressing-bright,tangy,and bursting with citrus notes. Paired with the warm, caramelized flavors of roasted veggies, the dressing adds a vibrant lift that wakes up every bite.
Q: Which vegetables work best for roasting in this salad?
A: Root vegetables like sweet potatoes and carrots, along with bell peppers, zucchini, and red onions are fantastic choices. Roasting brings out their natural sweetness and adds a delightful caramelized depth that contrasts beautifully with the fresh lemon dressing.
Q: Why choose quinoa as the grain base?
A: Quinoa is a nutritional powerhouse-it’s packed with protein, fiber, and essential minerals. Its slightly nutty flavor and fluffy texture make it a perfect canvas for the roasted veggies and zesty dressing, creating a hearty yet refreshing salad.Q: Can this salad be made ahead of time?
A: Absolutely! The quinoa and roasted veggies can be prepared in advance and kept chilled. When ready to serve, simply toss everything with the fresh lemon dressing. The flavors meld beautifully over time, making it an ideal make-ahead dish for lunches or gatherings.Q: How can I enhance the crunch factor in this salad?
A: Toasted nuts like almonds or walnuts, or even pepitas (pumpkin seeds), add a satisfying crunch. Sprinkle them on top just before serving to keep them crisp and add a delightful texture contrast.
Q: Is this salad suitable for special diets?
A: Yes! It’s naturally gluten-free, vegan, and packed with plant-based protein. It’s a wholesome option for anyone looking to enjoy a nourishing and vibrant meal without animal products or gluten.
Q: What herbs complement the lemon dressing and roasted veggies best?
A: Fresh herbs like parsley, cilantro, or mint brighten the salad and add aromatic layers. Their green freshness perfectly balances the roasted, earthy flavors and the zesty lemon dressing.
Q: Can I customize the dressing for different levels of tanginess?
A: Definitely. Adjust the lemon juice to your taste-start with the recommended amount and add more for extra zing. A small touch of honey or maple syrup can soften the acidity if desired, creating a perfectly balanced dressing.
Q: What’s the best way to roast the vegetables for this salad?
A: Cut the veggies into uniform pieces to ensure even cooking. Toss them with olive oil, salt, and pepper, then roast at 425°F (220°C) until beautifully caramelized and tender-usually around 20-30 minutes, tossing halfway through.
Q: How can I turn this salad into a complete meal?
A: Add in some cooked chickpeas or black beans for extra protein,or toss in avocado slices for creaminess. A sprinkle of toasted seeds or crumbled feta (if dairy is consumed) also boosts the texture and nutrition, transforming the salad into a satisfying main dish.
Wrapping Up
As the vibrant flavors of zesty roasted veggies mingle effortlessly with the nutty quinoa and bright, fresh lemon dressing, this salad becomes more than just a meal-it’s a celebration of wholesome ingredients and simple, clean eating. Whether you’re seeking a nutritious lunch, a light dinner, or a colorful side, this dish offers a delightful balance of textures and tastes that satisfy both the palate and the body. Next time you’re craving something fresh yet comforting, let this vibrant quinoa salad inspire you to embrace the delicious possibilities that seasonal vegetables and homemade dressings bring to your table. Bon appétit!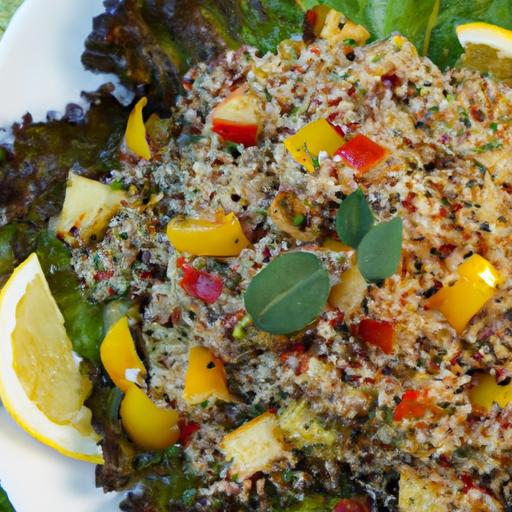
Wrap Up Flavor with irresistibly crispy chicken, creamy avocado, and smoky notes-all harmonized in every savory bite. These Chicken Bacon Avocado Bites redefine the art of snacking by combining textures and vibrant flavors that dance across your palate.
Prep and Cook Time
- Preparation: 15 minutes
- Cooking: 20 minutes
- Total Time: 35 minutes
Yield
- Serves 4 as an appetizer or snack
Difficulty Level
- Easy to medium – perfect for home cooks looking to elevate their snack game
Ingredients
- 2 large boneless, skinless chicken breasts, cut into bite-sized cubes
- 6 slices turkey bacon, cooked crispy and chopped
- 1 ripe avocado, peeled, pitted, and diced
- 1 cup panko breadcrumbs
- ½ cup grated Parmesan cheese
- 2 large eggs, beaten
- 1 tsp garlic powder
- 1 tsp smoked paprika
- Salt and freshly ground black pepper, to taste
- 2 tbsp olive oil, for sautéing
- fresh cilantro or parsley, finely chopped for garnish
- Optional: a squeeze of fresh lime juice for brightness
Step by Step Guide to Crafting Crispy chicken bacon Avocado Bites
- Prepare the chicken: Pat the chicken cubes dry with paper towels to ensure crispiness.Season evenly with garlic powder, smoked paprika, salt, and pepper.
- Set up your dredging station: Place the beaten eggs in one shallow bowl.In another, combine panko breadcrumbs and grated Parmesan for an extra savory crust.
- Coat the chicken bites: Dip each chicken piece first into the egg, letting excess drip off, then press into the breadcrumb mixture to coat thoroughly. set aside on a plate.
- Cook the bites: Heat olive oil in a large non-stick skillet over medium heat. add the coated chicken cubes, spacing them evenly. Sauté until golden and crispy, about 5-7 minutes per side, ensuring even browning. Adjust heat to prevent burning.
- Incorporate bacon and avocado: Once chicken is cooked, combine the bites with chopped turkey bacon and diced avocado in a mixing bowl. Gently toss so the avocado stays mostly intact but melds with warm chicken and bacon.
- Finishing touch: Add a light squeeze of lime juice and a sprinkle of fresh cilantro or parsley for a burst of freshness.
Chef’s Notes: Tips for Success
- Choose fresh, firm avocado to avoid mushy bites and ensure creamy texture contrasts with crisp chicken.
- Use turkey bacon for a smoky flavor without pork products.
- For extra crunch, toast the panko breadcrumbs lightly in a dry pan before coating.
- To make this recipe ahead: Prepare chicken bites and keep refrigerated up to 2 days. Add avocado just before serving to maintain freshness.
- Try swapping Parmesan for nutritional yeast if you want a dairy-free alternative with a cheesy twist.
Creative Serving Suggestions to Elevate Your Snack Experience
Present these bites on a rustic wooden board with a trio of dipping sauces-think vibrant chipotle aioli, classic ranch, or zesty cilantro-lime crema. Add texture contrast by pairing with crunchy celery sticks and pickled red onions on the side.
For a fresh twist, nestle each Chicken Bacon Avocado Bite onto a crisp endive leaf, turning them into bite-sized canapé jewels perfect for entertaining.
Visualize the golden crust gleaming under a sprinkle of fresh herbs, dotted with bursts of green avocado, creating irresistible, Instagram-worthy snacks that are as delightful to the eye as they are to the palate.
| Nutrient | Per Serving |
|---|---|
| Calories | 280 kcal |
| Protein | 25 g |
| Carbohydrates | 12 g |
| Fat | 15 g |

For a deeper dive into flavor layering and perfect protein snacks, check out our Healthy Protein Bites. To understand more about the health benefits of avocado and ways to incorporate it in your meals, visit Healthline’s avocado guide.
Q&A
Q&A: Wrap Up Flavor with Irresistible Chicken Bacon Avocado Bites
Q1: What makes Chicken Bacon Avocado Bites such a popular appetizer?
A1: these bites are a perfect harmony of creamy, savory, and crunchy textures. The tender chicken combined with smoky, crispy bacon and buttery avocado creates layers of flavor that excite the palate with every bite. Their bite-sized nature also makes them a convenient and elegant option for entertaining.
Q2: Can you describe the ideal chicken preparation for these bites?
A2: The chicken should be cooked until juicy and tender, preferably grilled, baked, or pan-seared with a hint of seasoning like garlic powder, paprika, and black pepper. This ensures a flavorful base that complements the creamy avocado and smoky bacon without overwhelming the palate.
Q3: How does avocado elevate the overall taste of these bites?
A3: Avocado brings a rich, buttery smoothness that balances the saltiness and crispiness of the bacon and the savoriness of the chicken. Its creamy texture also adds moisture, making every bite delightfully luscious and well-rounded.
Q4: What are some creative ways to assemble or serve these bites?
A4: You can skewer them onto toothpicks for easy finger food, serve them atop cucumber or endive leaves for a fresh crunch, or layer them on mini toasts for a charming, bite-sized canapé. Garnishing with fresh herbs like cilantro or chives can also add a bright, aromatic touch.
Q5: Are there any simple sauces or dips that pair well with Chicken Bacon Avocado Bites?
A5: Absolutely! A tangy lime crema, a zesty chipotle mayo, or a fresh herb yogurt dip complement these flavors beautifully. These sauces add a refreshing contrast and even more depth to the bites without overpowering the core ingredients.
Q6: Can this recipe be adapted for dietary preferences or restrictions?
A6: Yes! For those seeking a lighter option, use skinless chicken breast and turkey bacon alternatives that fit dietary needs. You can also swap out traditional bacon with plant-based smoked strips for a vegetarian-amiable twist that maintains smoky flavor.
Q7: What occasions are perfect for serving Chicken Bacon avocado Bites?
A7: These bites are versatile enough to shine at casual get-togethers, elegant cocktail parties, or even as a delightful starter for holiday meals. Their hand-held size and bold flavors make them a crowd-pleaser that suits nearly any celebration.
Q8: What’s a simple tip to keep avocado fresh and green when preparing these bites ahead of time?
A8: To prevent browning, toss avocado pieces gently in fresh lime or lemon juice right after slicing. Storing them in an airtight container with a slice of onion nearby can also help maintain their vibrant color until serving.
Elevate your appetizer game with these Chicken Bacon avocado Bites-the perfect marriage of flavors and textures that turn any occasion into a delicious celebration!
Concluding Remarks
As you savor the last bite of these Chicken Bacon Avocado Bites, it’s clear that the perfect wrap isn’t just about ingredients-it’s about the harmonious blend of flavors and textures that dance on your palate. Crispy bacon, tender chicken, and creamy avocado come together in a delicious symphony that’s as satisfying as it is simple to make.Whether your looking for a quick snack, a party appetizer, or a flavor-packed meal, these bites wrap up everything you crave in one irresistible package. So next time hunger strikes, remember: the ultimate flavor adventure is just a wrap away.
Quick & Nourishing: 10-Min Miso Soup with Tofu & Greens is a vivid celebration of umami-packed simplicity that channels the heartwarming spirit of customary Japanese home cooking. This soul-soothing soup effortlessly combines velvety miso broth, silken tofu, and vibrant fresh greens for a quick, wholesome meal that enlivens both the palate and the body. Whether you’re chasing a quick weekday lunch or a comforting starter, this recipe awakens a fresh, nourishing balance were flavor meets nutrition in perfect harmony.
Prep and Cook Time
- Readiness: 5 minutes
- Cooking: 5 minutes
- Total Time: 10 minutes
Yield
Serves 2 generous bowls
Difficulty Level
Easy - Perfect for beginners and busy home cooks
Ingredients That boost Flavor and Nutrition in Your Miso Soup
- 4 cups low-sodium vegetable broth (a clean, gentle base that lets miso shine)
- 3 tablespoons white miso paste (the cornerstone of a savory umami boost)
- 7 oz (200g) silken or firm tofu, cut into 1/2-inch cubes (for a creamy, tender protein hit)
- 2 cups fresh baby spinach or tender baby bok choy leaves (adding vivid green color and a mild earthy twist)
- 1/2 cup thinly sliced shiitake mushrooms (optional, for an added woodsy depth)
- 1 tablespoon finely sliced scallions (for a fresh aromatic lift)
- 1 teaspoon toasted sesame oil (a nuanced nutty finish)
- 1 tablespoon wakame seaweed, rehydrated and drained (classic sea-sourced minerals and texture)
- Freshly ground black pepper, to taste (to awaken layers of flavor)
- Optional garnish: toasted sesame seeds or a sprinkle of shichimi togarashi (Japanese seven-spice) for a mild kick
Step-by-Step Guide to Preparing Perfect Tofu and Greens
- Heat the broth: in a medium saucepan, bring your vegetable broth to a gentle simmer over medium heat. Avoid a rolling boil to preserve the delicate flavors.
- Prepare tofu: Gently cut tofu into uniform cubes to ensure even heating and a delicate mouthfeel. Silken tofu offers a custardy texture, while firm tofu provides a bit more bite.
- Add mushrooms: Introduce thinly sliced shiitake mushrooms and simmer for 2-3 minutes until just tender but still springy.
- Incorporate greens: Add spinach or baby bok choy and cook for 1-2 minutes until wilted but vibrant. Pull them out instantly to maintain their bright color and nutrition.
- Temper the miso: Place miso paste in a small bowl. Ladle 1/2 cup of warm broth and whisk the miso until smooth, preventing clumps and preserving probiotics.
- Combine miso with broth: Slowly add the miso mixture back into the pot, stirring gently but thoroughly. Avoid boiling after adding miso, as excessive heat can break down its flavor complexity.
- Gently fold in tofu and wakame: Warm the tofu cubes and seaweed in the simmering broth for a minute, taking care not to break the delicate tofu.
- Finish and season: Stir in toasted sesame oil and scallions, then season with freshly ground black pepper.
Tips for Enhancing Texture and Maintaining Freshness
- Use fresh greens: Choose tender baby greens; avoid older leaves which can turn bitter or overly fibrous.
- Skim foam: during simmering, gently skim off surface foam for a cleaner broth.
- Miso paste quality: Select quality miso from trusted suppliers for robust umami; organic or traditionally fermented varieties pack the best nutrition.
- Timing your tofu: Add tofu at the very end to keep it silky and prevent it from crumbling.
- Store broth properly: Make the broth fresh each time or store it in an airtight container to retain aromatic notes; reheat gently before use.
Customizing Your Miso Soup for Dietary Preferences and Seasonal Produce
The beauty of this miso soup lies in its adaptability. Feel free to swap tofu for other plant-based proteins such as edamame or tempeh, adjusting cook times accordingly.For a lighter broth, try dashi made from kombu and dried shiitake mushrooms as a base, tapping into traditional Japanese flavors without animal products. Seasonal vegetables like shredded cabbage in spring, tender asparagus tips, or sliced carrots in winter can add fresh textures and color.
For an extra nutrient boost, sprinkle a teaspoon of ground flaxseed or sprinkle chopped fresh herbs like cilantro or Thai basil at serving. If you require a gluten-free version, always check your miso paste label, as some contain barley or wheat. Experiment with heat by adding shichimi togarashi or a drizzle of chili oil for warmth.

instructions
- Bring 4 cups of low-sodium vegetable broth to a gentle simmer over medium heat.
- Add sliced shiitake mushrooms, simmer for 2-3 minutes until tender but firm.
- Add fresh baby spinach or bok choy; wilt for 1-2 minutes.
- In a separate bowl, whisk 3 tablespoons white miso paste with 1/2 cup warm broth until smooth.
- Slowly stir the miso mixture back into the pot. Avoid boiling to preserve flavor.
- Gently fold in cubed tofu and rehydrated wakame seaweed; warm through for one minute.
- Finish with 1 teaspoon toasted sesame oil and 1 tablespoon sliced scallions; season with black pepper.
- Serve hot, garnished with toasted sesame seeds or a sprinkle of shichimi togarashi if desired.
Chef’s Notes: Tips for Success
- Make-ahead: Prepare the broth in advance but add tofu and miso fresh at serving to preserve texture and umami.
- Tofu Choice: Silken tofu offers creaminess; firm tofu adds chewiness. Drain well before adding to prevent excess liquid.
- Miso Variations: White (shiro) miso is milder; try red (aka) miso for earthier, richer flavor.
- Broth Base: For depth,infuse vegetable broth with kombu or dried shiitakes for 20 minutes before heating.
- Handling Miso: Always dissolve miso in warm broth before mixing to prevent clumps and protect live cultures.
- Greens Timing: Add towards the end to keep their vibrant color and nutrients intact.
Serving Suggestions
Serve this Quick & Nourishing: 10-Min Miso Soup with Tofu & Greens in rustic ceramic bowls to enhance the homey feel. Garnish with a scattering of toasted sesame seeds or sliced scallions for contrasting texture and freshness. Pair with a side of steamed jasmine rice or a light cucumber sunomono salad to complement the umami richness.For added zing, offer small ceramic dishes of pickled ginger or a splash of citrusy yuzu juice on the table.
| Nutrient | per Serving |
|---|---|
| Calories | 130 kcal |
| Protein | 10 g |
| Carbohydrates | 8 g |
| Fat | 5 g |
Explore more easy tofu recipes
Learn about the nutritional benefits of miso on healthline.

Q&A
Q&A: Quick & Nourishing – 10-Min Miso Soup with Tofu & Greens
Q1: What makes miso soup a great quick meal option?
A1: Miso soup is a fantastic quick meal as it requires minimal ingredients, cooks rapidly, and still delivers a rich depth of umami flavor.Its simple broth, combined with nutrient-packed tofu and vibrant greens, provides a nourishing, warming dish that’s perfect when time is short but you still want something wholesome.Q2: Can I use any type of miso paste for this soup?
A2: Absolutely! While white miso (shiromiso) offers a gentle, slightly sweet flavor and cooks well in delicate broths, you can also experiment with red or mixed miso for a heartier, more robust taste. Just remember to add miso paste towards the end of cooking to preserve its probiotics and vibrant flavor.
Q3: What kind of tofu works best in miso soup?
A3: Silken or soft tofu is ideal becuase it gently absorbs the broth and adds a creamy texture without overpowering the soup. However, if you prefer a firmer bite, medium-firm tofu works well too - just cut it into small cubes to ensure even warming.
Q4: Which greens would you recommend for this recipe?
A4: Leafy greens like spinach, baby bok choy, or kale are perfect choices. They soften quickly in hot broth, adding color, nutrients, and a subtle earthiness. For a touch of freshness, thinly sliced scallions or a sprinkle of chopped chives on top can elevate the flavor even more.
Q5: How can I boost the nutritional value of my miso soup?
A5: Adding a handful of seaweed, such as wakame, not only enhances the umami but also infuses the soup with iodine and minerals. Including a variety of fresh or frozen greens amplifies antioxidants and vitamins,making this quick bowl both satisfying and healthful.
Q6: Is it necessary to use dashi stock in the broth?
A6: Traditional miso soup uses dashi for that authentic savory foundation, but if you’re short on time or ingredients, a simple vegetable broth or even water with a pinch of kombu (kelp) can work wonders. The miso paste itself brings plenty of flavor, so don’t stress too much about the base!
Q7: can this miso soup be made vegan?
A7: definitely! By choosing plant-based dashi or vegetable broth and sticking to tofu and greens, this miso soup is naturally vegan-friendly, providing a comforting, protein-rich, and plant-forward meal option.
Q8: What’s the best way to store leftover miso soup?
A8: Store any leftovers in an airtight container in the refrigerator for up to 2 days. When reheating, do so gently over low heat to avoid boiling and preserve the delicate flavors and beneficial enzymes in the miso paste. If the broth thickens, add a splash of water or broth to loosen it up.
Q9: Can I add other vegetables to this miso soup?
A9: Absolutely! Quick-cooking vegetables like thinly sliced mushrooms, carrots, or zucchini can add texture and flavor without extending cook time much. Just add them early enough to soften in the hot broth but keep things moving swiftly.
Q10: What makes this miso soup recipe so nourishing despite its simplicity?
A10: Its combination of fermented miso paste, plant protein-rich tofu, and vibrant greens creates a balanced bowl packed with probiotics, vitamins, minerals, and antioxidants. The warmth and umami provide comfort, while the wholesome ingredients fuel your body efficiently – all in just 10 minutes!
To Conclude
As you savor that final spoonful of your quick and nourishing miso soup, take a moment to appreciate how a handful of simple ingredients-silky tofu, vibrant greens, and umami-rich miso-come together to create a bowl that’s as comforting as it is wholesome. In just 10 minutes, you’ve crafted more than a meal; you’ve stirred up a ritual of wellness and warmth that effortlessly fits into your busy day. So next time you crave something fast yet fulfilling, remember this humble bowl of miso soup-a timeless blend of flavor and nourishment, ready to recharge both body and soul.

Quick & Tasty: 15-Min Honey Sesame Chicken with Veggies
Quick & Tasty: 15-Min Honey Sesame Chicken with veggies is the perfect weeknight solution when time is short but flavor is essential. This dish marries the irresistible sweetness of honey with the toasty crunch of sesame seeds, enhanced by crisp, vibrant vegetables that bring freshness and color to your plate. Inspired by classic Asian takeout,it’s a dish I’ve recreated countless times in my kitchen,always impressing guests with its balance of texture and flavor without spending hours cooking.
Prep and Cook Time
- Readiness: 10 minutes
- Cooking: 15 minutes
- Total: 25 minutes
Yield
Serves 4 hungry appetites
difficulty Level
Easy – Ideal for beginner and busy home cooks
Ingredients
- 1 lb boneless, skinless chicken breasts, cut into bite-sized pieces
- 2 tbsp sesame oil
- 1 cup broccoli florets
- 1 medium red bell pepper, thinly sliced
- 1 medium carrot, julienned
- 3 cloves garlic, minced
- 1 tbsp fresh ginger, grated
- 1/4 cup low sodium soy sauce
- 3 tbsp honey
- 1 tbsp rice vinegar
- 2 tsp cornstarch mixed with 2 tbsp water (slurry)
- 2 tbsp toasted sesame seeds
- 2 green onions, sliced for garnish
- Cooked jasmine rice or noodles, to serve (optional)
Instructions
- Heat the sesame oil in a large non-stick skillet or wok over medium-high heat until shimmering.
- Add the chicken pieces in a single layer. Sauté until golden on all sides and cooked through, about 5-6 minutes. Stir occasionally to promote even browning.
- Remove chicken from the skillet and set aside. In the same skillet, add garlic and ginger; sauté for 30 seconds until fragrant (do not let burn).
- Toss in the broccoli, bell pepper, and carrot. Stir fry for 3-4 minutes until veggies are crisp-tender but still vibrant.
- Return chicken to the skillet and pour in the soy sauce, honey, and rice vinegar.Stir to combine.
- Add the cornstarch slurry and cook for 1-2 minutes, stirring constantly, until sauce thickens and coats the chicken and vegetables beautifully.
- Sprinkle toasted sesame seeds over the stir-fry along with sliced green onions.
- Serve promptly over jasmine rice or your favorite noodles for a complete,colorful meal.
Why Honey Sesame Chicken is the Ultimate Weeknight Dinner
Nothing says comforting and quick like this honey sesame chicken packed with fresh veggies. It’s a dish that thrives on simplicity yet excites the palate with its sweet-savory glaze and nutty crunch. The 15-minute stir fry approach guarantees minimal cleanup and hands-on time, perfect for busy nights when you still want to impress yourself and loved ones with a dish that feels both wholesome and indulgent. The versatility of this recipe allows for endless customization, making it a staple in my weekly rotation.
Choosing the Perfect Veggies to Elevate Your Honey Sesame Chicken
Selecting the right vegetables is essential to complement the tender chicken and luscious sauce. Broccoli adds hearty crunch and vibrant greens, while bell peppers bring a subtle sweetness and lively color contrast. Julienned carrots introduce subtle earthiness and splash of orange, creating a visually appealing plate that invites you in. Feel free to mix in snap peas, baby corn, or water chestnuts for extra texture-and always choose fresh, crisp veggies to maximize flavor and nutritional value.

Step-by-Step Guide to a Flavorful 15-Minute Stir Fry
Mastering the art of a quick stir fry is about timing and multitasking. Start with dicing and prepping all ingredients before heating your pan-mise en place is crucial here. use a hot skillet to sear the chicken quickly for juicy results without drying out. stir frying veggies last prevents them from overcooking, preserving their snap and brightness. Combining the honey-soy sauce with a cornstarch slurry seals everything with a luscious glaze that clings naturally. This efficient layering builds complexity in a surprisingly short time.
Top Tips for Achieving the Best Texture and Taste Every Time
- Don’t overcrowd the pan: Cook chicken in batches if needed to get a perfect golden crust.
- Use freshly grated ginger: Fresh ginger infuses brightness that pre-ground powders cannot match.
- Adjust honey to taste: Balance sweetness with acidity by adding a splash more rice vinegar if necessary.
- Add veggies that cook at similar speeds: To ensure even cooking, cut them into comparable sizes.
- Use a non-stick skillet or well-seasoned wok: Prevent sticking and facilitate easy tossing.
- Toast your own sesame seeds: Lightly toasting intensifies their nutty flavor and aroma.
Chef’s Notes
- To make this recipe gluten-free,substitute regular soy sauce with tamari or coconut aminos.
- Chicken thighs can replace breasts for a juicier texture.
- Prepare the sauce ahead of time to speed up the cooking process even further.
- Leftovers reheat well and maintain their texture-great for lunch the next day.
Serving Suggestions
Plate this honey sesame chicken over steaming jasmine rice or silky noodles for a hearty meal. Garnish with extra green onions and a sprinkle of toasted sesame seeds for visual and textural appeal. A wedge of lime on the side adds an optional zesty brightness. For a fresh contrast, serve with a simple cucumber salad or pickled vegetables. The colorful medley of chicken and veggies makes for a stunning centerpiece on any dinner table.

| Nutrient | Per Serving |
|---|---|
| Calories | 380 kcal |
| Protein | 35 g |
| Carbohydrates | 28 g |
| Fat | 10 g |
For more thrilling weeknight dinners, check our collection of quick Asian-inspired meals. To deepen your knowledge on the health benefits of honey and sesame seeds, explore insights at The Nutrition Society.
Q&A
Q&A: Quick & Tasty: 15-Min Honey sesame Chicken with Veggies
Q1: What makes this Honey Sesame Chicken recipe quick and easy?
A1: The magic lies in the simple, speedy cooking process and minimal ingredients. The chicken is cut into bite-sized pieces that cook rapidly in a hot skillet, while pre-chopped veggies add crunch and color without extra prep time. The honey sesame sauce comes together in a breeze, delivering big flavor without the fuss.
Q2: Can I customize the veggies in this dish?
A2: Absolutely! This recipe is a versatile canvas. Classic choices like broccoli, bell peppers, and snap peas work wonderfully, but feel free to toss in zucchini, baby corn, or even shredded carrots to suit your taste and what’s fresh in your fridge.
Q3: How do I achieve that perfect sticky,glossy sauce?
A3: The key is balancing the honey’s natural sweetness with savory soy sauce and a hint of garlic and ginger. Cornstarch or arrowroot powder helps thicken the sauce quickly, coating the chicken and veggies with a luscious glaze that’s irresistibly glossy and clingy.
Q4: What type of chicken works best for this dish?
A4: Boneless,skinless chicken breasts or thighs cut into small chunks are ideal. Thighs tend to stay juicier and add extra depth,but breasts create a leaner meal. Just make sure the pieces are evenly sized for uniform cooking.
Q5: Can I prepare this meal ahead of time?
A5: While this dish shines when freshly cooked, you can prep the sauce and chop veggies in advance to speed up weeknight assembly. Leftovers reheated gently remain tasty but may lose a bit of the initial crisp-tender veggie texture.
Q6: Is there a way to make this recipe gluten-free?
A6: Yes! Opt for tamari or a gluten-free soy sauce option to replace regular soy sauce. Also, ensure your cornstarch or thickener hasn’t been cross-contaminated. This swap keeps all the flavor without gluten.
Q7: How can I add some extra crunch or texture?
A7: Toasted sesame seeds sprinkled on top add a delightful crunch and nutty aroma. For even more texture, you can garnish with chopped green onions or crushed roasted peanuts (unless allergies apply!).
Q8: Could this dish be made vegetarian or vegan?
A8: Certainly! Swap the chicken for firm tofu or tempeh, and use a plant-based soy sauce. A touch of maple syrup or agave can replace honey to keep it vegan-friendly without losing sweetness.Q9: What sides pair well with Honey Sesame Chicken and veggies?
A9: This dish pairs perfectly with steamed jasmine or brown rice, quinoa, or even cauliflower rice for a low-carb option.The grain soaks up the sticky sauce, making every bite a delight.
Q10: How do I prevent the chicken from drying out during cooking?
A10: Cook chicken pieces over medium-high heat just until thay’re opaque and slightly golden-about 4-5 minutes total.Avoid overcrowding the pan to ensure they sear rather than steam, locking in moisture and flavor.
This Q&A offers a flavorful glimpse into the secrets and tips behind the flavorful,fast-to-make Honey Sesame Chicken with Veggies – your new go-to for busy evenings full of zest and nourishment!
to Conclude
In just 15 minutes,you’ve unlocked a flavorful gateway to a weeknight dinner that doesn’t compromise on taste or nutrition. This honey sesame chicken with veggies is more than a quick fix-it’s a vibrant harmony of sweet, savory, and wholesome, proving that fast meals can also be fabulous. Next time your schedule gets tight, remember that delicious doesn’t have to wait. Give this recipe a whirl, and turn your kitchen into a hotspot of speedy, satisfying goodness.

Flavorful Ingredients That Make These Wraps Irresistible
Flavor-Packed Quick Chicken and Avocado Wraps to Try Today start with a harmony of fresh, vibrant ingredients that awaken every bite.The juicy, tender grilled chicken breast pairs beautifully with the creamy richness of perfectly ripe avocado, creating a balance that is both satisfying and light. sweet cherry tomatoes and crisp, crunchy lettuce add pops of freshness and texture, while a tangy lime-cilantro dressing brings a zesty brightness that ties all the flavors together. The warm, soft tortilla wrap acts as a perfect vessel, folding these ingredients into one irresistible handheld delight.
In this combination, every element plays a starring role. The choice of spices for the chicken, including smoked paprika and garlic powder, infuses a subtle warmth without overpowering the natural flavors. Simultaneously occurring, the creamy avocado acts as a natural binder with heart-healthy fats, enriching each bite and making these wraps a wholesome meal perfect for any time of day.
Prep and Cook Time
- Preparation: 10 minutes
- Cooking: 12 minutes
- total: 22 minutes
Yield
- Makes 4 servings (4 wraps)
Difficulty Level
- Easy – perfect for quick lunches or casual dinners
Ingredients
- 2 cups cooked chicken breast, shredded or sliced thinly
- 4 large flour tortillas (10-inch size)
- 1 ripe avocado, peeled, pitted, and sliced
- 1 cup cherry tomatoes, halved
- 1 cup baby romaine lettuce, roughly chopped
- 1 small red onion, thinly sliced
- 1/4 cup fresh cilantro, chopped
- 2 tablespoons fresh lime juice
- 1 teaspoon smoked paprika
- 1 teaspoon garlic powder
- 1/2 teaspoon ground cumin
- Salt and freshly ground black pepper, to taste
- 2 tablespoons olive oil
- Optional: 1/4 cup plain Greek yogurt (for a creamy sauce option)
Step by Step Guide to Assembling Your Perfect Chicken and Avocado Wrap
- Prepare the chicken: Toss cooked chicken with smoked paprika, garlic powder, cumin, salt, and pepper in a bowl. Drizzle olive oil and mix well to coat evenly.
- Warm the tortillas: Heat each tortilla in a dry skillet over medium heat for about 30 seconds per side, until soft and pliable.
- Create the lime-cilantro dressing: In a small bowl, combine lime juice, chopped cilantro, a pinch of salt, and a splash of olive oil. Whisk briefly.
- Layer the fillings: Lay the tortilla flat and begin with a bed of romaine lettuce in the center.Add seasoned chicken slices, followed by avocado slices, cherry tomatoes, and thin red onions for a sweet crunch.
- Drizzle the dressing: Generously spoon the lime-cilantro dressing over the fillings for a burst of zingy flavor in every bite.
- optional creaminess: For extra creaminess, spread a thin layer of Greek yogurt on the tortilla before adding the ingredients.
- Roll tightly: Fold in the sides of the tortilla and roll it up tightly from one end, keeping the fillings snug.
- Slice and serve: Cut the wrap diagonally for easy handling and a visually inviting presentation.
Tips for Boosting Flavor Without Adding extra Cooking Time
- Marinate the cooked chicken briefly with lime juice and herbs for 10 minutes before assembling to deepen flavor.
- Use fresh herbs like cilantro or parsley generously – their brightness adds complexity and freshness.
- Add a sprinkle of smoked paprika or chipotle powder to your layer of tomatoes for a subtle smoky kick without extra prep.
- Toast tortillas lightly to enhance texture and impart a nutty warmth that complements the creamy avocado beautifully.
- Mix a dash of zest (lemon or lime) into your creamy spread or yogurt for an instant lift in aroma and taste.
Creative Variations to Customize Your Wraps for Every Taste
- Spicy Kick: Add thinly sliced jalapeños and a chipotle mayo spread for a smoky, spicy twist.
- Mediterranean Flair: Replace cherry tomatoes with sun-dried tomatoes, add kalamata olives, and use a drizzle of tzatziki instead of lime dressing.
- Crunch Factor: Incorporate toasted sliced almonds or crushed tortilla chips inside the wrap for unexpected texture.
- Vegetarian Version: Swap chicken for grilled portobello mushrooms or chickpeas seasoned with cumin and smoked paprika.
- Breakfast Wrap: Add scrambled eggs and sautéed spinach to make a hearty morning meal that’s packed with protein.
serving Suggestions
Serve these Flavor-Packed Quick Chicken and Avocado Wraps with a side of homemade sweet potato fries or a light mixed green salad dressed in balsamic vinaigrette. Garnish with extra cilantro sprigs and lime wedges for a fresh, appetizing look. For a colorful presentation, place wraps cut side-up on a wooden board alongside small bowls of salsa, guacamole, or crema for dipping, inviting guests to customize every bite.

| nutrient | Per Serving |
|---|---|
| Calories | 350 kcal |
| Protein | 29 g |
| carbohydrates | 28 g |
| Fat | 12 g |
For more creative chicken-based wraps, check out our Healthy Grilled Chicken Wraps Recipe.To understand the benefits of including avocado in your meals, visit Healthline’s Avocado Benefits.
Q&A
Q&A: Flavor-Packed Quick Chicken and Avocado Wraps to Try Today
Q1: What makes these chicken and avocado wraps so flavor-packed?
A1: The secret lies in the vibrant combination of perfectly seasoned grilled chicken,creamy ripe avocado,and a medley of fresh herbs and zesty spices. Each bite delivers a balance of smoky, tangy, and buttery flavors that awaken the palate without overwhelming it.
Q2: How can I prepare these wraps quickly without sacrificing taste?
A2: Start with pre-cooked or quickly grilled chicken seasoned with simple pantry staples like garlic powder, paprika, and a touch of chili for heat. Mash ripe avocado with lime juice and a pinch of salt to enhance creaminess and brightness. Fresh veggies like crisp lettuce, juicy tomatoes, and a sprinkle of cilantro bring freshness-all wrapped in a soft tortilla ready in minutes!
Q3: Can these wraps be customized for different dietary preferences?
A3: Absolutely! Swap the chicken for grilled tofu or chickpeas to create a vegetarian option. Use gluten-free wraps or lettuce leaves as a low-carb alternative. You can also adjust the spice levels or add slices of jalapeño for an extra kick.Q4: What are some creative add-ins to elevate these wraps?
A4: Think crunchy roasted seeds, tangy pickled onions, or a drizzle of smoky chipotle mayo. Adding shredded carrots or thinly sliced radishes boosts texture, while a sprinkle of feta cheese introduces a salty contrast that pairs beautifully with avocado.
Q5: How should I store leftovers to keep the wraps fresh?
A5: To prevent sogginess, keep components like chicken, avocado mash, and veggies stored separately in airtight containers in the fridge. Assemble the wraps just before eating for the best texture and flavor.
Q6: Are these wraps suitable for meal prepping?
A6: Yes! Prepare your proteins, avocado spread, and veggies in advance. Assemble the wraps during the week, or layer the ingredients in a lunchbox for easy grab-and-go meals. This helps maintain freshness and keeps lunchtime exciting.
Q7: What makes avocado an essential ingredient in these wraps?
A7: Avocado brings a creamy richness and healthy fats that not only satisfy hunger but also complement the lean protein of chicken perfectly. Its mild flavor acts as a canvas for seasonings, elevating the entire wrap with smooth texture and natural subtle sweetness.
Q8: Can I use other types of tortillas or wraps?
A8: Definitely! Flour tortillas are a classic choice, but whole wheat, spinach, or sun-dried tomato wraps offer additional flavor and nutrients. For a grain-free option, large butter lettuce leaves work wonderfully as fresh, crisp carriers.
with these flavorful questions and answers, you’re all set to create quick chicken and avocado wraps that delight your taste buds and fit seamlessly into your busy lifestyle. Enjoy the fresh,zesty,and creamy joys rolled into each bite today!
Future Outlook
With their vibrant blend of tender chicken,creamy avocado,and a medley of fresh flavors,these quick chicken and avocado wraps are more than just a meal-they’re a festivity of easy,wholesome eating. Perfect for busy days or casual gatherings, they invite you to savor every bite without the fuss. So next time you’re pressed for time but craving something delicious and nutritious, roll up one of these flavor-packed wraps and enjoy a taste adventure that’s as simple to make as it is indeed satisfying. Your taste buds-and your schedule-will thank you.

Whip Up Quick Chickpea & Spinach Curry: Nutrient-packed Delight is a vibrant, wholesome dish that exemplifies the magic of combining simple ingredients for exceptional flavor and nourishment. Rooted in customary Indian cuisine yet effortlessly adaptable for any kitchen, this curry melds creamy chickpeas with fresh spinach in a fragrant, spiced tomato sauce. I first fell in love with this recipe on a chilly evening when craving comfort food that also fuels the body with wholesome goodness.The brilliant greens, earthy legumes, and warming spices come together to create layers of taste and texture that satisfy beyond expectation.
Prep and Cook Time
- Readiness: 10 minutes
- Cooking: 25 minutes
- Total Time: 35 minutes
yield
This recipe serves 4 hearty portions,perfect for family dinners or meal prep.
Difficulty Level
Easy - Ideal for cooks of all levels seeking a flavorful, nutritious meal on the table swiftly.
ingredients
- 2 tablespoons olive oil
- 1 medium onion, finely chopped
- 3 garlic cloves, minced
- 1 tablespoon freshly grated ginger
- 1 teaspoon cumin seeds
- 1 teaspoon turmeric powder
- 1 teaspoon coriander powder
- 1/2 teaspoon smoked paprika
- 1/2 teaspoon garam masala
- 1 can (400g) diced tomatoes
- 1 can (400g) chickpeas, drained and rinsed
- 4 cups fresh spinach, roughly chopped
- 1 cup light coconut milk (or vegetable broth for lighter option)
- Salt to taste
- Fresh cilantro for garnish
- Juice of 1/2 lemon
Step-by-Step Guide to Preparing Your Chickpea and Spinach Curry
- Heat olive oil in a large skillet over medium heat. Add cumin seeds and sauté for about 30 seconds until fragrant.
- Add finely chopped onion and cook until golden and translucent, about 5-7 minutes. Stir occasionally to avoid burning.
- Mix in garlic and ginger, sauté for 1-2 minutes until aromatic.
- Sprinkle the turmeric, coriander, smoked paprika, and garam masala into the pan. Stir well, letting the spices toast lightly for 1 minute.
- Pour in the diced tomatoes,breaking them down with the spoon,and simmer for 8-10 minutes until the mixture thickens.
- Stir in the rinsed chickpeas and coconut milk, bringing the curry to a gentle simmer.
- Add chopped spinach in batches, allowing it to wilt slightly before adding more, stirring constantly.
- Season with salt and finish with a fresh squeeze of lemon juice to brighten the flavors.
- Simmer for an additional 3-5 minutes, until all ingredients are melded perfectly and the curry reaches your desired consistency.
Tips for Enhancing Texture and Balancing Spices
For a luxurious texture, slightly mash a few chickpeas against the side of the pan with your spatula. This thickens the sauce without overpowering the curry’s hearty bite. Balancing spices is key-taste midway through cooking and adjust salt or sprinkle a pinch more garam masala to round the flavors. To add depth, a teaspoon of asafoetida (hing) at the start can elevate the umami without adding sodium.If the curry feels to sharp from the tomatoes, a teaspoon of natural sweetener like maple syrup or honey calms acidity beautifully.
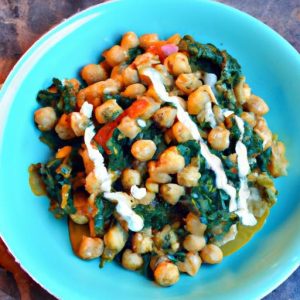
Creative Serving Suggestions to Elevate Your Meal Experience
Serve this chickpea and spinach curry atop fluffy basmati rice or alongside warm whole-wheat naan to soak up every drop of the luscious sauce. For a contrasting crunch,garnish with toasted pumpkin seeds or crushed roasted peanuts. Add a dollop of cooling Greek yogurt or vegan cashew cream to mellow the spices and provide a creamy balance. A sprig of fresh cilantro and thinly sliced red chili offer a vibrant,fresh finish that will delight your senses.
| Nutrient | Per Serving |
|---|---|
| Calories | 320 kcal |
| Protein | 14 g |
| Carbohydrates | 42 g |
| Fat | 9 g |
Chef’s Notes
- Ingredient swaps: Substitute fresh spinach with kale or Swiss chard for a different leafy flavor.
- Make ahead: this curry tastes even better the next day-store in an airtight container in the fridge for up to 3 days.
- Spice level: Adjust chili or smoked paprika for milder or bolder heat experiences.
- protein boost: Add cubed paneer or tofu in step 6 for extra creaminess and substance.

Discover more vibrant, nutrient-packed recipes in our healthy Vegetarian Dinners collection to keep your meals exciting and wholesome.
Q&A
Q&A: Whip Up Quick Chickpea & spinach Curry - A Nutrient-Packed Delight
Q1: What makes chickpea and spinach curry a great choice for a quick meal?
A: chickpeas and spinach both pack a powerful nutritional punch. Chickpeas provide plant-based protein and fiber, keeping you full and energized, while spinach delivers a wealth of iron, vitamins, and antioxidants. Combined, they create a hearty, flavorful dish that cooks up in under 30 minutes-perfect for busy days or last-minute dinners.
Q2: How can I make this curry flavorful without spending hours in the kitchen?
A: The secret lies in layering simple spices like cumin, coriander, turmeric, and garam masala while sautéing onions, garlic, and ginger. Using canned chickpeas and fresh or frozen spinach cuts down prep time drastically, yet the curry still bursts with rich, comforting flavors.
Q3: Can I customize the spice level of this curry?
A: Absolutely! Start with a gentle amount of chili or cayenne pepper if you prefer mild heat, or ramp it up for a fiery kick. Adding fresh green chilies, red pepper flakes, or a splash of lemon juice can fine-tune the flavor to suit your palate perfectly.
Q4: What are some clever ways to serve chickpea and spinach curry?
A: This versatile curry pairs beautifully with fluffy basmati rice, warm naan, or even a quinoa bowl for an extra protein boost. For a lighter twist, serve it over steamed vegetables or toss it with whole-grain pasta for a fusion-inspired meal.
Q5: Is this dish suitable for special diets?
A: Definitely! This curry is naturally vegan, gluten-free, and dairy-free, making it a fantastic choice for many dietary needs. Plus, it’s packed with fiber and antioxidants, supporting digestive health and immune function.
Q6: How can I store leftovers to keep the curry fresh and tasty?
A: Transfer the cooled curry into an airtight container and refrigerate for up to 3-4 days. Reheat gently on the stove or in the microwave, adding a splash of water or coconut milk to refresh the sauce’s texture. You can also freeze portions for up to 2 months, making meal prep a breeze.
Q7: Can I add other veggies or proteins to this curry?
A: Sure! Feel free to toss in diced tomatoes, bell peppers, or zucchini for extra colour and nutrients. If you want more protein variety, tofu, tempeh, or lentils complement chickpeas beautifully without overpowering the dish’s signature flavor.
Q8: What nutritional benefits can I expect from eating chickpea and spinach curry regularly?
A: Beyond being delicious, this curry supports heart health with its fiber-rich chickpeas, boosts iron absorption with spinach’s vitamin C content, and supplies anti-inflammatory compounds through its spices. It’s a simple way to nourish your body while enjoying a comforting meal.
Concluding Remarks
Whether you’re new to cooking or a seasoned kitchen adventurer, this quick chickpea and spinach curry proves that nutritious meals don’t have to be complex or time-consuming. Packed with vibrant flavors and wholesome ingredients, it’s a perfect weeknight warrior that nourishes both body and soul. So next time hunger strikes, remember that a delicious, nutrient-packed delight is just a few simple steps away-ready to warm your plate and brighten your day.