Flavorful Ingredients That Make These Wraps Irresistible
Flavor-Packed Quick Chicken and Avocado Wraps to Try Today start with a harmony of fresh, vibrant ingredients that awaken every bite.The juicy, tender grilled chicken breast pairs beautifully with the creamy richness of perfectly ripe avocado, creating a balance that is both satisfying and light. sweet cherry tomatoes and crisp, crunchy lettuce add pops of freshness and texture, while a tangy lime-cilantro dressing brings a zesty brightness that ties all the flavors together. The warm, soft tortilla wrap acts as a perfect vessel, folding these ingredients into one irresistible handheld delight.
In this combination, every element plays a starring role. The choice of spices for the chicken, including smoked paprika and garlic powder, infuses a subtle warmth without overpowering the natural flavors. Simultaneously occurring, the creamy avocado acts as a natural binder with heart-healthy fats, enriching each bite and making these wraps a wholesome meal perfect for any time of day.
Prep and Cook Time
- Preparation: 10 minutes
- Cooking: 12 minutes
- total: 22 minutes
Yield
- Makes 4 servings (4 wraps)
Difficulty Level
- Easy – perfect for quick lunches or casual dinners
Ingredients
- 2 cups cooked chicken breast, shredded or sliced thinly
- 4 large flour tortillas (10-inch size)
- 1 ripe avocado, peeled, pitted, and sliced
- 1 cup cherry tomatoes, halved
- 1 cup baby romaine lettuce, roughly chopped
- 1 small red onion, thinly sliced
- 1/4 cup fresh cilantro, chopped
- 2 tablespoons fresh lime juice
- 1 teaspoon smoked paprika
- 1 teaspoon garlic powder
- 1/2 teaspoon ground cumin
- Salt and freshly ground black pepper, to taste
- 2 tablespoons olive oil
- Optional: 1/4 cup plain Greek yogurt (for a creamy sauce option)
Step by Step Guide to Assembling Your Perfect Chicken and Avocado Wrap
- Prepare the chicken: Toss cooked chicken with smoked paprika, garlic powder, cumin, salt, and pepper in a bowl. Drizzle olive oil and mix well to coat evenly.
- Warm the tortillas: Heat each tortilla in a dry skillet over medium heat for about 30 seconds per side, until soft and pliable.
- Create the lime-cilantro dressing: In a small bowl, combine lime juice, chopped cilantro, a pinch of salt, and a splash of olive oil. Whisk briefly.
- Layer the fillings: Lay the tortilla flat and begin with a bed of romaine lettuce in the center.Add seasoned chicken slices, followed by avocado slices, cherry tomatoes, and thin red onions for a sweet crunch.
- Drizzle the dressing: Generously spoon the lime-cilantro dressing over the fillings for a burst of zingy flavor in every bite.
- optional creaminess: For extra creaminess, spread a thin layer of Greek yogurt on the tortilla before adding the ingredients.
- Roll tightly: Fold in the sides of the tortilla and roll it up tightly from one end, keeping the fillings snug.
- Slice and serve: Cut the wrap diagonally for easy handling and a visually inviting presentation.
Tips for Boosting Flavor Without Adding extra Cooking Time
- Marinate the cooked chicken briefly with lime juice and herbs for 10 minutes before assembling to deepen flavor.
- Use fresh herbs like cilantro or parsley generously – their brightness adds complexity and freshness.
- Add a sprinkle of smoked paprika or chipotle powder to your layer of tomatoes for a subtle smoky kick without extra prep.
- Toast tortillas lightly to enhance texture and impart a nutty warmth that complements the creamy avocado beautifully.
- Mix a dash of zest (lemon or lime) into your creamy spread or yogurt for an instant lift in aroma and taste.
Creative Variations to Customize Your Wraps for Every Taste
- Spicy Kick: Add thinly sliced jalapeños and a chipotle mayo spread for a smoky, spicy twist.
- Mediterranean Flair: Replace cherry tomatoes with sun-dried tomatoes, add kalamata olives, and use a drizzle of tzatziki instead of lime dressing.
- Crunch Factor: Incorporate toasted sliced almonds or crushed tortilla chips inside the wrap for unexpected texture.
- Vegetarian Version: Swap chicken for grilled portobello mushrooms or chickpeas seasoned with cumin and smoked paprika.
- Breakfast Wrap: Add scrambled eggs and sautéed spinach to make a hearty morning meal that’s packed with protein.
serving Suggestions
Serve these Flavor-Packed Quick Chicken and Avocado Wraps with a side of homemade sweet potato fries or a light mixed green salad dressed in balsamic vinaigrette. Garnish with extra cilantro sprigs and lime wedges for a fresh, appetizing look. For a colorful presentation, place wraps cut side-up on a wooden board alongside small bowls of salsa, guacamole, or crema for dipping, inviting guests to customize every bite.

| nutrient | Per Serving |
|---|---|
| Calories | 350 kcal |
| Protein | 29 g |
| carbohydrates | 28 g |
| Fat | 12 g |
For more creative chicken-based wraps, check out our Healthy Grilled Chicken Wraps Recipe.To understand the benefits of including avocado in your meals, visit Healthline’s Avocado Benefits.
Q&A
Q&A: Flavor-Packed Quick Chicken and Avocado Wraps to Try Today
Q1: What makes these chicken and avocado wraps so flavor-packed?
A1: The secret lies in the vibrant combination of perfectly seasoned grilled chicken,creamy ripe avocado,and a medley of fresh herbs and zesty spices. Each bite delivers a balance of smoky, tangy, and buttery flavors that awaken the palate without overwhelming it.
Q2: How can I prepare these wraps quickly without sacrificing taste?
A2: Start with pre-cooked or quickly grilled chicken seasoned with simple pantry staples like garlic powder, paprika, and a touch of chili for heat. Mash ripe avocado with lime juice and a pinch of salt to enhance creaminess and brightness. Fresh veggies like crisp lettuce, juicy tomatoes, and a sprinkle of cilantro bring freshness-all wrapped in a soft tortilla ready in minutes!
Q3: Can these wraps be customized for different dietary preferences?
A3: Absolutely! Swap the chicken for grilled tofu or chickpeas to create a vegetarian option. Use gluten-free wraps or lettuce leaves as a low-carb alternative. You can also adjust the spice levels or add slices of jalapeño for an extra kick.Q4: What are some creative add-ins to elevate these wraps?
A4: Think crunchy roasted seeds, tangy pickled onions, or a drizzle of smoky chipotle mayo. Adding shredded carrots or thinly sliced radishes boosts texture, while a sprinkle of feta cheese introduces a salty contrast that pairs beautifully with avocado.
Q5: How should I store leftovers to keep the wraps fresh?
A5: To prevent sogginess, keep components like chicken, avocado mash, and veggies stored separately in airtight containers in the fridge. Assemble the wraps just before eating for the best texture and flavor.
Q6: Are these wraps suitable for meal prepping?
A6: Yes! Prepare your proteins, avocado spread, and veggies in advance. Assemble the wraps during the week, or layer the ingredients in a lunchbox for easy grab-and-go meals. This helps maintain freshness and keeps lunchtime exciting.
Q7: What makes avocado an essential ingredient in these wraps?
A7: Avocado brings a creamy richness and healthy fats that not only satisfy hunger but also complement the lean protein of chicken perfectly. Its mild flavor acts as a canvas for seasonings, elevating the entire wrap with smooth texture and natural subtle sweetness.
Q8: Can I use other types of tortillas or wraps?
A8: Definitely! Flour tortillas are a classic choice, but whole wheat, spinach, or sun-dried tomato wraps offer additional flavor and nutrients. For a grain-free option, large butter lettuce leaves work wonderfully as fresh, crisp carriers.
with these flavorful questions and answers, you’re all set to create quick chicken and avocado wraps that delight your taste buds and fit seamlessly into your busy lifestyle. Enjoy the fresh,zesty,and creamy joys rolled into each bite today!
Future Outlook
With their vibrant blend of tender chicken,creamy avocado,and a medley of fresh flavors,these quick chicken and avocado wraps are more than just a meal-they’re a festivity of easy,wholesome eating. Perfect for busy days or casual gatherings, they invite you to savor every bite without the fuss. So next time you’re pressed for time but craving something delicious and nutritious, roll up one of these flavor-packed wraps and enjoy a taste adventure that’s as simple to make as it is indeed satisfying. Your taste buds-and your schedule-will thank you.

The Perfect Marinade Blend for Ultimate Flavor Infusion
zesty Lemon Herb Chicken Thighs owe their irresistible taste to a carefully crafted marinade that balances bright citrus with fragrant herbs and warming spices. This marinade not only softens the meat but also seeps deep into every fiber, ensuring each bite bursts with layers of fresh, zesty complexity. The marriage of fresh lemon juice,garlic,and herbs like rosemary,thyme,and parsley captures the essence of Mediterranean sunshine,perfect for a quick roasted delight.
To create the ultimate infusion,use extra virgin olive oil as your base; its smooth mouthfeel coats the chicken evenly and helps the herbs retain their aroma during roasting. Season generously with sea salt and freshly cracked black pepper-these staples elevate the natural juices of the chicken thigh to savory perfection.
Choosing the Ideal Chicken Thighs for Juicy Tenderness
When it comes to juicy tenderness, bone-in, skin-on chicken thighs reign supreme. The bone insulates the meat during cooking, keeping it moist, while the skin crisps up beautifully when roasted at high heat, creating a delightful contrast between crunchy and succulent textures. Look for thighs that are plump with firm, pale pink flesh and smooth skin free from bruising.
For those who prefer a leaner option, skinless thighs will still deliver amazing flavor when properly marinated but won’t achieve the same crispy exterior-a worthwhile consideration depending on your texture preference.Whenever possible, choose organic or free-range chicken thighs for a richer, more natural flavor profile.
Mastering the Roasting Technique for Crispy Skin and Succulent Meat
Perfecting the roasting process is key to achieving the hallmark crispiness of the skin juxtaposed with tender, juicy meat underneath. Preheat your oven to 425°F (220°C) to encourage quick caramelization of the marinade sugars and skin fat. Use a wire rack set over a rimmed baking sheet or roasting pan to allow hot air to circulate evenly around each piece-this will prevent sogginess.
Pat the chicken dry with paper towels before roasting; moisture is the enemy of crispy skin. Roast for 30-35 minutes, turning once halfway through to brown evenly. Internal temperature should reach 165°F (74°C)-use a meat thermometer for best results. Let the chicken rest 5-7 minutes after roasting to allow juices to redistribute, locking in moistness.
Serving Suggestions and Pairings to Elevate Your Lemon Herb Chicken
To complement the vibrant zesty and herbal notes, serve the chicken thighs alongside simple, bright sides such as a cucumber and tomato salad dressed with lemon vinaigrette or a light quinoa pilaf with toasted almonds and fresh herbs. Roasted baby potatoes tossed with olive oil and rosemary form a rustic, satisfying accompaniment that echoes the flavors in your marinade.
Garnish your plate with a handful of chopped parsley, thin lemon slices, or a sprinkling of crumbled feta cheese for a burst of color and creamy contrast. A dollop of creamy tzatziki or garlic aioli adds a luxurious, cooling balance to the warmth of the roasted chicken.

Prep and Cook Time
- Readiness: 15 minutes
- Marinating: 1 hour (minimum)
- Cooking (Roasting): 35 minutes
- Total Time: Approximately 1 hour 50 minutes
Yield
Serves 4 generously, ideal for a family dinner or casual entertaining
Difficulty Level
Easy – Perfect for weeknight cooks looking for speedy, remarkable results
Ingredients
- 8 bone-in, skin-on chicken thighs (about 3.5 lbs)
- 1/4 cup extra virgin olive oil
- Juice and zest of 2 large lemons
- 4 garlic cloves, minced
- 2 tablespoons fresh rosemary, finely chopped
- 2 tablespoons fresh thyme leaves
- 2 tablespoons fresh parsley, chopped
- 1 teaspoon sea salt
- 1/2 teaspoon freshly ground black pepper
- 1/4 teaspoon smoked paprika (optional, adds depth)
Instructions
- Prepare the marinade: In a large mixing bowl, whisk together olive oil, lemon juice and zest, garlic, rosemary, thyme, parsley, sea salt, black pepper, and smoked paprika.
- Marinate the chicken: Add the chicken thighs to the bowl and toss until fully coated. Cover with plastic wrap and refrigerate for at least 1 hour (up to 6 hours) to let flavors penetrate.
- Preheat the oven and prepare pan: Set your oven to 425°F (220°C).Arrange a wire rack over a rimmed baking sheet to encourage airflow beneath the chicken pieces.
- Dry and arrange chicken: Remove chicken from marinade, pat dry with paper towels to remove excess moisture-this ensures crispy skin. Place chicken skin-side up on the wire rack.
- Roast: Roast for 30-35 minutes, turning thighs once after 15 minutes to brown evenly. Check for doneness with a meat thermometer (165°F/74°C internal temperature).
- Rest: transfer cooked thighs to a plate and tent loosely with foil.Allow to rest 5-7 minutes to lock in juices.
- Serve: Arrange chicken on a platter. Spoon pan juices over if desired, and garnish with fresh herbs and lemon slices.
Chef’s Notes
- for even deeper flavor, marinate overnight but no longer than 24 hours to avoid acidity breaking down the chicken too much.
- Skinless thighs will cook faster; reduce roasting time by 5-7 minutes and keep a close eye to avoid drying out.
- Use fresh herbs where possible for the brightest aroma, but dried might potentially be substituted in a pinch (reduce by half).
- Make ahead: Chicken can be marinated and refrigerated up to 24 hours before cooking. Leftovers reheat beautifully in a hot oven or air fryer to restore crispiness.
Serving Suggestions
Present your lemon herb chicken thighs with a vibrant Mediterranean-style chopped salad featuring cherry tomatoes,cucumbers,red onion,and kalamata olives,tossed in a light lemon vinaigrette.A side of fluffy couscous or herbed rice pilaf complements the zesty notes perfectly.
For a rustic touch, roast seasonal vegetables such as asparagus, bell peppers, or zucchini drizzled with the same marinade before roasting alongside the chicken.
Garnish with thin lemon wheels, a sprinkle of fresh parsley, and a drizzle of extra virgin olive oil. To make it a complete plate, a scoop of cooling tzatziki or garlic yogurt sauce adds a luscious contrast.
Nutritional Information (per serving)
| Calories | Protein | Carbs | Fat |
|---|---|---|---|
| 320 kcal | 28 g | 2 g | 20 g |
For inspiration on Mediterranean side dishes to pair with this chicken, explore our curated collection. Learn more about the health benefits of citrus and herbs from Healthline’s detailed guide.
Q&A
Q&A: Zesty Lemon Herb Chicken Thighs – A Quick Roasted Delight
Q1: What makes lemon and herbs such a perfect pairing for chicken thighs?
A1: Lemon’s bright, tangy acidity cuts through the rich, juicy flavor of chicken thighs, creating a harmonious balance that awakens the palate. Herbs like rosemary, thyme, and parsley add earthy, aromatic layers, transforming a simple roast into a vibrant, zesty masterpiece.
Q2: Can I use bone-in,skin-on chicken thighs for this recipe?
A2: Absolutely! bone-in,skin-on thighs are ideal as the bones help retain moisture,keeping the meat tender,while the crispy skin adds an irresistible crunch and locks in flavor. Plus, they roast beautifully under high heat, getting that perfect golden finish.
Q3: How quick is the preparation and roasting process for this dish?
A3: this dish is a true weeknight hero. Preparation takes about 10 minutes - a quick marinade with lemon juice, zest, olive oil, garlic, and herbs – and roasting requires just 25-30 minutes. The result is a delicious, aromatic meal in under 45 minutes.
Q4: Are there any tips to maximize the lemon flavor without overpowering the chicken?
A4: To keep lemon bright and balanced, use fresh lemon juice and zest sparingly, combined with a good drizzle of olive oil and plenty of herbs. Marinate briefly-around 15-20 minutes-so that the chicken absorbs just enough zestiness without becoming too tart.
Q5: What side dishes complement zesty lemon herb chicken thighs best?
A5: Roasted vegetables like asparagus, baby potatoes, or carrots make wonderful companions. A simple quinoa salad or fluffy couscous with fresh herbs and a squeeze of lemon can also highlight and enhance the zesty notes of the chicken.
Q6: Is this recipe adaptable for a larger crowd or meal prepping?
A6: Definitely! The marinade scales up beautifully, and these chicken thighs hold their flavor well when reheated. Store them in an airtight container,and enjoy leftovers cold on salads or warm with your favorite grain bowl.
Q7: Can I make this recipe gluten-free?
A7: Yes! The recipe is naturally gluten-free, relying on fresh ingredients like lemon, herbs, garlic, and olive oil-perfect for anyone avoiding gluten without needing substitutions.
Q8: What’s the secret to achieving crispy skin on roasted chicken thighs?
A8: Pat the chicken skin dry with paper towels before marinating, and roast on a high rack or baking tray at a hot temperature (around 425°F/220°C). This dry heat crisps the skin beautifully,while the fat underneath bastes the meat,keeping it juicy.
Q9: Can this recipe be adapted for bone-free, skinless chicken thighs?
A9: Yes, though bone-in, skin-on thighs offer superior flavor and texture. If using boneless, skinless thighs, reduce roasting time slightly and consider adding a quick sear in a hot pan first to develop some caramelization.
Q10: How should leftovers be stored and reheated?
A10: Store leftovers in a sealed container in the refrigerator for up to 3 days. To reheat, gently warm in the oven at 350°F (175°C) to help maintain crispiness, or in a skillet with a splash of olive oil for added flavor and texture.
To Conclude
With its vibrant medley of zesty lemon and fragrant herbs, this roasted chicken thigh recipe transforms simple ingredients into a quick, delicious meal that delights the senses. Whether you’re cooking for a busy weeknight or impressing guests with minimal fuss, these lemon herb chicken thighs offer a perfect harmony of bright flavors and tender juiciness. So next time you crave a dish that’s both effortless and remarkable, remember this recipe-it’s your ticket to a beautifully roasted delight that’s as nourishing as it is flavorful.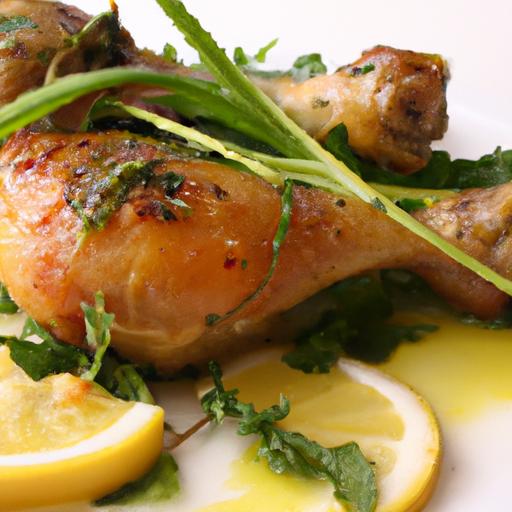
One Pan Roasted Chicken & Cherry Tomatoes: Simple Flavor Boost
One pan roasted chicken & cherry tomatoes transforms weeknight dinners into effortless culinary delights, blending juicy poultry with bursts of sweet, roasted tomatoes in a vibrant, aromatic medley. This method celebrates simplicity and bold flavors, offering a beautifully balanced dish that’s as visually stunning as it is indeed delicious. Whether you’re new to one pan cooking or a seasoned chef craving minimalist prep with maximum impact, this recipe unlocks the secrets to a juicy roast and perfectly caramelized cherry tomatoes, elevating your home-cooked meals.
Prep and Cook Time
- Preparation: 15 minutes
- Cooking: 40 minutes
- Total Time: 55 minutes
Yield
Serves 4 generous portions
Difficulty level
Easy – perfect for weeknight cooks and beginners looking to impress
Ingredients
- 4 bone-in, skin-on chicken thighs (about 1.5 to 2 lbs)
- 2 cups cherry tomatoes, preferably vine-ripened or heirloom
- 3 tbsp extra virgin olive oil
- 4 cloves garlic, smashed
- 1 tsp smoked paprika
- 1 tsp dried oregano
- 1 tsp kosher salt
- ½ tsp freshly cracked black pepper
- 1 tbsp fresh thyme leaves (or 1 tsp dried thyme)
- 1 lemon, sliced thinly
- Fresh basil or parsley for garnish
Instructions
- Preheat your oven to 425°F (220°C) to achieve the perfect balance of crispy skin and tender chicken.
- Dry the chicken thighs thoroughly with paper towels. This step is crucial for a golden, crispy crust that locks in juices.
- in a small bowl, combine olive oil, smoked paprika, dried oregano, salt, pepper, and thyme. Rub this fragrant blend evenly all over the chicken thighs, ensuring full coverage beneath the skin for maximum flavor infusion.
- Arrange chicken thighs skin-side up on a large, oven-safe skillet or sheet pan. Nestle the cherry tomatoes, smashed garlic cloves, and lemon slices around and under the chicken pieces.
- Roast in the preheated oven for 35 to 40 minutes, or until the internal temperature of the chicken reaches 165°F (74°C) and the skin is crisp and golden brown. The cherry tomatoes will blister and release their sweet juices, bathing the chicken in rich flavor.
- Halfway through cooking (around 20 minutes), gently toss the tomatoes and baste the chicken with pan juices for even roasting and intensified taste.
- Once done, remove from the oven and let rest for 5 minutes to allow the juices to redistribute.
- Garnish with fresh basil or parsley before serving to add a radiant, fresh contrast to the roasted richness.
Understanding the Magic of One Pan Cooking for Effortless Meals
Using a single pan not onyl minimizes cleanup but also encourages a harmonious melding of flavors. The chicken’s fat renders and seeps into the cherry tomatoes, wich burst under the high heat, releasing sweet, concentrated juices.This natural basting ensures every bite is juicy and aromatic without requiring elaborate techniques or multiple dishes.
Selecting the Perfect Cherry Tomatoes to elevate Your Roasted Chicken
Choosing the right cherry tomatoes can dramatically influence the dish’s flavor and texture. Look for firm,plump tomatoes with vibrant color-deep red or golden varieties offer a sweeter,more intense flavor.Vine-ripened or heirloom cherry tomatoes are excellent choices because they roast beautifully, becoming soft but not mushy, with an irresistible bright acidity that cuts through the richness of the chicken.
Mastering the Ideal Roast Time and Temperature for Juicy, Flavorful Results
The 425°F roasting temperature is key to achieving succulent chicken with crisply caramelized skin and perfectly blistered tomatoes. High heat ensures rapid Maillard reactions on the chicken skin, locking in moisture, while gently coaxing the tomatoes to soften and release their natural sugars. Timing is precise enough to cook thoroughly yet short enough to prevent drying, resulting in a juicy, flavorful plate.
Creative Herb and Spice Combinations to Amplify Every Bite
While smoked paprika and thyme bring depth and earthiness, consider experimenting with other spices like sumac for a lemony tang, or fresh rosemary for aromatic pine notes. Adding a pinch of chili flakes can introduce a subtle warmth that pairs beautifully with the sweetness of roasted tomatoes. Herbs like basil and parsley aren’t just garnishes-they brighten the palate and enhance every mouthful, adding layers that dance against the roasted backdrop.
Chef’s notes
- Skin-On Chicken Thighs: Using bone-in, skin-on thighs ensures juiciness and flavor. Boneless or breasts can work but require shorter cooking and careful monitoring.
- Make-Ahead: Marinate the chicken overnight with the olive oil and spice mix for even more intense flavor.
- Substitutions: Swap oregano for rosemary, or add a tablespoon of balsamic vinegar with the tomatoes for a tangy twist.
- Common Pitfall: Avoid overcrowding the pan; give the chicken and tomatoes some breathing room for even roasting and caramelization.
- resting Time: Never skip resting the chicken after roasting to preserve juiciness.
Serving Suggestions
Serve this one pan roasted chicken & cherry tomatoes alongside creamy mashed potatoes or herbed couscous to soak up the luscious pan juices. A light arugula salad with lemon vinaigrette adds freshness that balances the richness. for garnish, sprinkle flaky sea salt and fresh cracked pepper over the top, and scatter chopped fresh basil or parsley for a pop of color and aroma.
| Nutrient | Amount per Serving |
|---|---|
| Calories | 380 kcal |
| Protein | 35 g |
| Carbohydrates | 8 g |
| Fat | 22 g |

For more cozy and efficient meals, check out our One Pan Vegetable Roast. Learn about the health benefits of tomatoes from Healthline.
Q&A
Q&A: One Pan Roasted Chicken & cherry Tomatoes – Simple Flavor Boost
Q1: What makes one pan roasted chicken with cherry tomatoes such a popular dish?
A1: The magic lies in its simplicity and flavor. Roasting chicken and cherry tomatoes together in one pan lets their natural juices mingle, creating a luscious, rich sauce with minimal effort. It’s an easy, fuss-free way to transform humble ingredients into a vibrant, satisfying meal.
Q2: Why use cherry tomatoes rather of regular tomatoes in this recipe?
A2: Cherry tomatoes burst with intense sweetness and juiciness when roasted, adding a delightful pop of color and flavor to the dish. Their small size makes them perfect for roasting quickly alongside chicken, ensuring an even cook and that irresistible caramelized finish.
Q3: How can I ensure the chicken stays juicy and tender?
A3: Start by patting the chicken dry and seasoning it generously. Searing the chicken skin-side down first locks in juices and creates crispy, golden skin.Roasting at a moderately high temperature allows the chicken to cook through while keeping it moist. Resting the chicken briefly after cooking also helps the juices redistribute.
Q4: Can I customize the herbs and spices for different flavor profiles?
A4: Absolutely! Fresh herbs like rosemary, thyme, or oregano meld beautifully with roasted chicken and tomatoes. For a bold twist,experiment with smoked paprika,garlic powder,or lemon zest. The one pan method welcomes creative flavor tweaks without complicating preparation.
Q5: What side dishes pair best with this one pan roasted chicken and cherry tomatoes?
A5: The roasted juices create a natural sauce that complements simple sides such as garlic mashed potatoes, creamy polenta, or a crisp green salad. For a lighter option, consider steamed asparagus or roasted Brussels sprouts to keep the meal balanced and fresh.
Q6: Is this recipe suitable for meal prep or leftovers?
A6: definitely! This dish reheats wonderfully, with flavors often deepening over time. Simply store leftovers in an airtight container in the fridge for up to three days.Reheat gently to preserve moisture, and enjoy a swift, flavorful meal throughout the week.
Q7: How does cooking everything in one pan improve the cooking process?
A7: One pan cooking streamlines both the cooking and cleanup processes, saving time and energy. The ingredients roast together, sharing flavors and creating a harmonious dish where nothing is wasted-every bit of caramelization and fond enriches the final meal.
Q8: What tips can help avoid soggy tomatoes or undercooked chicken?
A8: Arrange chicken pieces skin-side up to keep tomatoes from getting crushed and soggy. Ensure tomatoes are spread evenly around the pan without overcrowding to allow proper roasting. Use a meat thermometer to check chicken doneness-165°F (74°C) guarantees safety and juiciness.
Q9: Can this recipe be adapted for boneless chicken cuts?
A9: Yes! Boneless chicken breasts or thighs will cook faster and can be more convenient. Just reduce roasting time accordingly and watch closely to prevent drying out. Boneless cuts soak up the roasted tomato juices beautifully, offering a tender, flavorful bite.Q10: How can I elevate this dish for a dinner party without losing simplicity?
A10: Add a sprinkle of toasted pine nuts or slivered almonds for crunch, a drizzle of high-quality olive oil, or fresh herbs scattered on top just before serving. Pairing with a rustic artisan bread to soak up the vibrant sauce keeps the presentation elegant yet effortless.
Key Takeaways
In the world of weeknight dinners and rushed meals, this One Pan Roasted Chicken & Cherry Tomatoes recipe stands out as a beacon of simplicity and vibrant flavor. With minimal effort, you unlock a symphony of juicy roasted chicken and burstingly sweet tomatoes that elevate any table. Whether you’re a seasoned cook or just beginning your culinary journey, this recipe proves that sometimes the best dishes come from the easiest methods. So next time you crave a meal that’s both comforting and bright,remember: one pan,a handful of ingredients,and a flavor boost that speaks volumes. Happy roasting!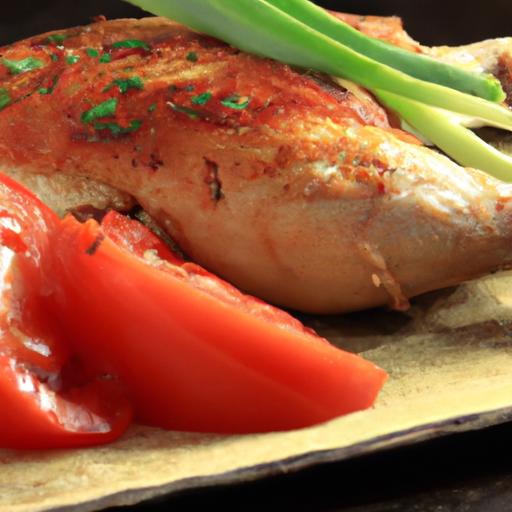
Easy & Tasty Store-Bought Veggie Burgers Made Simple are a fantastic gateway to embracing plant-based meals without sacrificing flavor or nutrition. Whether you’re a busy home cook or simply craving a satisfying, wholesome burger, mastering how to choose, enhance, and store your veggie patties can transform your meal experience from ordinary to extraordinary.
Prep and Cook Time
- Readiness: 5 minutes
- Cooking: 10 minutes
- Total Time: 15 minutes
Yield
Serves 4 hearty veggie burger lovers
Difficulty Level
Easy - perfect for weeknight dinners or casual gatherings
Ingredients
- 4 store-bought veggie burger patties (choose your preferred protein base: black bean,chickpea,lentil,or mushroom)
- 4 whole-grain burger buns or gluten-free buns,toasted
- 1 ripe avocado,sliced
- 1 cup mixed salad greens (arugula,spinach,or kale)
- 1 large tomato,thinly sliced
- 1 small red onion,thinly sliced
- 4 slices of vegan cheese or your favorite cheese alternative
- 1/4 cup hummus or spicy vegan mayo
- 1 tablespoon olive oil (for cooking)
- Optional toppings: pickles,roasted red peppers,sautéed mushrooms
Instructions
- Preheat a non-stick skillet or grill pan over medium heat and add olive oil to warm.
- Cook the veggie patties according to package instructions, typically 4-5 minutes per side.To enhance texture, avoid flipping frequently – let a golden crust form before turning.
- Add vegan cheese slices to the patties during the last minute of cooking, covering the pan with a lid to melt perfectly.
- Lightly toast the burger buns in the same skillet or toaster until crisp and golden brown.
- Spread hummus or vegan mayo evenly on the bottom bun to add creaminess and a flavor boost.
- Layer the cooked patty on the bun, then top with avocado slices, salad greens, tomato, red onion, and any optional toppings you desire.
- Place the top bun over the stacked ingredients and gently press down for easy handling.
- Serve immediately with your favorite side like sweet potato fries, a crisp slaw, or a fresh garden salad.
Tips for Success
- Flavor Boost: Brush patties lightly with smoked paprika or garlic-infused olive oil before cooking to add smoky warmth.
- Texture Trick: For an ultra-crispy exterior, dust patties with a thin layer of cornstarch before frying.
- Make-Ahead: Cook patties in advance and store them individually wrapped in an airtight container; reheat in a skillet for 3 minutes on each side to restore crispness.
- Substitutions: Swap avocado with guacamole or creamy cashew spread for a different twist on richness.
- Allergy Tips: Opt for gluten-free buns and verify veggie burger ingredients if sensitive to soy or nuts.
Serving Suggestions
Pair your veggie burgers with colorful, crisp garnishes like pickled red onions or charred corn salad for lively crunch and acidity. A small drizzle of balsamic glaze or a scattering of toasted pumpkin seeds adds unexpected gourmet charm. complement the burger with sweet potato wedges or a dill-infused cucumber salad for a well-rounded meal experience.

| Nutritional Info (per burger) | Calories | Protein (g) | Carbs (g) | Fat (g) |
|---|---|---|---|---|
| Black Bean Patty w/ toppings | 320 | 18 | 35 | 12 |
| Chickpea Patty w/ toppings | 310 | 16 | 38 | 11 |
| Lentil Patty w/ toppings | 300 | 17 | 33 | 10 |
| Mushroom Patty w/ toppings | 280 | 14 | 30 | 9 |
For more ways to customize and amplify your plant-based meals, check out our collection of delicious vegan side dishes. To learn about the nutritional benefits of popular veggie burger ingredients, visit HealthlineS guide to black beans, an excellent resource to deepen your culinary knowledge.
Q&A
Q&A: Easy & Tasty Store-Bought Veggie Burgers Made Simple
Q1: What makes store-bought veggie burgers a convenient meal option?
A1: Store-bought veggie burgers save valuable prep time while offering a nutritious and flavorful meal. They come pre-seasoned and ready to cook, making them perfect for busy weekdays or last-minute gatherings without sacrificing taste or quality.
Q2: How can I enhance the flavor of a plain veggie burger?
A2: Elevate your veggie burger by adding fresh toppings like avocado slices, caramelized onions, or tangy pickles. Experiment with sauces such as spicy mustard, garlic aioli, or smoky BBQ sauce. Toasting the bun and lightly seasoning the patty with a pinch of smoked paprika or garlic powder can also add depth.
Q3: what cooking methods work best for store-bought veggie burgers?
A3: Most veggie burgers perform wonderfully on a grill, stovetop skillet, or oven. Grilling adds a smoky char, while pan-searing gives a crispy crust. Baking is fuss-free and keeps the burger juicy-just be sure to follow package instructions and keep an eye so they don’t dry out.
Q4: Are there specific veggies or sides that pair well with veggie burgers?
A4: Absolutely! Think vibrant roasted sweet potato fries, crisp kale slaw, or crunchy pickled veggies. fresh tomato slices and leafy greens can brighten the burger, while a side of tangy coleslaw or seasoned corn on the cob creates a well-rounded plate full of texture and flavor.
Q5: Can I customize store-bought veggie burgers to suit different dietary needs?
A5: Definitely! Look for gluten-free or low-sodium options if needed. You can also swap traditional buns for lettuce wraps or whole grain bread. Adding nutrient boosters like sprouts, avocado, or a fried egg (for non-vegan eaters) can tailor your burger to your preferred diet while keeping it delicious.
Q6: how do I prevent store-bought veggie burgers from becoming soggy?
A6: To keep your veggie burger firm and delightful, avoid overcrowding the pan or grill, which can trap moisture. Toasting the bun separately and adding fresh, dry toppings last minimizes sogginess.let the patty rest briefly after cooking to maintain its structure before assembling.
Q7: Are there any fun twists to upgrade a basic veggie burger?
A7: Absolutely! Try layering your burger with grilled pineapple rings for a sweet-savory combo or spread hummus and sprinkle toasted pine nuts for a Mediterranean flair. For a spicy kick, mix some chipotle mayo or sriracha into your toppings lineup. Get creative, and let your taste buds lead the way!
Q8: What shoudl I look for when choosing a good store-bought veggie burger?
A8: Seek out burgers with wholesome ingredients like beans, peas, quinoa, or vegetables, avoiding those heavy in preservatives or artificial fillers. A balanced mix of protein and fiber can keep you satisfied longer. Checking nutrition labels ensures you select a burger that fits your health goals while delighting your palate.
With these tips and tricks, transforming store-bought veggie burgers into easy, tasty meals becomes a delicious adventure-not just a shortcut! Enjoy the simplicity and savor the flavors.
Concluding Remarks
Whether you’re a busy weeknight warrior or a weekend grill master, store-bought veggie burgers offer a deliciously simple way to enjoy plant-based goodness without the fuss. With so many tasty options available and a few clever tips up your sleeve, crafting a satisfying veggie burger meal is easier than ever. So next time you’re craving something wholesome,flavorful,and quick,don’t hesitate to reach for that pack in the fridge - your taste buds and time will thank you!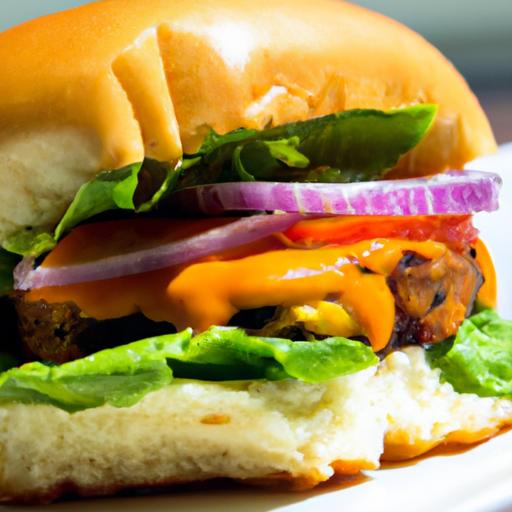
Quick & Tasty: easy Shrimp and Spinach Skillet Recipe
Quick & Tasty: Easy Shrimp and Spinach Skillet Recipe is more than just a weeknight dinner option – it’s a festivity of fresh, vibrant ingredients that come together in a flash, packing a punch of flavor and nutrition.Inspired by Mediterranean coastal cooking, this dish combines succulent shrimp with tender spinach, accented by aromatic garlic and zesty lemon, making every bite bright and satisfying.

Prep and Cook Time
- Preparation: 10 minutes
- Cooking: 12 minutes
- Total Time: 22 minutes
yield
Serves 4 generous portions
Difficulty level
easy – perfect for beginner cooks and seasoned pros alike!
Ingredients
- 1 lb large shrimp,peeled and deveined
- 6 cups fresh baby spinach,thoroughly rinsed
- 3 cloves garlic,minced
- 2 tbsp extra-virgin olive oil
- 1/2 tsp smoked paprika
- 1/4 tsp red pepper flakes (optional for heat)
- juice of 1 lemon
- Salt and freshly ground black pepper,to taste
- 2 tbsp chopped fresh parsley,for garnish
- 1/4 cup sliced toasted almonds (optional,for crunch)
Step-by-Step Guide to Perfectly Cooked Shrimp and Spinach
- Heat the skillet: Place a large non-stick skillet over medium-high heat and add the olive oil. Let it warm until it shimmers but doesn’t smoke.
- Season the shrimp: While heating, toss the shrimp with smoked paprika, salt, and pepper to evenly coat them with the spices.
- Sauté the shrimp: Add the shrimp to the skillet in a single layer. Cook for 2 minutes on one side without moving to get a beautiful sear.
- Flip and add garlic: Turn the shrimp over and promptly add the minced garlic and red pepper flakes. Sauté for another 2 minutes until the shrimp are pink, opaque, and curled.
- Add spinach: Reduce heat to medium and pile the spinach into the skillet. It may look like a lot, but it wilts quickly. Stir gently to combine with shrimp and garlic, cooking until wilted-about 3 minutes.
- Finish with lemon: Squeeze the fresh lemon juice over the skillet contents, then give everything one last toss to awaken the flavors.
- adjust seasoning: Taste and add more salt or pepper, if desired. Remove from heat immediately to avoid overcooking the delicate shrimp and spinach.
Flavor Boosters and Seasoning Tips to Elevate Your Skillet
Elevate this easy shrimp and spinach skillet recipe by incorporating a few game-changing tips:
- Use fresh shrimp whenever possible: Frozen shrimp can work but thaw thoroughly and pat dry to avoid watery cooking.
- Don’t rush the searing: Allow shrimp to brown on the first side before flipping to build deeper flavor and a more appealing texture.
- Try adding a splash of high-quality extra virgin olive oil just before serving for a luscious finish.
- Mix in fresh herbs: Basil or dill can be a welcome substitution for parsley, providing aromatic twists.
- Infuse garlic oil ahead of time for stronger garlic depth-gently warming garlic in olive oil off-heat for 10 minutes before cooking.
Creative Serving Suggestions for a Complete Meal Experience
Present your shrimp and spinach skillet as a vibrant centerpiece with these inspired serving ideas that turn a simple dish into a meal everyone will remember:
- Over fluffy quinoa or steamed jasmine rice - for a wholesome, fiber-rich base.
- With a side of creamy garlic mashed potatoes for comforting richness.
- Accompanied by a crisp arugula salad with cherry tomatoes,shaved parmesan,and a lemon vinaigrette to brighten the plate.
- Garnish with toasted sliced almonds or pine nuts to add satisfying crunch and nutty flavor.
- Serve with warm, crusty artisan bread to soak up those garlicky, lemony pan juices.

Chef’s Notes
- Substitutions: Baby kale works beautifully in place of spinach for a heartier bite, though it requires a slightly longer cooking time to soften.
- Make-ahead tip: Pre-mix the shrimp seasoning and store in an airtight container for up to 24 hours; this helps the spices penetrate for enhanced flavor.
- Avoid overcooking shrimp: They cook quickly – once opaque and pink, remove immediately to maintain juicy tenderness.
| Nutrient | Per Serving |
|---|---|
| Calories | 210 kcal |
| Protein | 28 g |
| Carbohydrates | 4 g |
| Fat | 8 g |
For further inspiration on seafood dishes, visit the Serious Eats seafood section – a trusted resource for culinary techniques and flavor profiles.
Q&A
Q: What makes this shrimp and spinach skillet recipe “quick and tasty”?
A: This recipe combines succulent shrimp with fresh spinach in a one-pan dish that cooks in under 20 minutes. The simplicity of sautéing shrimp with garlic and tossing in vibrant greens means maximum flavor with minimal fuss-perfect for busy weeknights or a speedy, nutritious meal.
Q: Can I use frozen shrimp for this skillet dish?
A: Absolutely! Just make sure to thaw the shrimp thoroughly before cooking. Pat them dry to avoid excess moisture,which helps achieve that perfect sear and prevents the spinach from wilting too quickly.
Q: What seasonings work best in this shrimp and spinach skillet?
A: Garlic,red pepper flakes,lemon zest,and a pinch of smoked paprika elevate the flavors beautifully. These seasonings add a bright, zesty kick and a subtle warmth that complements the mild sweetness of the shrimp and the earthiness of the spinach.
Q: Is this recipe suitable for a low-carb or keto diet?
A: Yes! Shrimp and spinach are both low in carbs and high in nutrients, making this skillet a fantastic option for low-carb or keto-friendly meals. Just skip any added sugars or carb-heavy sides, and you’re all set.
Q: Can I make this dish vegetarian or vegan?
A: While shrimp is the star here, you can substitute it with hearty mushrooms or tofu for a plant-based twist.Sauté the mushrooms or tofu with the same spices and garlic before adding spinach to keep that satisfying texture and flavor.
Q: What’s the best way to serve this shrimp and spinach skillet?
A: Serve it straight from the pan over a bed of fluffy rice, with crusty bread for dipping, or alongside roasted vegetables. A squeeze of fresh lemon juice right before serving brightens every bite.
Q: How can I add extra creaminess without using dairy?
A: Stir in a splash of coconut milk or a dollop of cashew cream towards the end of cooking.These plant-based options add luscious creaminess without overwhelming the natural flavors of shrimp and spinach.
Q: Can this recipe be doubled for a larger crowd?
A: Yes,it scales up beautifully! Just use a larger skillet or cook in batches to ensure the shrimp cooks evenly and the spinach wilts perfectly without steaming.
Q: How do I prevent the spinach from getting soggy?
A: Add the spinach at the very end, allowing just enough time to wilt it slightly while keeping its vibrant color and texture. Overcooking spinach can make it mushy, so quick folding and tossing is key.
Q: Any tips for perfectly cooked shrimp?
A: Cook shrimp over medium-high heat until they turn pink and opaque-about 2 minutes per side depending on size. Avoid overcrowding the pan to get a nice sear and keep the shrimp juicy and tender.
To Wrap It Up
There you have it-a vibrant, flavorful dish that comes together in minutes but leaves a lasting impression. This shrimp and spinach skillet isn’t just a recipe; it’s a celebration of simplicity meeting taste, perfect for busy weeknights or anytime you crave somthing fresh and satisfying.So next time you’re looking to whip up a quick meal that doesn’t compromise on flavor, remember this easy skillet magic. Your taste buds-and your schedule-will thank you.

Speedy Chicken & Corn Quesadillas: flavor in Minutes
There’s something undeniably satisfying about the Speedy Chicken & Corn Quesadillas. This quick, flavor-packed dish melds the smoky sweetness of fresh corn with tender sautéed chicken, wrapped in a crisped tortilla that’s golden and inviting. Inspired by traditional Mexican street food yet perfect for a busy weeknight, these quesadillas bring warmth and comfort without compromising on speed or depth of flavor.
prep and Cook Time
- Readiness: 10 minutes
- Cooking: 15 minutes
- Total Time: 25 minutes
Yield
serves 3-4 hungry eaters
Difficulty Level
Easy – perfect for cooks of all levels
Ingredients
- 2 cups cooked chicken breast, shredded or diced
- 1 cup fresh or frozen corn kernels
- 1/2 cup shredded sharp cheddar cheese
- 1/2 cup shredded Monterey Jack cheese
- 4 large flour tortillas (10-inch diameter)
- 1 small red bell pepper, finely diced
- 1/4 cup finely chopped fresh cilantro
- 1 small jalapeño, seeded and minced (optional, for heat)
- 1 teaspoon ground cumin
- 1 teaspoon smoked paprika
- 2 tablespoons olive oil
- Salt and freshly ground black pepper, to taste
- Optional: Fresh lime wedges for serving
Instructions
- Prepare the filling: heat 1 tablespoon of olive oil in a skillet over medium heat. Add the diced red bell pepper and jalapeño, sautéing until softened, about 3 minutes.
- Cook corn and season: Add the corn kernels, cumin, smoked paprika, salt, and pepper. Stir well and cook for another 2-3 minutes until corn is slightly charred but tender, stirring frequently to prevent burning.
- Add chicken and herbs: Fold in the shredded chicken and fresh cilantro to the skillet. Toss everything together, allowing the flavors to meld on low heat for 2 minutes. Remove from heat.
- Assemble quesadillas: Place one tortilla flat on a clean surface. Evenly spread a mix of cheddar and Monterey Jack cheese over half of the tortilla. Spoon a generous amount of the chicken and corn filling over the cheese. Top with a little more cheese (this acts as a glue). Fold the tortilla in half, pressing gently.
- Cook quesadillas: Wipe the skillet clean and heat over medium heat. Add a drizzle of olive oil. Carefully place the folded quesadilla in the pan.Cook for about 3-4 minutes until the bottom is golden and crisp.
- Flip carefully: Using a wide spatula, flip the quesadilla to the other side. Cook an additional 3-4 minutes,pressing down slightly for even browning and to help the cheese melt fully.
- Rest and slice: Transfer the cooked quesadilla to a cutting board and let rest for a minute. Cut into wedges using a sharp knife or pizza cutter.
Tips for Success
- Quick Chicken options: Use rotisserie chicken or leftover grilled chicken to drastically cut prep time.
- Even Cooking: Cook on medium heat to ensure tortillas crisp evenly without burning while allowing cheese to melt completely.
- Make Ahead: Prepare the filling in advance and refrigerate for up to 2 days. Assemble and cook quesadillas right before serving to maintain crispness.
- Vegetarian Variation: Swap chicken for spiced black beans or sautéed mushrooms for a hearty feel.
- Flavor Boost: A sprinkle of smoked salt or a drizzle of chipotle mayo adds an irresistible smoky kick.
serving Suggestions That Bring Your Meal to Life
present Speedy Chicken & Corn Quesadillas plated alongside a vibrant green salad tossed with lime vinaigrette for freshness. Garnish with extra chopped cilantro,a squeeze of fresh lime on top,and a dollop of creamy guacamole or tangy salsa verde for color contrast and flavor complexity. For an added crunch, scatter some pickled red onions or radishes over the wedges. A side of Mexican street corn salad or black bean salad pairs beautifully to round out the meal.

| Nutrient | Per Serving |
|---|---|
| Calories | 420 kcal |
| Protein | 32 g |
| Carbohydrates | 29 g |
| Fat | 17 g |
For more quick and flavorful Mexican-inspired recipes, check out our Quick and Easy mexican Dinners collection. To learn more about the history and cultural importance of quesadillas, visit encyclopaedia Britannica.
Q&A
Q&A: Speedy Chicken & Corn Quesadillas: Flavor in Minutes
Q1: What makes Speedy Chicken & Corn Quesadillas such a quick meal option?
A1: These quesadillas come together in no time thanks to simple, pre-cooked or quickly sautéed chicken and canned or fresh corn. With minimal prep and a fast cook time on the stovetop, you can go from hungry to satisfied in under 15 minutes!
Q2: Can I use leftovers for this recipe?
A2: Absolutely! Leftover grilled or roasted chicken works perfectly, adding smoky depth without extra cooking time. Toss in some fresh or leftover corn, and you’ve got a speedy, delicious meal.
Q3: What kind of cheese works best in these quesadillas?
A3: A melty,mild cheese like Monterey Jack or mozzarella is ideal. They melt smoothly and complement the sweetness of the corn and savoriness of the chicken without overpowering the dish.
Q4: How can I add more flavor without complicating the recipe?
A4: Simple additions like a sprinkle of cumin, a pinch of smoked paprika, or fresh chopped cilantro can elevate your quesadilla’s flavor with minimal effort. A dollop of salsa or guacamole on the side also boosts taste and texture.
Q5: Are these quesadillas freezer-pleasant?
A5: While quesadillas are best enjoyed fresh and crispy, you can prepare the filling in advance and freeze it. When ready, thaw and assemble as usual for a quick meal. Just note that the tortillas are best toasted just before serving.
Q6: Can I make these quesadillas gluten-free or dairy-free?
A6: Certainly! use gluten-free tortillas to accommodate gluten sensitivities. For dairy-free options, try plant-based cheeses that melt well. The core flavors of chicken and corn remain delicious with these simple swaps.
Q7: What sides pair well with Speedy Chicken & Corn Quesadillas?
A7: Fresh sides like a crisp green salad, zesty pico de gallo, or creamy avocado slices balance the warm, cheesy quesadilla. Black beans or a light tomato soup can also round out the meal nicely.
Q8: How do I prevent the quesadilla from getting soggy?
A8: To keep it perfectly crispy, ensure your filling isn’t too wet-drain canned corn well and pat down juicy ingredients. Cook on medium heat and press gently with a spatula to create that golden, crunchy crust.
Q9: Is this recipe kid-friendly?
A9: Definitely! Mild flavors and familiar ingredients make Speedy Chicken & Corn Quesadillas a hit with kids. You can customize by reducing spices or adding a favorite mild cheese to keep it simple and tasty.
Q10: Can I customize the filling with other vegetables?
A10: Yes! Bell peppers, diced tomatoes, or sautéed spinach can add color and nutrition without impacting the quick cook time. Just chop finely and sauté briefly before adding to your quesadilla.
With these handy tips and creative ideas,speedy Chicken & Corn Quesadillas bring bold flavor and convenience to your kitchen,perfect for busy days or anytime you crave a fast,satisfying meal!
To Wrap It Up
As the final sizzle settles and the quesadilla is sliced into golden,melty wedges,you’ll realize that speedy meals don’t have to sacrifice flavor. These Chicken & Corn quesadillas prove that with just a handful of ingredients and a few minutes on the stove, you can bring vibrant, comforting taste to your table in no time. Weather it’s a quick lunch, a weeknight dinner, or a last-minute snack, this recipe is your ticket to flavor-packed satisfaction-ready faster than you can say “¡Buen provecho!”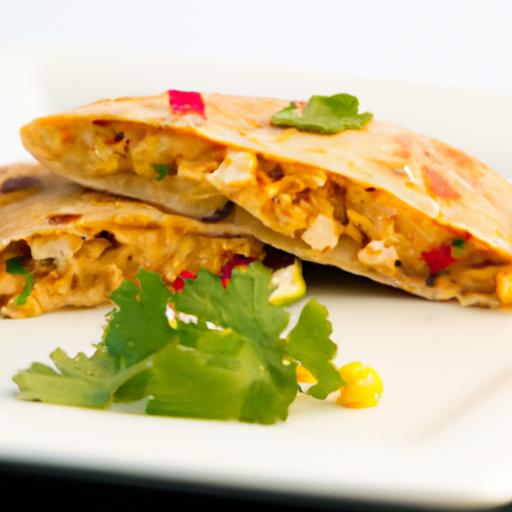
Nutritious & Quick: Easy Lentil and Quinoa Bowls Made Simple bring together the hearty earthiness of lentils and the nutty crunch of quinoa to create a vibrant, wholesome meal that fuels your body and satisfies your taste buds. Originating from ancient grains and legumes prized in Mediterranean and South American cuisines, this bowl has become a modern-day go-to for busy home cooks seeking balanced nutrition without compromising flavor or time.
Choosing the Perfect Lentils and Quinoa for Maximum Nutrition
When selecting lentils, opt for green or brown lentils for a firm texture that holds shape beautifully, or red lentils if you prefer a softer, creamier consistency.Quinoa varieties like tricolor or red quinoa add a delightful visual contrast and extra antioxidants. Always rinse quinoa thoroughly under cold water to remove the natural saponins that can impart bitterness. Both lentils and quinoa are rich in protein, fiber, and essential micronutrients like folate and magnesium, making this combo a true powerhouse of nutrition.
Flavor-Packed Ingredients That Transform Your Bowl
Complement your lentils and quinoa with a base of fresh vegetables such as crisp cucumber, sweet cherry tomatoes, and vibrant bell peppers. Layer on aromatic herbs like parsley, cilantro, or mint, and include a squeeze of lemon or lime juice for shining acidity. Roasted sweet potatoes or caramelized onions can elevate the bowl with subtle sweetness and depth.Toasted nuts or seeds bring a satisfying crunch while boosting healthy fats.
Prep and Cook Time
- Preparation Time: 10 minutes
- Cook Time: 20 minutes
- Total Time: 30 minutes
Yield
Serves 4 hearty portions
Difficulty Level
Easy – Perfect for quick weeknight dinners or meal prepping.
Ingredients
- 1 cup green or brown lentils, rinsed and drained
- 3/4 cup tricolor or red quinoa, rinsed
- 3 cups water or low-sodium vegetable broth
- 1 medium cucumber, diced
- 1 cup cherry tomatoes, halved
- 1 bell pepper, diced (red, yellow, or orange for color)
- 1/2 cup red onion, finely chopped
- 1 cup roasted sweet potatoes, cubed (optional)
- 1/4 cup chopped fresh parsley or cilantro
- 1/4 cup toasted sunflower seeds or pumpkin seeds
- Juice of 1 lemon
- 3 tbsp extra virgin olive oil
- 1 tsp ground cumin
- Salt and freshly cracked black pepper, to taste
Step-by-Step Guide to Quick and effortless Meal Prep
- Cook the lentils: In a medium saucepan, combine lentils with 2 cups water or broth. Bring to a boil, then reduce heat to simmer. Cook uncovered for 15-20 minutes until lentils are tender yet intact. Drain any excess liquid.
- Cook the quinoa: Meanwhile, in a seperate pot, bring 1 cup water or broth to boil. Add quinoa, cover, and simmer on low for 15 minutes or until water is absorbed and quinoa is fluffy. Remove from heat and let it sit covered for 5 minutes,then fluff with a fork.
- Prepare vegetables: While the grains cook, chop cucumber, cherry tomatoes, bell pepper, and red onion.If using roasted sweet potatoes, prepare them now by roasting 1 large sweet potato at 400°F (205°C) for 25 minutes with olive oil and seasoning.
- Mix the dressing: Whisk together lemon juice, olive oil, ground cumin, salt, and pepper in a small bowl until emulsified.
- Assemble the bowl: In a large mixing bowl, combine cooked lentils, quinoa, vegetables, roasted sweet potatoes, and fresh herbs. Pour dressing over the mixture and toss gently to coat all ingredients evenly.
- Add texture: Sprinkle toasted seeds on top just before serving to maintain crunch.
Creative Toppings and Dressings to elevate Every Bite
Explore flavor variations by adding creamy avocado slices, tangy feta cheese crumbles, or a dollop of plant-based yogurt. For extra zest, drizzle with a balsamic glaze or a spicy harissa dressing. Fresh herbs like dill or basil can add unexpected freshness, while a sprinkle of smoked paprika or sumac provides aromatic depth. Toasted nuts like walnuts or slivered almonds offer a satisfying bite and boost the nutritional profile.
Chef’s Notes
- Make-ahead tip: Both cooked lentils and quinoa store beautifully in airtight containers for up to 4 days, making these bowls ideal for meal prep.
- Substitution ideas: Swap green lentils for French lentils (Puy lentils) for a more peppery flavor, or use bulgur wheat instead of quinoa if preferred.
- Flavor booster: Sauté onions and garlic before adding lentils to the pot for deeper savory notes.
- Texture troubleshoot: If lentils turn mushy, reduce cooking time slightly; rinsing quinoa well prevents bitterness.
Serving Suggestions
Serve your vibrant lentil and quinoa bowls in wide,shallow dishes to showcase the colorful medley inside. Garnish with fresh herb sprigs and a lemon wedge for an inviting pop of color.Enjoy alongside warm, fluffy pita or crusty whole-grain bread. For a refreshing finish,offer sliced cucumbers or a crisp salad tossed in a light vinaigrette. These bowls also pair beautifully with a cooling cucumber-mint raita or a spicy tahini drizzle.

| Nutrient | Amount per Serving |
|---|---|
| Calories | 350 kcal |
| Protein | 18 g |
| Carbohydrates | 45 g |
| Fat | 9 g |
For more wholesome bowl recipes, check out our healthy Grain Bowls Guide. For scientific insights on the nutritional benefits of lentils and quinoa, visit WHFoods Lentils Profile.
Q&A
Q&A: Nutritious & Quick – Easy Lentil and Quinoa Bowls Made Simple
Q1: Why are lentils and quinoa such a great combo for a healthy meal?
A: Lentils and quinoa form a dynamic duo packed with plant-based protein, fiber, and essential nutrients. Lentils are rich in iron and folate, while quinoa provides all nine essential amino acids, making it a complete protein. together, they create a balanced, satisfying bowl that keeps you energized and nourished.Q2: How can I prepare lentils and quinoa quickly without compromising flavor?
A: Start with rinsing both lentils and quinoa to remove any impurities. Cook them separately to control texture-quinoa usually takes about 15 minutes, lentils can take 20-25 depending on the variety. To boost flavor, simmer lentils in vegetable broth and toss quinoa with a squeeze of lemon or a splash of olive oil right after cooking. Add fresh herbs or a quick spice blend for an extra taste punch!
Q3: What are some simple yet tasty add-ins to make the bowls more exciting?
A: Think fresh chopped veggies like cherry tomatoes, cucumber, or bell peppers for crunch; roasted sweet potatoes or carrots for natural sweetness; and leafy greens such as spinach or kale for a nutrient lift. nuts, seeds, and a dollop of hummus or avocado can add creaminess and texture. A drizzle of tahini or a sprinkle of za’atar really wakes up the flavor.
Q4: How can I customize these bowls for different dietary needs?
A: Lentil and quinoa bowls are naturally gluten-free and vegan, but you can also tailor them easily: Add more veggies for a low-carb approach or toss in some feta or goat cheese for extra creaminess if you enjoy dairy. For allergy-friendly options, swap nuts for seeds and double up on fresh herbs. The key is to keep balancing protein,fiber,and fats for sustained energy.
Q5: Can these bowls be meal-prepped in advance? How should I store them?
A: Absolutely! Lentil and quinoa bowls are perfect for meal prep. Cook your grains and lentils ahead, chop your veggies, and store everything separately to keep textures fresh-especially the crunchy veggies.Assemble the bowl right before eating,or pack with dressings and creamy components on the side to prevent sogginess. Stored properly in airtight containers, they stay delicious for up to 4 days.
Q6: What’s a foolproof dressing to elevate lentil and quinoa bowls?
A: A simple lemon-tahini dressing never fails: whisk together tahini,fresh lemon juice,garlic,a touch of maple syrup or honey,salt,and a splash of water to thin. It’s creamy, tangy, and naturally rich without overpowering the ingredients. Alternatively, a zesty herb vinaigrette with olive oil, apple cider vinegar, mustard, and fresh parsley brightens every bite.
Q7: How can I add an international twist to my lentil and quinoa bowl?
A: Lentils and quinoa are endlessly adaptable! For a Mediterranean flair, add olives, sun-dried tomatoes, cucumbers, and a sprinkle of sumac. Want Indian-inspired? Toss in garam masala, turmeric, diced paneer or roasted cauliflower, and a raita-style yogurt dollop on top. For a Latin vibe, include black beans, corn, avocado, and a cumin-lime dressing. The world is your bowl!
Q8: What benefits do these bowls offer for busy people on the go?
A: These bowls are a powerhouse of nutrition and convenience.They feature complex carbs and protein for lasting fuel, fiber for digestion, and vitamins for overall wellness-all coming together in a meal that can be prepped in under 45 minutes and easily portioned for grab-and-go lunches or dinners. They keep you full, focused, and feeling good, even on the busiest days.
With these simple tips and creative ideas,your lentil and quinoa bowls will never be boring – just wholesome,fast,and delicious!
to Conclude
As you wrap up your culinary adventure with these easy lentil and quinoa bowls,remember that nutritious meals don’t have to be elaborate or time-consuming. With just a handful of wholesome ingredients and a little creativity, you can craft vibrant, satisfying dishes that fuel your body and delight your taste buds. Whether you’re rushing through a busy week or simply seeking a fresh, nourishing option, these bowls offer the perfect balance of speed, flavor, and health. So next time hunger calls, dive into this simple, smart meal solution-and savor the delicious power of wholesome simplicity.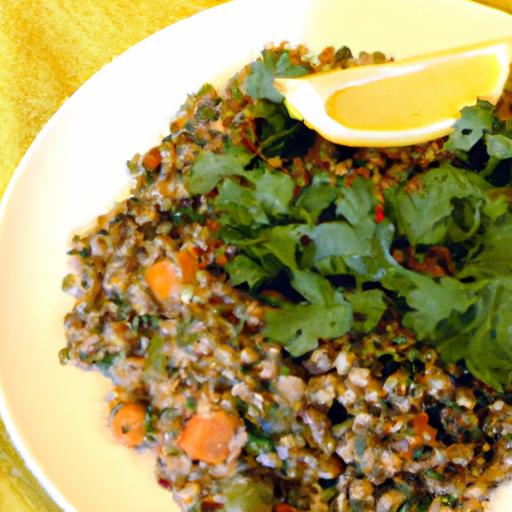
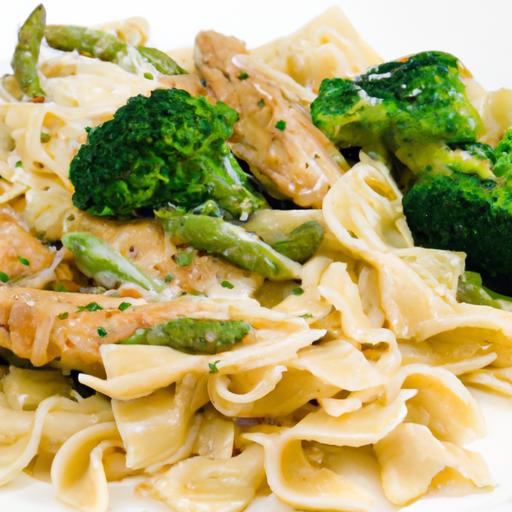
Speedy Chicken & Broccoli Pasta is truly a weeknight staple that combines vibrant flavors with nutritional balance in an effortless manner. This dish brings together tender chicken,crisp broccoli,and al dente pasta in a symphony of textures that makes for both a satisfying and health-conscious meal. Inspired by the need for quick, wholesome dinners that don’t skimp on taste or nourishment, this recipe is your go-to for busy evenings when time is precious but flavour can’t be compromised.

Prep and Cook Time
Readiness: 15 minutes | Cooking: 15 minutes | total: 30 minutes
Yield
Serves 4 generously
Difficulty Level
Easy
Ingredients
- 12 oz dry penne or fusilli pasta
- 1 lb boneless, skinless chicken breasts, cut into bite-sized strips
- 3 cups fresh broccoli florets
- 3 tbsp extra-virgin olive oil, divided
- 3 cloves garlic, finely minced
- 1 cup low-sodium chicken broth
- 1/2 cup freshly grated Parmesan cheese
- 1/4 tsp crushed red pepper flakes (optional)
- Salt and freshly ground black pepper, to taste
- Fresh lemon juice from half a lemon
- 2 tbsp chopped fresh basil or parsley for garnish
Instructions
- Cook the pasta: Bring a large pot of salted water to a boil. Add the pasta and cook until al dente according to package instructions, usually 9-11 minutes. In the last 3 minutes of pasta cooking, add the broccoli florets to the same pot to blanch them perfectly. Drain pasta and broccoli together, reserving about 1 cup of pasta water.
- Prep the chicken: While pasta cooks,pat chicken strips dry and season generously with salt and pepper.
- Master the quick sauté: Heat 2 tablespoons of olive oil in a large skillet over medium-high heat. Add the chicken in a single layer, sautéing without overcrowding – this ensures an even sear. cook about 3-4 minutes on each side until golden and cooked through but still juicy.Remove chicken and set aside, keeping the skillet hot for the next step.
- Add aromatics: Reduce heat to medium. add the remaining tablespoon of olive oil and minced garlic to the skillet. Sauté until fragrant but not browned, about 30 seconds – this technique unlocks garlic’s vibrant flavor without bitterness.
- Build the sauce: Pour in the chicken broth,scraping any browned bits from the pan for maximum flavor. Let it simmer gently for 2-3 minutes to reduce slightly.
- Combine all elements: Return chicken to the skillet, then add drained pasta and broccoli. Toss everything together,adding reserved pasta water a little at a time until you achieve a silky,cohesive sauce that clings to each piece.
- Finish and flavor balance: Stir in parmesan cheese, fresh lemon juice, and crushed red pepper flakes (if using). Adjust seasoning with salt and pepper. Toss gently to coat.
- Serve: Remove from heat, garnish with chopped fresh herbs, and plate promptly for best texture and flavor.
Tips for Success
- Ingredient quality matters: Choose fresh, vibrant broccoli and freshly grated Parmesan for the most uplifted flavors. Pre-grated cheese often contains anti-caking agents that can alter mouthfeel.
- Speedy chicken cooking: Avoid overcrowding the pan when sautéing chicken strips to ensure they develop a golden crust and remain tender inside. If necessary, cook in batches.
- Customize the pasta: Swap regular pasta for whole wheat or chickpea pasta to increase fiber and protein content without changing flavor profiles to much.
- Make it ahead: Precisely time your broccoli blanching and chicken sautéing to enable a quick reheat in a single skillet within minutes for a fast weeknight revival.
- broccoli balance: Blanching broccoli with pasta softens but keeps a pleasant bite.Overcooked broccoli becomes mushy and can mask the dish’s delicate texture contrast.
Serving Suggestions
Serve this vibrant pasta dish in shallow bowls, topped with a generous sprinkle of freshly cracked black pepper and an extra dusting of Parmesan. Add radiant pops of color and freshness by garnishing with finely chopped basil or parsley. For a little indulgence, drizzle with a splash of high-quality extra-virgin olive oil or a squeeze of lemon for brightness. Pair with a crisp green salad tossed in a light lemon vinaigrette or a crusty baguette to soak up any remaining flavorful sauce.

| Nutrient | Per Serving |
|---|---|
| Calories | 420 kcal |
| Protein | 38 g |
| Carbohydrates | 38 g |
| Fat | 12 g |
Discover more quick and wholesome meals in our Healthy Weeknight dinners collection. For in-depth food safety tips when handling chicken, visit the USDA Food Safety and Inspection Service.
Q&A
Q&A: Speedy chicken & Broccoli Pasta – Your Flavorful Weeknight Fix
Q: What makes Speedy Chicken & Broccoli Pasta perfect for weeknight dinners?
A: This dish is a powerhouse of convenience and flavor. It comes together in under 30 minutes, requiring just a handful of pantry staples and fresh ingredients. The quick-cooking pasta mixed with tender chicken and crisp broccoli creates a balanced meal that’s both satisfying and nutritious-ideal for busy weeknights when time is tight but taste matters.
Q: Can I use other vegetables besides broccoli in this recipe?
A: Absolutely! While broccoli adds a vibrant crunch and subtle earthiness, you can swap it with other quick-cooking veggies like asparagus tips, snap peas, or even baby spinach.Just keep in mind the cooking time to maintain that perfect tender-crisp texture.
Q: How do I keep the chicken juicy and flavorful?
A: Season the chicken generously with salt, pepper, and your favorite herbs or spices before sautéing. Cooking it over medium-high heat ensures a golden sear that locks in moisture. Cutting the chicken into bite-sized pieces helps it cook evenly and quickly, pairing seamlessly with the pasta.
Q: What type of pasta works best for this recipe?
A: Short pastas like penne, fusilli, or farfalle are great choices because their shapes catch the sauce and ingredients beautifully. though, feel free to use spaghetti or linguine if that’s what you have on hand-the flavors remain just as delightful.
Q: Is this dish suitable for meal prepping?
A: Yes! Prepare the chicken and broccoli ahead of time,then toss everything together with freshly cooked pasta when ready to eat. Store components separately if possible to avoid sogginess. Reheat gently with a splash of broth or olive oil to revive the flavors and textures.
Q: What kind of sauce pairs well with the Speedy Chicken & Broccoli Pasta?
A: this versatile dish shines with a light garlic and olive oil base, a zesty lemon-butter sauce, or a creamy tomato blend. Each option enhances the natural flavors without overpowering the wholesome ingredients, keeping your weeknight fix both quick and tantalizing.
Q: How can I add an extra flavor boost without complicating the recipe?
A: Simple additions like freshly grated Parmesan, red pepper flakes for a touch of heat, or chopped fresh herbs such as basil or parsley work wonders. These little touches elevate the dish effortlessly, turning your speedy pasta into a memorable meal.
Insights and Conclusions
Whether you’re racing the clock or simply craving a comforting meal that doesn’t skimp on flavor, this Speedy Chicken & Broccoli Pasta is your new weeknight hero. Packed with vibrant greens, tender chicken, and al dente pasta all tossed in a savory sauce, it strikes the perfect balance between wholesome and delicious. Next time dinner time sneaks up on you, remember that quick, satisfying dishes like this one can transform a hectic evening into a flavorful feast-no stress required. So grab your skillet, chop some broccoli, and let this recipe be your shortcut to dinner delight!
fuel Your Day with a Speedy Salmon and Quinoa Bowl is a vibrant way to revitalize your mornings with balanced nutrition and bold flavors. This dish brings together the hearty richness of perfectly cooked salmon with the wholesome earthiness of quinoa-a supergrain celebrated for its protein content and versatility. originating from South American staples and elevated in global health-conscious kitchens, this bowl is a personal favorite for those rushed mornings when you crave something nourishing yet quick.
Prep and Cook Time
Prep Time: 10 minutes
Cook Time: 20 minutes
Total Time: 30 minutes
Yield
Serves 2 generous portions
Difficulty Level
Easy – Perfect even for beginner cooks looking to fuel their day efficiently
Ingredients
- 1 cup quinoa, rinsed thoroughly
- 2 salmon fillets (about 5-6 oz each), skin-on or skinless
- 1 tbsp olive oil, divided
- 1 lemon, zested and juiced
- 2 cups water or low-sodium vegetable broth for cooking quinoa
- 1/2 tsp smoked paprika
- 1/4 tsp garlic powder
- Salt and freshly ground black pepper, to taste
- 1 cup baby spinach, chopped
- 1/2 cup cherry tomatoes, halved
- 1/4 cup red onion, finely diced
- 2 tbsp fresh parsley, chopped
- 1 avocado, sliced (optional but highly recommended)
- 1 tbsp toasted sesame seeds or chopped nuts for garnish
Instructions
- Cook the quinoa: In a medium saucepan, combine rinsed quinoa and water or vegetable broth with a pinch of salt. Bring to a boil, then reduce heat to low, cover, and simmer for 15 minutes until the liquid is absorbed.Remove from heat and let it sit covered for 5 minutes. Fluff with a fork.
- Prepare the salmon: Pat salmon fillets dry and season with salt, pepper, smoked paprika, and garlic powder. Heat 1/2 tablespoon olive oil over medium heat in a nonstick skillet.
- Cook the salmon: Place salmon skin-side down if using skin-on and cook for about 4-5 minutes without disturbing to get a crispy finish. Flip carefully and cook for another 3-4 minutes until salmon is opaque and flakes easily. Transfer to a plate and let rest briefly.
- Sauté the spinach and aromatics: In the same skillet,add the remaining olive oil and gently wilt the baby spinach and diced red onion until soft,about 2-3 minutes. Toss in cherry tomatoes and cook for another minute to release freshness without losing their vibrant texture.
- Assemble the bowl: Divide the quinoa between two bowls, top with sautéed vegetables and fresh parsley. Place salmon fillets over the quinoa. Drizzle with lemon juice and garnish with lemon zest,avocado slices,and toasted sesame seeds for crunch and visual appeal.
- Final touches: Taste and adjust seasoning with extra salt, pepper, or a dash more lemon juice if desired. Serve instantly for a warm bowl or chill for an energizing meal prep option.
Tips for Success: Quick Prep and Meal-Prep Mastery
- Make quinoa ahead: Cooked quinoa keeps beautifully in the fridge for up to 4 days, making it a perfect base for quick bowl assembly.
- Salmon flexibility: Use wild-caught or sustainably farmed salmon for superior flavor and nutrition. Swap fillets for canned sockeye salmon in a pinch, just adjust seasoning accordingly.
- Flavors in balance: The smoky paprika and garlic powder add warmth, while lemon juice lifts the overall brightness-don’t skimp on fresh citrus for that zing.
- Texture play: Including crunchy elements like toasted sesame seeds or walnuts creates delightful contrast against the tender quinoa and silky salmon.
- batch cooking: Bake multiple fillets together at 400°F (200°C) for 12-15 minutes if cooking for a family or meal prep to save time.
Serving Suggestions
For a picture-perfect plate,serve your bowl atop a rustic ceramic dish. Enhance colour contrast with a drizzle of vibrant herb-infused olive oil or a dollop of Greek yogurt mixed with lemon zest for creamy brightness.Sprinkle chopped fresh dill or chives alongside parsley to accentuate the ocean-inspired flavors. Pair with a side of crisp cucumber ribbons or a crunchy fennel slaw for an added refreshing bite.
| Nutrient | Per serving |
|---|---|
| Calories | 430 |
| Protein | 35g |
| carbohydrates | 30g |
| Fat | 15g |
For more nourishing bowl options, check out our Healthy Bowls Recipes collection. To dive deeper into quinoa’s nutritional benefits, visit the Healthline quinoa guide.
Q&A
Q&A: Fuel your Day with a Speedy Salmon and Quinoa Bowl
Q1: Why is salmon a great choice for a quick and nutritious meal?
A: Salmon is a powerhouse of omega-3 fatty acids, high-quality protein, and essential vitamins like B12 and D.It cooks quickly and packs a rich, satisfying flavor that elevates any bowl-from breakfast to dinner. Its healthy fats support brain health and keep you energized throughout the day.
Q2: What makes quinoa a perfect companion to salmon in this bowl?
A: Quinoa is a complete protein, meaning it contains all nine essential amino acids, making it an excellent plant-based complement to salmon. It’s also high in fiber and minerals like magnesium and iron, helping to keep your digestion smooth and your energy steady.
Q3: How can I prepare this salmon and quinoa bowl quickly on a busy day?
A: Use pre-cooked quinoa or prepare it in advance, so all you have to do is reheat. For the salmon, a simple sear or baking it under the broiler for 8-10 minutes is enough to get flaky, tender results. Throw in quick-to-chop veggies like cherry tomatoes, spinach, or avocado, and drizzle with a zesty lemon-tahini dressing for a meal ready in under 30 minutes.
Q4: Can I customize this bowl to fit different dietary preferences?
A: Absolutely! This bowl is naturally gluten-free and can be adapted easily. For more plant-based protein, toss in roasted chickpeas or steamed edamame. If you want extra crunch, sprinkle with toasted seeds or nuts. The beauty is in the flexibility-you can make it vibrant and nourishing according to your taste and needs.
Q5: What kind of dressings or sauces pair best with a salmon and quinoa bowl?
A: Bright and tangy dressings work wonders-think lemon,dill,garlic,or turmeric blends. You might try a honey-mustard vinaigrette or a creamy avocado-lime sauce to add depth without overpowering the natural flavors of salmon and quinoa.
Q6: How does this bowl help fuel your day?
A: Packed with balanced macros-protein, complex carbs, and healthy fats-this bowl stabilizes blood sugar levels and provides lasting energy.It’s a nutrient-dense meal that supports brain function, muscle repair, and satiety, keeping you focused and fueled for hours.
Q7: Are there any quick tips to make this dish even faster?
A: Yes! Use canned or smoked salmon if you’re really pressed for time, and steam the quinoa in a microwave-safe container. Pre-chopped veggies or a bagged salad mix can save precious minutes, turning meal prep into a breeze.Q8: Is the salmon and quinoa bowl suitable for meal prep?
A: Definitely. Both salmon and quinoa hold up well in the fridge for several days. Store components separately to keep textures fresh-quinoa in one container, salmon in another, and veggies on the side. When ready to eat, assemble and add your dressing for a quick, wholesome meal.
Fuel your day with this vibrant and speedy bowl-because delicious nutrition doesn’t have to be intricate!
Future Outlook
As the final grains of quinoa settle and the last flake of salmon melts on your tongue, you’ll realize this vibrant bowl is more than just a meal-it’s a celebration of speed, nutrition, and flavor all in one. Whether you’re powering through a busy morning or refueling after a whirlwind afternoon, this speedy salmon and quinoa bowl offers a perfect balance of protein, fiber, and essential nutrients to keep your energy soaring. So next time you need a delicious, wholesome boost, remember: fueling your day doesn’t have to be complicated. With a bowl like this,nourishment and simplicity go hand in hand,ready to keep you thriving from the first bite to the very last.
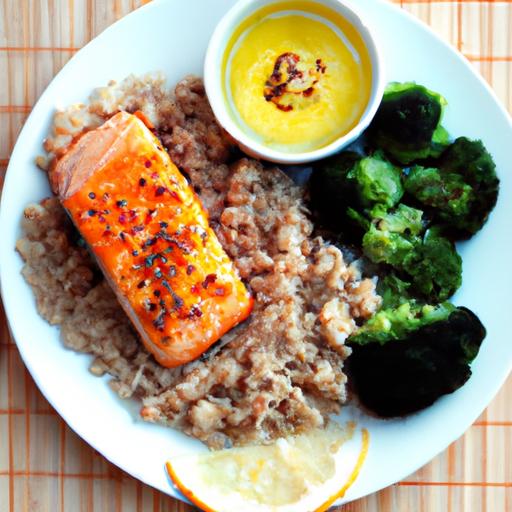
Savor the Zesty Charm of Chicken and Asparagus Skillet brings together a vibrant symphony of flavors that celebrates the bright, fresh notes of spring vegetables with the comforting richness of tender chicken.This dish is a testament to simplicity and finesse, inspired by Mediterranean culinary traditions that highlight fresh, seasonal produce and bold, zesty accents. From the very first bite, the harmony of lemon, garlic, and fresh herbs creates a mouthwatering experience that’s as visually appealing as it is delicious.

prep and Cook Time
Prep Time: 15 minutes
Cook time: 20 minutes
Total Time: 35 minutes
Yield
Serves 4 comfortably, making it perfect for weeknight dinners or intimate gatherings.
Difficulty Level
Easy – ideal for home cooks looking to impress without spending hours in the kitchen.
Ingredients
- 1 lb boneless, skinless chicken breasts, cut into 1-inch strips
- 1 lb fresh asparagus, trimmed and cut into 2-inch pieces
- 3 tbsp olive oil, divided
- 4 cloves garlic, minced
- 1 large lemon, zested and juiced
- 1/2 tsp red pepper flakes (optional, for a subtle kick)
- 1 tsp dried oregano or 1 tbsp fresh oregano, chopped
- Salt and freshly ground black pepper, to taste
- 2 tbsp unsalted butter
- Fresh parsley, chopped for garnish
Instructions
- Prepare the chicken: Season the chicken strips generously with salt, pepper, and half the lemon zest. Heat 2 tablespoons of olive oil in a large skillet over medium-high heat.
- Sauté the chicken: Add the chicken to the skillet in a single layer. Sauté until golden brown and cooked through, about 5-7 minutes, turning occasionally. Remove the chicken from the skillet and set aside.
- Cook the asparagus: In the same skillet, heat the remaining 1 tablespoon of olive oil. Toss in the asparagus pieces and sauté until crisp-tender, about 4-5 minutes, stirring occasionally to maintain even cooking.
- Add aromatics: Lower the heat to medium, add the minced garlic, red pepper flakes, and oregano. Stir constantly for about 1 minute, until fragrant but not browned.
- Reintroduce chicken and finish: Return the chicken to the skillet, add the butter, lemon juice, and remaining lemon zest. Stir gently,coating everything in the zesty,buttery sauce. Cook an additional 2 minutes to marry the flavors.
- Adjust seasonings: Taste and add more salt, pepper, or lemon juice as desired. Remove from heat.
- Garnish and serve: Sprinkle freshly chopped parsley over the skillet instantly before serving for a burst of color and freshness.
Tips for Success
- Ingredient freshness is key. Choose firm asparagus with tightly closed tips and chicken breasts that are plump with no discoloration to maximize flavor and texture.
- Perfect sautéing: Avoid overcrowding the pan when cooking chicken. Cook in batches if needed to ensure a golden crust and tender interior.
- Customize spice level: The subtle warmth from red pepper flakes can be omitted or increased according to preference.
- Make-ahead tip: Cook chicken and asparagus separately, then combine and heat through with lemon sauce just before serving to retain crispness.
- Substitutions: Baby spinach or green beans work beautifully if asparagus is unavailable.
Serving Suggestions
Serving this dish with a side of fluffy lemongrass jasmine rice or warm, crusty artisan bread is a surefire way to round out the meal. Garnishing with toasted slivered almonds or pine nuts adds a delightful crunch. For a photogenic touch, sprinkle edible microgreens or thin lemon slices atop the skillet before presenting. Pair with a crisp, non-alcoholic sparkling beverage to amplify the zesty freshness.

| Nutrient | Per Serving |
|---|---|
| Calories | 320 kcal |
| Protein | 38 g |
| Carbohydrates | 7 g |
| Fat | 14 g |
For more vibrant and wholesome skillet recipes, visit our Skillet Meals Collection. To learn about the nutritional benefits of asparagus and how to select the freshest produce, explore this Healthline asparagus guide.
Q&A
Q&A: Savor the Zesty Charm of chicken and Asparagus Skillet
Q1: What makes the Chicken and Asparagus Skillet a standout weeknight meal?
A1: This dish strikes the perfect balance between simplicity and flavor. Tender chicken breasts sear to golden perfection while fresh asparagus adds a vibrant crunch. The zesty lemon and herb-infused sauce ties everything together, creating a meal that feels both fresh and satisfying without demanding hours in the kitchen.
Q2: How can I ensure the chicken remains juicy and flavorful in this skillet recipe?
A2: The secret lies in searing the chicken over medium-high heat just until golden on each side, then allowing it to finish cooking gently in the sauce. Avoid overcrowding the pan to maintain a nice crust, and don’t skip resting the chicken briefly before slicing-this helps the juices redistribute for maximum succulence.
Q3: What role does asparagus play in the texture and taste of this skillet dish?
A3: Asparagus brings a fresh, slightly grassy flavor and a delightful crisp-tender texture that contrasts beautifully with the tender chicken. It’s natural earthiness pairs wonderfully with bright citrus notes, adding complexity without overpowering the dish.
Q4: Can this skillet meal be adapted for dietary preferences or restrictions?
A4: Absolutely! For a gluten-free version,simply ensure your broth or any added seasoning blends are free from gluten-containing ingredients.For a dairy-free twist, substitute butter with olive oil or a plant-based choice when cooking. The recipe’s flexibility makes it easy to tailor without losing its zesty charm.
Q5: What herbs and spices best complement the flavors in a Chicken and Asparagus Skillet?
A5: Fresh thyme and garlic work wonders by layering earthy and aromatic notes throughout the dish. A sprinkle of chili flakes adds just a hint of warmth, while freshly cracked black pepper brightens the overall flavor. Lemon zest and juice finish with an uplifting zing that brings everything to life.
Q6: Is this skillet recipe suitable for meal prep or making ahead of time?
A6: Yes! This dish reheats beautifully and maintains much of its fresh flavor when stored properly. To preserve the asparagus’s crispness, consider cooking it slightly less during reheating or adding a quick sauté just before serving to revive its texture.
Q7: What sides pair well with chicken and Asparagus Skillet to complete the meal?
A7: Light and simple sides complement this dish best. Think fluffy quinoa, steamed basmati rice, or a tangy couscous salad. A crisp green salad with a citrus vinaigrette would also add a refreshing contrast, making the whole meal feel balanced and vibrant.
Embrace the lively flavors and effortless elegance of the Chicken and Asparagus Skillet-it’s a delicious way to celebrate fresh ingredients and zestful cooking any night of the week!
closing Remarks
As you close the skillet and savor the last hints of zesty charm on your palate, it’s clear that this chicken and asparagus medley is more than just a meal-it’s a celebration of simple ingredients elevated by bold, vibrant flavors. Whether you’re seeking a quick weeknight dinner or a dish to impress guests, this recipe delivers a harmonious blend of freshness and zest that leaves you both satisfied and inspired. so next time you crave something bright,wholesome,and effortlessly delicious,remember the magic waiting in your skillet,ready to bring a burst of flavor to your table.