Sunrise Delight: Sweet Potato Hash with Perfect Poached Eggs
Sunrise Delight: Sweet Potato Hash with Perfect Poached Eggs brings together vibrant colors, bold spices, and luscious textures to transform your morning routine into an unforgettable culinary experience. This dish balances the natural sweetness of tender, caramelized sweet potatoes with the creamy silkiness of flawlessly poached eggs, creating a harmony that delights both the eye and palate.
Choosing the Ideal Sweet Potatoes for a Flavorful Hash
Begin your Sunrise Delight by selecting the perfect sweet potatoes, the backbone of this vibrant hash. Opt for firm, evenly colored tubers with smooth skin and minimal blemishes. Garnet or Jewel varieties are ideal – their deep orange flesh delivers natural sweetness while holding shape well during sautéing. Avoid overly soft or shriveled sweet potatoes, as they tend to become mushy, compromising the hash’s texture.
When preparing, peel your sweet potatoes carefully using a sharp vegetable peeler to reveal the bright flesh beneath. Cut them into uniform, ½-inch cubes to ensure even cooking and that signature caramelized crust. This consistency allows the spices to cling beautifully,embedding their warmth into every bite.
Mastering the Art of Poaching Eggs to Achieve Silky Perfection
the crowning glory of this dish is the poached egg-silky, white, and yielding a golden, runny yolk. Start with the freshest eggs you can find, as fresher eggs hold their shape better during poaching. Fill a deep saucepan with water, adding a splash of white vinegar to help the egg whites coagulate faster.
Create a gentle whirlpool by stirring the water, then gently slip in cracked eggs one at a time. Poach them for 3-4 minutes untill the whites are set but the yolks remain boisterously runny. Avoid overcrowding the pot to preserve the perfect shape. Lift the eggs with a slotted spoon, draining excess water before plating.
Layering Spices and Aromatics for a Balanced Sunrise Delight
The magic of Sunrise Delight lies in how spices and aromatics build layers of flavor without overpowering one another. Begin by sautéing finely chopped onions and garlic in a blend of olive oil and a pinch of smoked paprika, infusing the oil with a warm, smoky essence. Introduce freshly diced sweet potatoes alongside diced bell peppers to add vibrant color and sweetness.
Season the hash with a subtle mix of cumin, chili powder, and freshly ground black pepper, balancing heat and earthiness. Sprinkle fresh herbs like chopped cilantro or parsley toward the end, refreshing the hash with herbal brightness. This thoughtful layering results in a dish that awakens your senses, perfect for a nourishing start.
Serving Suggestions and Pairings to Elevate Your Breakfast Experience
To truly celebrate this Sunrise delight,present the hash on warm plates,ladling the vibrant sweet potato mixture in a rustic mound. Crown it with one or two perfectly poached eggs, letting yolk cascades over the colorful medley.
Garnish with toasted pepitas for a satisfying crunch and a sprinkle of flaky sea salt for enhanced depth. Add thin slices of ripe avocado on the side or a dollop of creamy Greek yogurt to introduce cool creaminess that contrasts the warm hash.
Pair with a freshly brewed cup of bright citrusy coffee or a glass of freshly squeezed orange juice to complete the bright morning mood. For a wholesome twist,serve alongside lightly sautéed leafy greens or toasted whole-grain bread to add substance without overwhelming the flavors.
Prep and Cook Time
- Prep Time: 15 minutes
- Cook Time: 20 minutes
- Total Time: 35 minutes
Yield
Serves 3-4 hearty portions
Difficulty Level
Medium – Requires attention to poaching and flavor layering
Ingredients
- 2 large sweet potatoes, peeled and diced into ½-inch cubes
- 1 medium yellow onion, finely chopped
- 2 cloves garlic, minced
- 1 red bell pepper, diced
- 3 tablespoons olive oil
- 1 teaspoon smoked paprika
- 1 teaspoon ground cumin
- ½ teaspoon chili powder
- Salt and freshly ground black pepper, to taste
- 4 large eggs
- 1 tablespoon white vinegar (for poaching)
- ½ cup fresh cilantro, chopped
- ¼ cup toasted pepitas (optional garnish)
- Flaky sea salt, for finishing
- Avocado slices or Greek yogurt (optional)
Instructions
- Prepare the sweet potato hash: Heat olive oil in a large skillet over medium heat. Add the chopped onion and sauté for 3 minutes until translucent.
- Add garlic and spices: Stir in minced garlic,smoked paprika,cumin,and chili powder. Cook for 1 minute until fragrant.
- Cook sweet potatoes and bell pepper: Add diced sweet potatoes and red bell pepper to the skillet. Season with salt and pepper.Sauté, stirring occasionally, for 12-15 minutes, until sweet potatoes are tender and golden brown.
- Finish hash: Stir in chopped cilantro and adjust seasoning if needed. Keep warm on very low heat while poaching eggs.
- Poach the eggs: Fill a medium saucepan with water and add white vinegar. Bring to a gentle simmer. Create a whirlpool by stirring the water,then gently slide eggs one at a time into the water. Poach for 3-4 minutes until whites are set but yolks remain runny.
- Remove eggs: Using a slotted spoon, carefully lift eggs from water and drain on a paper towel.
- Plate your dish: Spoon sweet potato hash onto plates. Top each serving with a poached egg. Garnish with toasted pepitas and a pinch of flaky sea salt.Add avocado slices or a dollop of Greek yogurt if desired.
Tips for Success
- Use fresh eggs for the best poached texture; older eggs spread out too thinly.
- If you don’t have smoked paprika, substitute with sweet paprika and add a tiny pinch of cayenne for subtle heat.
- To speed up cooking, parboil sweet potatoes for 3 minutes before sautéing-this ensures crisp edges and tender insides.
- Make the hash ahead and reheat gently in a skillet to maintain texture; poach eggs fresh when ready to serve.
- For a vegan version, swap poached eggs with pan-fried tofu slices seasoned with turmeric and black salt.
Nutritional Details
| Nutrient | Per Serving |
|---|---|
| Calories | 320 kcal |
| Protein | 11 g |
| Carbohydrates | 38 g |
| Fat | 12 g |
Explore more healthy breakfast dishes to keep your mornings vibrant and nutritious. For additional egg poaching tips, check out Serious Eats’ definitive guide.

Q&A
Q&A: Sunrise Delight - Sweet Potato Hash with Perfect Poached Eggs
Q1: What makes sweet potato hash a great choice for breakfast?
A1: Sweet potato hash offers a delightful balance of natural sweetness and earthiness, providing sustained energy to kickstart your day.Unlike regular potatoes, sweet potatoes pack more fiber, vitamins A and C, and antioxidants, making them both delicious and nutritious for morning fuel.
Q2: How can I achieve crispy, caramelized sweet potatoes in the hash?
A2: The secret lies in patience and proper technique. Start by cubing the sweet potatoes evenly,then par-cook them briefly to soften. Drain any excess moisture, then roast or sauté over medium-high heat with a bit of oil, allowing them room in the pan to brown without steaming. Resist stirring too often so they develop a golden crust.
Q3: What vegetables and herbs complement sweet potato hash best?
A3: Classic additions include bell peppers, onions, spinach, and fresh herbs like rosemary or thyme. These ingredients add layers of flavor and texture-bell peppers and onions bring sweetness and crunch, while leafy greens add freshness and a vibrant pop of color.
Q4: Any tips for perfect poached eggs with runny yolks?
A4: Absolutely. Use fresh eggs for best results,and bring a pot of water to a gentle simmer (not a boil). Add a splash of vinegar to help the whites coagulate, swirl the water to create a whirlpool, then gently slide in the egg. cook for about 3 minutes for a tender white and luscious runny yolk, then carefully remove with a slotted spoon.
Q5: Can this dish be prepared ahead of time for busy mornings?
A5: Yes! Prepare the sweet potato hash the night before and store it in the refrigerator. In the morning, simply reheat it in a skillet to bring back its crispiness, then top with freshly poached eggs. This fast reheating keeps the flavors vibrant without compromising texture.
Q6: How can I make this dish vegan or dairy-free without losing its hearty appeal?
A6: For a vegan twist,swap the eggs for pan-fried or baked tofu slices seasoned with turmeric and black salt to mimic an eggy flavor. You could also add avocado slices on top for creaminess and extra nutrients, ensuring the dish remains satisfying and vibrant.
Q7: What spices work well to enhance the natural sweetness of the sweet potatoes?
A7: Warm spices like smoked paprika, cumin, or a touch of cinnamon add depth and a subtle aromatic warmth, perfectly complementing the sweet potatoes. A pinch of chili flakes can bring a gentle heat to contrast the sweetness, creating a more dynamic flavor profile.
Q8: Is it possible to make this meal gluten-free?
A8: Absolutely! Sweet potatoes, vegetables, eggs, and herbs are naturally gluten-free. Just ensure that any additional toppings or seasoning blends you use don’t contain hidden gluten. This makes the dish perfect for those avoiding gluten without sacrificing flavor or satisfaction.
Q9: How can I customize this hash for a brunch gathering?
A9: Turn your sweet potato hash into a colorful brunch centerpiece by serving it family-style with bowls of mix-ins like sautéed mushrooms, avocado, fresh salsa, and a variety of herbs. Provide options for guests to top their hash with different sauces or spreads, such as creamy tahini or tangy hot sauce, making it interactive and fun.
Q10: What’s the best way to serve and enjoy this Sunrise delight?
A10: Serve your sweet potato hash piping hot, topped with perfectly poached eggs so the yolk oozes over every bite. Garnish with fresh herbs and maybe a sprinkle of flaky sea salt or cracked black pepper. pair it with a side of crusty whole grain toast or a fresh green salad for a balanced, satisfying meal that brightens your morning.
The Conclusion
As the morning light filters through your kitchen window, this Sunrise Delight-sweet potato hash crowned with flawlessly poached eggs-offers more than just a meal; it’s a party of flavors and textures that awaken your senses and fuel your day. With each bite, the natural sweetness of roasted sweet potatoes harmonizes effortlessly with the silky embrace of the eggs, creating a breakfast experience that’s as nourishing as it is delightful. Whether you’re starting a busy workday or savoring a leisurely weekend, this dish invites you to pause, indulge, and welcome the morning with a plate full of warmth and possibility. So next time you crave something both comforting and vibrant, remember that the perfect sunrise begins long before the sun hits the horizon-it starts right here, on your plate.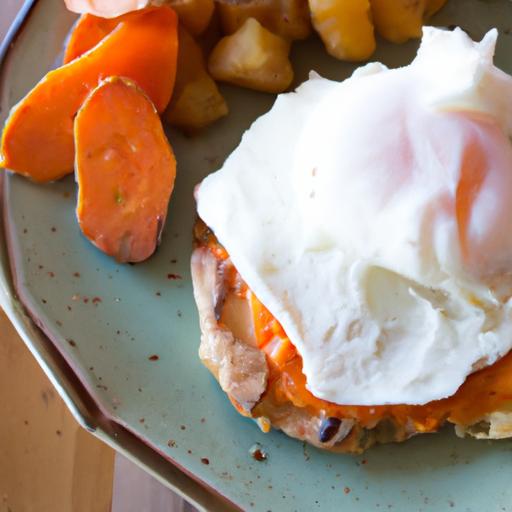
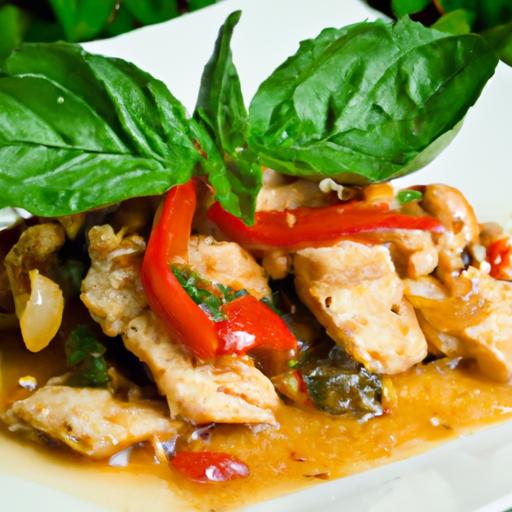
Exploring the Bold Flavors of Chipotle and Lime in Every Bite
Fiery Chipotle Lime Chicken bursts with vibrant, smoky heat softened by lively lime zest-a flavor pairing rooted in Mexican culinary tradition that transforms simple chicken into an unforgettable feast.drawing inspiration from the rich, smoky chipotle peppers native to Mexico and the bright citrus notes of fresh lime, this dish captures the balance of boldness and brightness that makes every bite a zesty party.
From the first squeeze of lime to the rustic smokiness of the chipotle, this recipe invites you to master a marinade that penetrates the chicken deeply, ensuring tender, juicy meat infused with layers of complex flavor.Whether you’re looking to impress at a weeknight dinner or ignite your next cookout, this guide will help you harness the perfect heat and zest.
Prep and Cook Time
- Planning: 15 minutes
- Marinating: 2 hours (minimum) up to overnight
- Cooking: 12-15 minutes
- Total: Approximately 2 hours 30 minutes
Yield
Serves 4 hungry guests
Difficulty Level
Easy to Medium – perfect for home cooks wanting bold flavors with a straightforward method
Ingredients
- 4 boneless, skinless chicken breasts (about 6 ounces each)
- 3 tablespoons chipotle peppers in adobo sauce, finely chopped
- Juice of 2 large limes (about 4 tablespoons)
- 2 tablespoons olive oil
- 3 garlic cloves, minced
- 1 teaspoon ground cumin
- 1 teaspoon smoked paprika
- 1 teaspoon honey (balances heat)
- 1/2 teaspoon salt
- 1/4 teaspoon freshly ground black pepper
- Fresh cilantro, chopped (for garnish)
Instructions
- Prepare the marinade: In a medium bowl, whisk together chipotle peppers, lime juice, olive oil, minced garlic, cumin, smoked paprika, honey, salt, and black pepper until well combined. This bold mixture will tenderize and flavor the chicken deeply.
- Marinate the chicken: Place the chicken breasts in a resealable plastic bag or shallow dish and pour the marinade over them. Seal or cover and refrigerate for at least 2 hours, or overnight for maximum flavor and tenderness. Turn the chicken midway to ensure even coating.
- Bring to room temperature: About 20 minutes before cooking, remove the chicken from the fridge to let it come to room temperature. this step ensures even cooking and juicy results.
- Preheat your grill or skillet: For grilling,heat to medium-high. For stovetop cooking, warm a large non-stick skillet or cast iron pan over medium-high heat with a teaspoon of olive oil.
- Cook the chicken: Remove chicken from marinade, shaking off excess, and place on the grill or skillet. Cook for 6-7 minutes per side, or until the internal temperature reaches 165°F (75°C) and the edges have a beautiful charred finish.Avoid flipping too frequently enough-once per side is sufficient.
- Rest before serving: Transfer the cooked chicken to a plate and cover loosely with foil.Let it rest for 5 minutes-this seals in the juices and keeps the meat tender and moist.
- Garnish and serve: Slice the chicken and sprinkle generously with chopped fresh cilantro and an extra squeeze of lime juice for a zesty brightness that lifts the smoky flavors.
Tips for Achieving the Ideal Fiery Heat Without Overpowering the Dish
Chipotle peppers pack a smoky punch, but balancing their heat with lime juice and honey tames the intensity without dulling the flavor. If you prefer a milder heat,reduce the chipotle quantity by half or remove seeds before chopping.For those craving more kick, add a pinch of cayenne or a fresh diced jalapeño to the marinade.
Always taste your marinade before marinating and adjust with extra honey or lime juice to find your personal sweet-spicy harmony. Cooking the chicken just until done ensures it stays juicy and that the smoky heat doesn’t turn bitter from overcooking.
Creative Serving Suggestions to Elevate Your Chipotle Lime Chicken experience
Transform this fiery staple into a feast with these inspired presentation ideas:
- Taco Night: Slice the chicken thinly and serve with warm corn tortillas, avocado slices, pickled red onions, fresh cilantro, and a drizzle of crema or Greek yogurt. Add a side of smoky black beans for extra depth.
- grain Bowl: Layer sliced chipotle lime chicken on a bed of cilantro-lime quinoa or brown rice. Top with diced mango,roasted corn,and a sprinkle of toasted pepitas for a balance of sweet and smoky flavors.
- Salad Upgrade: Serve slices atop a mixed green salad with cherry tomatoes,radishes,cotija cheese,and a light avocado vinaigrette. The heat and zest elevate the greens into a main meal.
- Skewers & Sliders: Cut chicken into chunks and thread onto skewers for grilling, then serve in mini buns with chipotle mayo and crunchy slaw for a casual crowd-pleaser.
| Nutrient | Per Serving |
|---|---|
| Calories | 320 |
| Protein | 38g |
| Carbohydrates | 5g |
| fat | 14g |
Chef’s Notes
- For maximum tenderness,marinate chicken overnight up to 24 hours but no longer,as lime’s acidity can start to “cook” the meat reducing its texture.
- Use fresh limes rather than bottled lime juice-the bright freshness is key to balancing chipotle’s smoky depth.
- Chicken thighs can be substituted for a juicier, more flavorful option. Adjust cooking time accordingly.
- To make this recipe gluten-free, ensure your adobo sauce does not contain gluten ingredients or substitutions.
- Leftovers are fantastic cold as protein-packed salad toppers or sliced thin in wraps the next day.

Discover more bold recipes featuring vibrant flavors in our boldly marinated chicken collection.For a deeper dive into chipotle’s smoky character, visit Serious Eats’ guide to chipotle peppers.
Q&A
Q&A: Fiery Chipotle Lime Chicken – A Zesty Flavor Explosion
Q1: What makes Chipotle Lime Chicken so irresistibly flavorful?
A1: The magic lies in the perfect marriage of smoky chipotle peppers and bright,tangy lime juice. The chipotle’s smoky heat builds a deep,complex flavor,while the lime adds a fresh,citrusy zing that balances and elevates every bite. Together, thay create a vibrant, zesty explosion on your palate.
Q2: How do I achieve the perfect level of heat without overpowering the dish?
A2: Start with a modest amount of chipotle peppers or chipotle powder, then gradually increase based on your heat tolerance. Balancing the heat with a touch of sweetness-such as honey or brown sugar-plus the acidity from lime helps tame the spice, ensuring a harmonious, fiery kick instead of an overwhelming blaze.
Q3: Can I prepare Chipotle Lime Chicken ahead of time?
A3: Absolutely! Marinating the chicken for at least 2 hours,or even overnight,amplifies the flavors and allows the spices to penetrate deeply. When ready to cook, simply grill, pan-sear, or bake for a deliciously juicy and flavorful meal that tastes like it’s fresh off the grill.
Q4: What cooking methods work best for this dish?
A4: Grilling is a top choice because it enhances the smoky chipotle notes and adds a lovely char that complements the lime’s acidity. However, pan-searing or baking also work beautifully, especially if you want to keep things simple indoors while still locking in juicy, zesty flavor.
Q5: What sides pair well with Fiery Chipotle Lime Chicken?
A5: To complement the bold flavors, try serving with fresh, cooling sides like avocado salsa, cilantro-lime rice, or a crisp corn and black bean salad.Veggies like grilled asparagus, roasted sweet potatoes, or a vibrant slaw also add texture and freshness, rounding out the meal perfectly.
Q6: is this dish suitable for different dietary preferences?
A6: Absolutely! It’s naturally gluten-free and packed with protein, making it a great option for many diets. To keep it lighter, you can use skinless chicken breasts or thighs. For a more indulgent version,chicken thighs with skin on add extra juiciness and depth.
Q7: How can I tweak the marinade for extra layers of flavor?
A7: Experiment by adding minced garlic, smoked paprika, cumin, or fresh herbs like cilantro and oregano. A splash of orange juice can introduce a subtle sweetness, while a dash of chili powder intensifies the smoky heat. Each tweak lets you customize the boldness and complexity to your liking.
Q8: Can this chicken be used beyond the main course?
A8: Definitely! Leftover chipotle lime chicken is fantastic shredded into tacos, tossed into salads, or layered in burrito bowls. Its zesty, smoky profile adds excitement to any dish, making it a versatile superstar in your weekly meal rotation.
To Wrap It Up
In the grand tapestry of bold and vibrant flavors, Fiery Chipotle Lime Chicken stands out as a masterpiece-an exhilarating blend that awakens the senses and invites adventurous palates to revel in its zestful embrace. Whether grilled to smoky perfection or simmered into a succulent stew, this dish transforms ordinary meals into unforgettable experiences. So next time you crave a culinary thrill,let the smoky heat of chipotle and the bright punch of lime guide you to a feast that’s as dynamic as it is indeed delicious. Your taste buds will thank you for the fiery flavor explosion.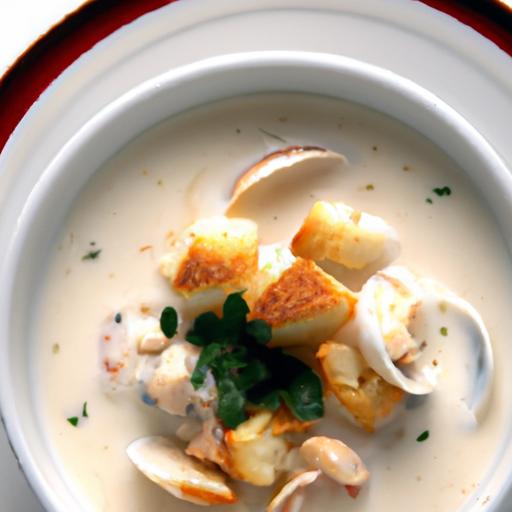
Birria tacos & consommé are a culinary treasure from the heart of Mexico, celebrated not only for their bold, smoky flavors but also for their rich cultural history.Originating from the state of Jalisco, this traditional dish began as a celebratory feast crafted using goat meat, infused with vibrant chiles and spices, slow-cooked until tender perfection. Today, Mexican birria tacos & consommé infuse modern kitchens with the same soulful spirit, delivering layers of aroma and texture that ignite the senses and create unforgettable dining experiences.
Prep and Cook Time
- Readiness: 30 minutes
- Cook Time: 3 hours (slow simmer)
- Total Time: 3 hours 30 minutes
Yield
Serves 6 hearty portions (approximately 12 tacos with consommé)
Difficulty level
Medium – requires some patience and attention to layering flavors, but perfect for adventurous cooks
Ingredients
- 3 lbs beef chuck roast, cut into large chunks (substitute goat or lamb for traditional authenticity)
- 6 dried guajillo chiles, stemmed and seeded
- 3 dried ancho chiles, stemmed and seeded
- 2 dried pasilla chiles, stemmed and seeded
- 4 cups beef broth, low sodium
- 1 large white onion, quartered
- 5 cloves garlic, peeled
- 2 tsp dried oregano
- 1 tsp ground cumin
- 1/2 tsp ground cloves
- 2 bay leaves
- Salt and pepper, to taste
- 2 tbsp apple cider vinegar
- 12 small corn tortillas
- 1 cup shredded Oaxaca cheese or mozzarella
- Fresh cilantro and lime wedges, for garnish
Instructions
- Prepare the chilies: Toast dried guajillo, ancho, and pasilla chiles in a hot dry skillet for about 1-2 minutes until fragrant, turning frequently.Transfer to a bowl and cover with hot water.Let soak for 20 minutes to soften.
- Create the chile paste: Drain rehydrated chiles and blend them with onion, garlic, oregano, cumin, cloves, apple cider vinegar, and 1 cup of beef broth until smooth. Adjust seasoning with salt and pepper.
- Brown the beef: In a heavy-bottom pot or Dutch oven, heat a tablespoon of oil over medium-high heat. Sear the beef chuck chunks on all sides until golden brown, about 4-5 minutes per batch. Set aside.
- Combine and simmer: Return the beef to the pot and pour the chile paste over top. Add remaining beef broth and bay leaves. Bring to a gentle boil,then reduce heat to low,cover,and let simmer for 3 hours until meat is ultra-tender and easy to shred.
- Shred the meat: Remove beef chunks from the pot and shred with two forks. strain and reserve the broth for the consommé, discarding solids except bay leaves which should be removed.
- Assemble the tacos: Dip each corn tortilla briefly in the warm consommé broth to soften and absorb flavor. Heat a skillet over medium heat and place the tortilla on it. Add a portion of shredded beef and sprinkle with shredded cheese. Fold the tortilla in half and cook until cheese melts and tortilla crisps slightly, about 2 minutes per side.
- Serve with consommé: Pour the warm consommé into small bowls alongside the tacos for dipping. Garnish tacos with fresh cilantro and a squeeze of lime to brighten flavors.
Tips for Success
- Chili blending: Toasting dried chiles unlocks their deep, smoky aroma-don’t skip this step for the richest flavor.
- Slow cooking: Low and slow simmering is essential to break down the beef connective tissue for tender, juicy meat.
- Consommé clarity: Strain the broth carefully to create a clear, rich consommé perfect for dipping or sipping.
- Make-ahead: Birria tastes even better the next day as flavors meld-prepare a day ahead for the ultimate taco feast.
- Cheese options: Use a mild melting cheese such as Oaxaca or mozzarella to perfectly complement the spicy beef without overpowering.
Serving Suggestions and Pairings
Present your birria tacos stacked on rustic wooden boards or vibrant Mexican-patterned plates to enhance the visual appeal. Serve with small bowls of consommé for dipping, accompanied by fresh lime wedges and chopped white onion for contrasting tang and crunch. For an authentic touch, add roasted serrano peppers or a smoky chipotle salsa.
Pair with a chilled agua fresca such as hibiscus (jamaica) or a sparkling mineral water to cleanse the palate between flavorful bites. to elevate your experience, consider a side of charred grilled vegetables or a light cabbage slaw tossed with a squeeze of lime and a pinch of salt.
| Nutrient | Per Serving |
|---|---|
| Calories | 480 kcal |
| Protein | 35 g |
| Carbohydrates | 28 g |
| Fat | 21 g |

Where to Find Authentic Birria Tacos & Consommé in Mexico
For those inspired to experience birria tacos & consommé in its birthplace, MexicoS Jalisco region, especially the city of Guadalajara, offers an array of street vendors and family-owned restaurants that have perfected this dish over generations. Look for bustling markets like Mercado Libertad where the air is thick with the scent of slow-cooked meat and smoky chiles.
If traveling isn’t an option, many Mexican cities across North America now boast birria specialties crafted by skilled cooks keeping tradition alive.For a detailed guide and history, the Smithsonian Magazine’s article on Birria is an excellent resource.
To explore more vibrant Mexican dishes, check out our related article on Authentic Mole poblano Recipe and broaden your culinary journey through Mexico’s rich flavors.
Q&A
Q&A: Birria Tacos & Consommé – Mexico’s Flavorful Tradition Unveiled
Q1: what exactly is birria,and where does this flavorful tradition originate?
A: Birria is a savory Mexican stew known for its rich,deep flavors and tender,slow-cooked meat. Originating from the state of Jalisco,birria has become a symbol of festive meals and regional pride. Traditionally prepared with goat or beef, its complex seasoning and long cooking process transform humble ingredients into a culinary masterpiece.
Q2: How do birria tacos differ from other types of tacos?
A: Birria tacos stand out because they are filled with the stewed meat from the birria pot-moist, flavorful, and richly spiced. the tacos are ofen dipped in the birria consommé, a flavorful broth served alongside, before being lightly fried on a griddle, resulting in crispy, golden tortillas bursting with juicy meat and vibrant spices.
Q3: What are the key spices and ingredients that define birria’s unique flavor?
A: The magic of birria lies in its aromatic blend of dried chilies (like guajillo and ancho), garlic, cumin, cloves, thyme, bay leaves, and sometimes cinnamon. These spices are combined with vinegar and tomatoes to create a rich, tangy marinade and broth. The slow cooking allows these flavors to meld deeply into the meat.
Q4: Can you explain the role of consommé in birria dining?
A: Consommé is the golden broth that results from simmering the birria meat and spices. Served piping hot alongside the tacos, it’s rich, savory, and infused with a complex depth of flavor. Diners often dip their tacos into the consommé or enjoy it as a comforting sip between bites, elevating the eating experience into something truly communal and soul-warming.
Q5: How is birria traditionally prepared and served during celebrations?
A: Birria preparation is often a labor of love, involving slow-cooking meat in a seasoned broth for hours until it melts in your mouth. During celebrations, families gather to share birria tacos and consommé, accompanied by chopped onions, cilantro, lime wedges, and sometimes fresh radishes. It’s more than a meal; it’s a festive tradition that brings people together.
Q6: Are there modern variations of birria tacos while staying true to tradition?
A: Absolutely! While the essence of birria remains rooted in its classic seasoning and slow-cooking technique, modern chefs experiment with different cuts of beef and creative presentations.Some serve it as quesabirria (birria with melted cheese in the taco), or even as birria tortas (Mexican sandwiches).Nevertheless, the consommé remains a must-have element, honoring the dish’s hearty origins.
Q7: How can home cooks recreate authentic birria tacos and consommé?
A: To recreate birria at home, start with a good cut of beef-such as chuck roast-marinate it in a blend of dried chilies and spices, then slow-simmer it until tender. Don’t skip the consommé; it’s the heart of the dish. Serve with corn tortillas, fresh garnishes like onion and cilantro, and plenty of lime for that perfect balance of smoky, savory, and tangy flavors. Patience is key, but the reward is a bowl and plate full of Mexico’s soulful tradition.
Q8: Why has birria gained international popularity in recent years?
A: Birria’s rise on the global stage can be attributed to its irresistible marriage of familiar comfort food elements-tacos and broth-with bold, authentic Mexican flavors. Its interactive way of eating (dipping tacos into consommé) and the perfect combination of crispy and tender textures make it a foodie favorite. Plus, its rich cultural story resonates with those eager to savor genuine culinary traditions.
Birria tacos and consommé are not just dishes; they’re a vibrant celebration of Mexico’s history, flavors, and community spirit. whether enjoyed at a bustling market stall in Guadalajara or crafted in your own kitchen, each bite tells a flavorful story centuries in the making.
To Conclude
As the rich aroma of slow-cooked meats and spices lingers in the air, birria tacos and their accompanying consommé invite us to savor more than just a meal-they offer a taste of Mexico’s vibrant history and communal spirit. This flavorful tradition, born from humble beginnings and perfected over generations, reminds us that true culinary treasures are crafted with patience, passion, and a deep connection to culture. Whether enjoyed on bustling street corners or in cozy kitchens, birria tacos and consommé continue to warm hearts and ignite appetites, proving that some flavors are timeless stories waiting to be shared bite by bite.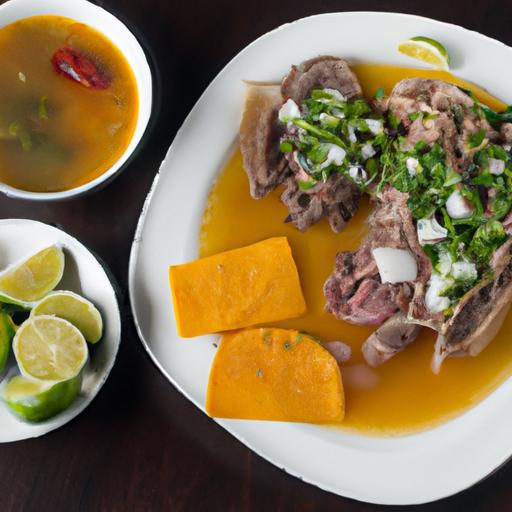
Savor Carne Asada fries Topped with Creamy Queso Fresco
Savor Carne Asada Fries Topped with creamy Queso Fresco delivers an irresistible fusion of bold, smoky flavors paired with a velvety, tangy sauce that transforms simple fries into a culinary masterpiece. This dish, rooted in vibrant Mexican street food culture, celebrates the harmony of tender, marinated steak and crisp potatoes, all lavishly draped in a luscious queso fresco sauce. Coming from my years of food styling and recipe development, I can confidently say this recipe will ignite your taste buds while making your kitchen aroma unforgettable.
Prep and Cook Time
- Readiness: 25 minutes
- Marinating: 2-4 hours (or overnight for deeper flavor)
- Cooking: 20 minutes
- Total time: Approximately 3 hours (including marination)
Yield
Serves 4 generous portions
Difficulty Level
Medium – Requires marinating and multitasking during cooking, but it’s approachable for confident home cooks.
Ingredients
- For the Carne Asada:
- 1.5 lbs flank steak or skirt steak
- 4 cloves garlic, finely minced
- 1/4 cup fresh lime juice
- 1/4 cup orange juice
- 1/4 cup olive oil
- 1/4 cup fresh cilantro, chopped
- 1 tsp ground cumin
- 1 tsp smoked paprika
- 1/2 tsp chili powder
- 1 tsp kosher salt
- 1/2 tsp freshly ground black pepper
- For the Fries:
- 4 large Russet potatoes, cut into fries
- 2 tbsp vegetable oil
- Salt, to taste
- For the Creamy Queso Fresco Sauce:
- 1 cup crumbled queso fresco
- 1/2 cup sour cream
- 1/4 cup whole milk
- 1 small jalapeño, seeded and finely chopped (optional)
- 1 clove garlic, minced
- 1 tbsp fresh lime juice
- Salt, to taste
- Additional Toppings:
- 1/4 cup chopped fresh cilantro
- 1/4 cup diced red onion
- 1 ripe avocado, sliced
- Fresh lime wedges
- Marinate the carne Asada: In a large bowl, whisk together lime juice, orange juice, olive oil, minced garlic, cilantro, cumin, smoked paprika, chili powder, salt, and pepper. Add the flank steak, turning to coat thoroughly.Cover and refrigerate for at least 2 hours, preferably overnight for optimal tenderness and flavor infusion.
- Prepare the Fries: Preheat your oven to 425°F (220°C). Toss the cut potatoes in vegetable oil and a pinch of salt.Spread on a rimmed baking sheet in a single layer, ensuring fries aren’t overcrowded to achieve crispness. Bake for 25-30 minutes, flipping halfway through, until golden and crispy on the edges.
- Grill the Steak: Heat a grill pan or outdoor grill to high heat. Remove steak from marinade, shaking off excess liquid. Grill 3-4 minutes per side for medium rare, adjusting based on thickness. Rest meat on a cutting board for 10 minutes to retain juices, then slice thinly against the grain.
- Make the Creamy Queso Fresco Sauce: in a food processor or blender, combine crumbled queso fresco, sour cream, milk, garlic, jalapeño, and lime juice. Blend until smooth and creamy. Taste and season with salt as needed. The sauce should be velvety with a slight tang and gentle heat from the jalapeño.
- Assemble Your Carne Asada Fries: Plate the crispy fries generously, layer the sliced carne asada over the top, and drizzle with the creamy queso fresco sauce. Garnish with diced red onion, cilantro, and avocado slices. Serve immediately with fresh lime wedges to brighten each bite.
- Cut and Marinade Choices: Choosing flank or skirt steak is ideal for vibrant carne asada flavor and easy slicing. Marinating overnight enables the meat to become irresistibly tender and packed with citrus-herb nuances.
- Fries Texture: For even crispier fries, soak cut potatoes in cold water for 30 minutes before baking to remove excess starch. pat dry thoroughly to avoid steaming.
- Queso Fresco Sauce: If you can’t find queso fresco, substitute with a mild feta or queso blanco but expect slight textural variation.
- Advance Prep: You can marinate the meat up to 24 hours ahead and prep the sauce a day in advance-store chilled in an airtight container.
- Customize Heat Level: Adjust or omit jalapeño in the queso fresco sauce if you prefer a milder kick.
Savor Carne Asada Fries: Step-by-Step Instructions
Chef’s Notes and Tips for Success
Serving Suggestions to Elevate Your Fries Experience
Serve on a large wooden board or platter to create a festive, shareable vibe. Top with additional chopped fresh herbs like cilantro or green onions for a punch of color and freshness. Pair with a side of pickled jalapeños or a fresh pico de gallo for vibrant contrasts. A chilled sparkling soda or aguas frescas perfectly complements the richness of the carne asada fries.
| Nutritional Info (per serving) | Calories | protein | Carbs | Fat |
|---|---|---|---|---|
| Carne asada Fries Topped with Creamy Queso Fresco | 680 kcal | 37 g | 45 g | 35 g |
Explore expert tips on marinating carne asada to deepen your culinary skills,or check out our collection of Mexican-inspired recipes for more flavor-packed dishes.

Q&A
Q&A: Savor carne asada Fries Topped with Creamy Queso Fresco
Q: What makes carne asada fries such a beloved dish?
A: Carne asada fries blend the best of crispy, salty potatoes with juicy, smoky grilled steak, creating a satisfying balance of textures and flavors. each bite delivers a comforting crunch followed by the rich, savory goodness of marinated beef, making it a flavorful feast that’s both casual and indulgent.
Q: How does queso fresco elevate carne asada fries?
A: queso fresco adds a cool, creamy contrast to the warm, robust flavors of carne asada and fries. Its mild, slightly tangy creaminess melts just enough to bind the ingredients, offering a silky texture that enhances every bite without overpowering the boldness of the meat.
Q: What are the key components to making authentic carne asada fries?
A: The heart of the dish lies in perfectly marinated carne asada – thinly sliced skirt or flank steak seasoned with lime, garlic, cumin, and cilantro.This is paired with golden crispy fries, fresh pico de gallo, and a generous drizzle of creamy queso fresco. Garnishes like avocado slices, jalapeños, and a squeeze of lime add brightness and depth.
Q: Can carne asada fries be adapted for a healthier twist?
A: Absolutely! Opt for baked fries rather of deep-fried, and consider lean cuts of steak or marinated grilled chicken as alternatives. Load up on fresh toppings like chopped tomatoes, onions, and cilantro to boost nutrition, while still enjoying the creamy queso fresco to keep that indulgent feel.Q: What’s the secret to the perfect queso fresco topping?
A: The secret is achieving a sauce that’s smooth but not too runny – creamy enough to coat the fries and carne asada evenly without losing its signature crumbly texture. Mixing queso fresco with a touch of Mexican crema or a hint of lime juice creates a luscious, tangy topping that complements the savory flavors perfectly.
Q: How can you serve carne asada fries for an unforgettable gathering?
A: Serve them family-style on a large platter, allowing guests to customize their toppings. Provide small bowls of pickled jalapeños, chopped cilantro, salsa verde, and guacamole alongside the carne asada fries.This interactive setup makes for a fun and flavorful experience, perfect for sharing good times and great food.
Q: What beverage pairings work well with carne asada fries?
A: Bright, refreshing non-alcoholic options like sparkling citrus sodas, limeade, or horchata bring balance to the dish’s richness. These drinks cleanse the palate and enhance the zesty notes in the carne asada and queso fresco, creating a harmonious dining experience.
Q: Is it possible to recreate carne asada fries at home without specialized equipment?
A: Definitely! While grilling the steak adds authentic char,you can use a cast-iron skillet or broiler to cook the carne asada indoors.Crispy fries can come from your oven or air fryer, making it easy to enjoy restaurant-quality carne asada fries in your own kitchen anytime.
key Takeaways
Whether you’re a longtime fan of Mexican street food or a curious culinary adventurer, carne asada fries topped with creamy queso fresco offer a delightful twist on a classic favorite. This irresistible combination marries savory, smoky grilled beef with crispy fries and the cool, tangy richness of queso fresco-a trio that elevates simple comfort food into an unforgettable experience. Next time you crave something hearty yet refreshing, give this vibrant dish a try, and savor every bite of its bold flavors and satisfying textures. Your taste buds will thank you.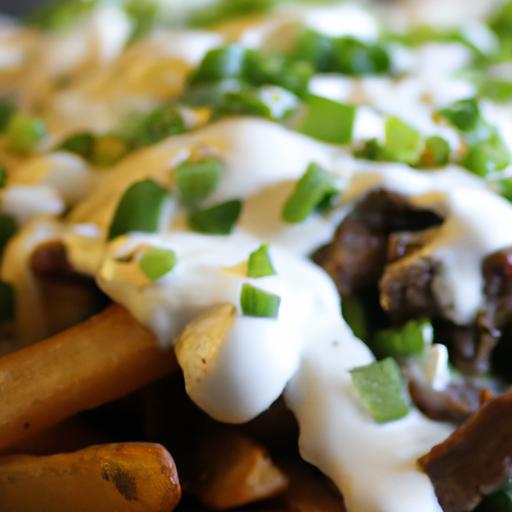
Flavor-Packed baked Chicken Fajita Bowls: Easy & Healthy
Experience the vibrant zest of Mexico right in your kitchen with these flavor-packed baked chicken fajita bowls. This dish beautifully marries tender chicken, colorful veggies, and bold spices – all baked to perfection for a healthy, fuss-free meal.Inspired by traditional fajitas but perfected for effortless weeknight dinners, this recipe brings a symphony of smoky, tangy, and fresh flavors, layered in a wholesome bowl that’s as nourishing as it is delicious.
Prep and cook Time
- prep Time: 15 minutes
- Cook Time: 25 minutes
- Total Time: 40 minutes
Yield
Serves 4 hearty portions
Difficulty Level
Easy – Perfect for both beginner cooks and seasoned foodies looking for a quick, wholesome dinner.
Ingredients That Bring Bold fajita Flavors to Life
- 1.5 lbs boneless, skinless chicken breasts, thinly sliced for even baking
- 3 bell peppers (red, yellow, and green), sliced into thin strips
- 1 large red onion, sliced into rings
- 3 tbsp olive oil (divided)
- 2 tsp smoked paprika for that signature smoky depth
- 1 tsp ground cumin to add earthy warmth
- 1 tsp chili powder for gentle heat
- 0.5 tsp garlic powder
- 0.5 tsp onion powder
- 0.5 tsp dried oregano
- Salt and freshly ground black pepper to taste
- Juice of 1 lime for zesty brightness
- Fresh cilantro leaves for garnish and refreshing herbal notes
- cooked quinoa or brown rice,warm,to serve as the base
- Optional toppings: sliced avocado,Greek yogurt or sour cream,shredded cheese,jalapeño slices
step-by-Step Guide to Perfectly Baked Chicken with veggies
- Preheat your oven to 425°F (220°C). Line a large baking sheet with parchment paper or lightly grease it to prevent sticking.
- In a large bowl, combine sliced chicken breasts with 2 tablespoons of olive oil, smoked paprika, ground cumin, chili powder, garlic powder, onion powder, dried oregano, salt, and pepper. Toss until the chicken is evenly coated in this fragrant spice blend.
- Add the sliced bell peppers and red onion to the bowl along with the remaining tablespoon of olive oil. Toss everything together thoroughly to coat the veggies in flavor.
- Spread the chicken and vegetable mixture in a single even layer across the baking sheet, ensuring there’s space between pieces so thay roast rather than steam.
- Bake for 20-25 minutes, stirring halfway through. The chicken should be cooked through and lightly browned, and the vegetables tender yet slightly crisp.
- Remove from oven and immediately squeeze fresh lime juice over the hot skillet to brighten flavors. toss gently.
- Let the fajita mixture rest for 2-3 minutes-this step allows juices to redistribute, keeping the chicken juicy and the vegetables vibrant.
How to Customize Your Fajita Bowls for Maximum Nutrition
This recipe is wonderfully versatile. For extra protein power, swap chicken for skinless turkey breast or firm tofu strips for a vegetarian twist. To boost fiber and texture, serve your fajita filling over nutrient-dense quinoa or a blend of wild rice.
If you’re looking to amplify your veggie intake, add sliced zucchini or diced tomatoes before baking. For some healthy fats, top your bowl with a few slices of creamy avocado or a sprinkle of toasted pepitas.
Try our superfood quinoa salad as a nutritious base option. For more on healthful meal customization, visit the USDA’s Protein Foods Guide.
Serving Suggestions and Tips for Meal Prep Success
Serve your flavorful fajita mixture layered atop a bed of quinoa or brown rice. garnish with a handful of freshly chopped cilantro and optional toppings like creamy Greek yogurt, shredded cheese, or pickled jalapeños for an exciting texture contrast.
For vibrant presentation,arrange components in “food bowls” with each ingredient distinct but easily mixed on the fork. This method not only looks inviting but allows diners to balance flavors bite-by-bite.
Meal Prep Tip: Prepare the entire fajita mix ahead of time and portion out into airtight containers for grab-and-go lunches or easy dinners. Stored properly, leftovers keep beautifully for up to 4 days in the fridge, ready to reheat or eat cold over salad greens.
Chef’s Notes & Tips for Success
- Use thinner chicken slices to ensure quick, even cooking that retains juiciness.
- Don’t overcrowd the baking sheet: leaving space lets the edges caramelize beautifully.
- For extra charred flavor, broil for an additional 2-3 minutes at the end, watching carefully.
- To make this dish vegan, substitute chicken for extra-firm tofu or portobello mushrooms and omit cheese/yogurt toppings.
- For a lower-carb option, serve over cauliflower rice or a bed of mixed greens.
| Nutrient | Per Serving |
|---|---|
| Calories | 350 kcal |
| Protein | 38 g |
| Carbohydrates | 20 g |
| Fat | 10 g |

Q&A
Q&A: Flavor-Packed Baked Chicken Fajita Bowls – Easy & Healthy
Q1: What makes baked chicken fajita bowls a healthy meal option?
A1: Baked chicken fajita bowls combine lean protein from chicken breasts with nutrient-rich vegetables like bell peppers and onions. baking rather of frying reduces added fats, and pairing the protein and veggies with wholesome grains like brown rice or quinoa provides balanced energy and fiber. This meal is low in processed ingredients and packed with vitamins, minerals, and antioxidants, making it both flavorful and nourishing.
Q2: How can I ensure the chicken stays juicy and tender while baking?
A2: To keep your chicken juicy,marinate it with lime juice,olive oil,and spices for at least 30 minutes before baking. Also, bake at a moderate temperature (around 400°F/200°C) and avoid overcooking by checking its internal temperature with a meat thermometer-165°F (74°C) is perfect for safely cooked yet tender chicken.
Q3: What spices are essential for authentic fajita flavor without added salt?
A3: A fragrant blend of chili powder, smoked paprika, cumin, garlic powder, and a hint of cayenne pepper creates that classic fajita spark. These spices infuse the chicken and veggies with smoky, earthy warmth while keeping the dish vibrant and salt-conscious.
Q4: Can I customize the bowls to fit different dietary preferences?
A4: Absolutely! Swap out the chicken for grilled tofu or chickpeas for a plant-based version. Use cauliflower rice or mixed greens rather of grains for a lower-carb approach. Top with guacamole, salsa, or dairy-free yogurt to keep it delicious and tailored to any lifestyle.
Q5: How do baked fajita bowls save time compared to traditional fajita recipes?
A5: Traditional fajitas often require pan-cooking chicken and veggies separately and assembling tortillas. Baking everything together on one sheet minimizes cleanup and frees up your stovetop. it’s a one-dish wonder: pop it in the oven, and in about 25 minutes, dinner is ready-flavorful and fuss-free.Q6: What sides or toppings complement baked chicken fajita bowls best?
A6: Fresh toppings like chopped cilantro, slices of avocado, lime wedges, and a sprinkle of shredded cheese or dairy-free alternatives enhance texture and taste. On the side, a light black bean salad or a simple cucumber and tomato salad adds refreshing contrast without overpowering the fajita flavors.Q7: Are there any tips for prepping baked chicken fajita bowls ahead of time?
A7: Yes! Marinate and chop your ingredients the night before for a quick assembly. bake just before mealtime or bake in advance and reheat gently to preserve moisture. Store components separately-especially anything creamy like guacamole-to keep everything fresh and vibrant.
Q8: How can I make these fajita bowls kid-friendly?
A8: Use mild spices and serve with familiar sides like corn or simple rice to appeal to younger palates. Let kids customize their bowls by choosing their own toppings-this involvement makes mealtime interactive and fun while easing them into new flavors.
Embrace the vibrant layers of smoky spices, wholesome ingredients, and easy prep in these baked chicken fajita bowls. Flavor-packed, family-friendly, and health-smart-all in one bowl!
To Conclude
With their vibrant medley of sizzling peppers, tender chicken, and wholesome grains, these Flavor-Packed Baked Chicken Fajita Bowls bring both simplicity and zest to your table. Not only do they satisfy your cravings with every colorful bite, but they also offer a nutritious punch that keeps your health goals on track.Whether you’re meal prepping for the week or seeking a quick evening fix, this recipe proves that healthy eating can be effortless and exciting. So go ahead-embrace the sizzling flavors, customize to your heart’s content, and let these fajita bowls become your new go-to for delicious, nourishing meals that never compromise on taste.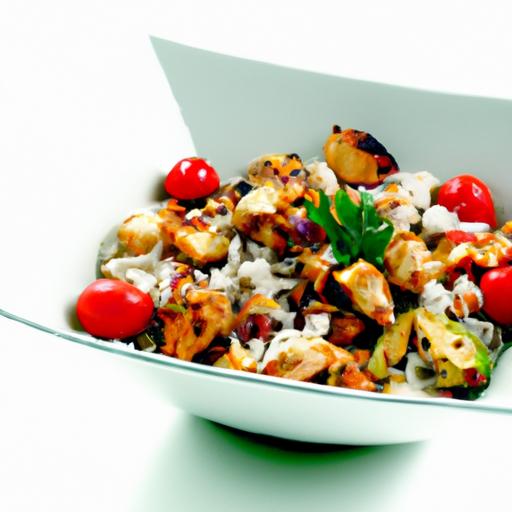
nutritional benefits of Roasted Sweet Potato and Black Beans
Harvest Harmony: Roasted Sweet potato & Black Bean Salad is not just a feast for the senses but also a powerhouse of nutrition. The union of roasted sweet potatoes and black beans in this salad offers an remarkable blend of vitamins,minerals,fiber,and plant-based protein. sweet potatoes are loaded with beta-carotene, which your body converts into vitamin A, promoting eye health and boosting immunity. Meanwhile, black beans provide a hearty dose of dietary fiber and iron, supporting digestion and sustained energy levels. This combination makes the Harvest Harmony salad a smart choice for anyone seeking both flavor and wellness in every bite.
Perfect Pairings and Ingredient Enhancements
To elevate the vibrant flavors in this salad, consider adding a handful of fresh herbs like cilantro or parsley for a burst of green freshness. A squeeze of lime juice brings a bright acidity that contrasts beautifully with the natural sweetness of the roasted sweet potato. Toasted pumpkin seeds or pepitas introduce a delightful crunch and subtle nuttiness, while diced avocado lends creaminess and richness that rounds out the texture. For a touch of spice, a dash of smoked paprika or ground cumin integrates perfectly, enhancing the earthy black beans and caramelized edges of the sweet potato. These thoughtful enhancements highlight the salad’s harvest-inspired roots, making every forkful a symphony of taste and texture.
Step by Step to the Ultimate Harvest Salad
Prep and Cook Time
- Preparation: 15 minutes
- Cooking: 30 minutes
- Total Time: 45 minutes
Yield
Serves 4 as a hearty main dish or 6 as a side salad.
Difficulty Level
Easy – perfect for home cooks craving a nutritious meal with minimal fuss.
Ingredients
- 2 medium sweet potatoes (about 1 lb), peeled and cubed into 1-inch pieces
- 1 (15 oz) can of black beans, drained and rinsed
- 2 tablespoons extra-virgin olive oil, divided
- 1 teaspoon ground cumin
- 1/2 teaspoon smoked paprika
- 1/2 teaspoon sea salt, divided
- 1/4 teaspoon freshly ground black pepper
- 1 small red bell pepper, finely diced
- 1/4 cup finely chopped red onion
- 1/4 cup fresh cilantro, roughly chopped
- 1 ripe avocado, diced
- Juice of 1 lime
- 2 tablespoons toasted pumpkin seeds (pepitas)
- Optional: a pinch of cayenne pepper for heat
Instructions
- Preheat your oven to 425°F (220°C).Line a baking sheet with parchment paper for easy cleanup.
- In a large bowl,toss the cubed sweet potatoes with 1 tablespoon olive oil,ground cumin,smoked paprika,half the salt,and black pepper until evenly coated.
- Spread the sweet potatoes in a single layer on the prepared baking sheet. Roast in the oven for 25-30 minutes, flipping halfway through, until tender and golden at the edges.
- While the sweet potatoes roast, gently combine the black beans, red bell pepper, red onion, and cilantro in a large serving bowl.
- Drizzle the remaining 1 tablespoon olive oil and lime juice over the bean mixture. Add the remaining salt and toss to combine.
- Once the sweet potatoes are roasted and cooled slightly, fold them into the black bean mixture carefully to avoid mashing the beans.
- Gently fold in the diced avocado last, so it retains its creamy texture throughout.
- Sprinkle toasted pumpkin seeds and a pinch of cayenne pepper on top if using, adding visual appeal and an exciting crunch.
- Serve immediately at room temperature or chilled. this salad also holds well for up to two days in the fridge, making it ideal for make-ahead meals.
tips for Success
- Sweet Potato choice: Opt for firm sweet potatoes without blemishes to ensure perfect roasting.
- Roasting Evenly: Cut sweet potatoes into uniform cubes so they cook consistently and caramelize beautifully.
- Bean Texture: Use fresh canned black beans for ease, but rinsing is vital to remove excess sodium and canned flavor.
- Avocado Substitute: If you prefer, swap avocado for cubes of cucumber or roasted butternut squash for a different texture profile.
- Make-Ahead: Separate the avocado and pumpkin seeds when storing leftovers and add just before serving to maintain freshness and crunch.
- Extra Zing: For a bold twist, stir in a teaspoon of freshly grated ginger or a splash of apple cider vinegar in the dressing.
Serving Suggestions
This vibrant salad shines served in rustic bowls garnished with a wedge of lime and extra cilantro sprigs. It pairs wonderfully alongside warm, crusty bread or can be spooned over a bed of mixed greens to create a full meal. Consider offering a dollop of dairy-free yogurt or tahini drizzle for creaminess and a touch of elegance. for a festive table, sprinkle pomegranate seeds on top; their ruby hue and tartness bring a stunning contrast and seasonal flair.
| Nutrient | per Serving | % Daily Value* |
|---|---|---|
| Calories | 320 kcal | 16% |
| Protein | 9 g | 18% |
| Carbohydrates | 50 g | 17% |
| Fat | 8 g | 12% |
| Fiber | 12 g | 48% |
| *Percent Daily Values are based on a 2,000 calorie diet. | ||

For more nourishing plant-based recipes, check out our Seasonal Harvest Bowls collection and embrace fresh, wholesome eating year-round.
Q&A
Q&A: Harvest Harmony - Roasted Sweet Potato & Black Bean Salad
Q1: What makes the “harvest Harmony” salad unique compared to other autumn dishes?
A1: The “Harvest Harmony” salad shines through its vibrant blend of roasted sweet potatoes and hearty black beans, creating a perfect balance of sweetness and earthiness. This dish embraces the season’s bounty,offering a wholesome yet refreshing way to celebrate autumn flavors without heaviness.
Q2: Why roast the sweet potatoes rather of boiling or steaming them?
A2: Roasting the sweet potatoes caramelizes their natural sugars, enhancing their rich, sweet flavor and adding a delightful caramelized edge.This method also gives a slightly crisp exterior with a soft, creamy interior that contrasts beautifully with the tender black beans.
Q3: what role do black beans play in this salad?
A3: Black beans add a protein-packed, creamy texture that complements the sweet potatoes’ soft roast. they also introduce subtle earthiness and provide a satisfying bite, making the salad more filling and nutritionally complete.Q4: Can I customize the dressing to suit different tastes?
A4: Absolutely! The classic dressing balances tangy acidity with subtle sweetness and spice, but feel free to experiment. Citrus-based dressings highlight freshness, while a hint of maple syrup or honey can deepen the autumnal vibe. Adding fresh herbs like cilantro or parsley brings a bright, herbaceous note.
Q5: What are some excellent additions or toppings to elevate this salad?
A5: Toasted pumpkin seeds or pepitas add crunch and a nutty flavor, while thinly sliced red onions or pickled jalapeños bring a zingy contrast. Avocado slices introduce creaminess, and a sprinkle of feta or cotija cheese (for a plant-based twist, try a tangy nut cheese) can elevate the savory depth.
Q6: Is this salad suitable for special dietary needs?
A6: Yes! This salad is naturally gluten-free, vegetarian, and vegan-friendly when using a plant-based dressing. It’s also high in fiber and protein, making it a nourishing choice for a wide range of diets.
Q7: How can I prepare this salad ahead of time without losing flavor or texture?
A7: Roast the sweet potatoes and cook the black beans in advance, then store them separately.Combine and dress the salad shortly before serving to maintain freshness and prevent sogginess. Keep crunchy toppings aside until the last moment for optimal texture.
Q8: Can this salad be served warm, cold, or at room temperature?
A8: One of the beauties of this dish is its versatility. It’s delicious warm, straight from the oven, offering cozy comfort. At room temperature, the flavors meld beautifully, and chilled, it becomes a refreshing meal perfect for on-the-go lunches or picnics.Q9: What inspired the creation of the “Harvest Harmony” salad?
A9: Inspired by the golden hues and hearty flavors of fall’s harvest, this salad celebrates the marriage of sweet, smoky sweetness with robust legumes.It’s a tribute to seasonal simplicity and the joy of combining textures and tastes that sing together in perfect harmony.
This Q&A invites readers to discover the thoughtful layers behind the Harvest Harmony salad, enriching their cooking journey with creativity and knowledge.
Wrapping Up
As the vibrant flavors of roasted sweet potato and hearty black beans mingle in this Harvest Harmony salad, we’re reminded that the best meals are those that bring together nature’s bounty in perfect balance. This dish not only celebrates the autumn harvest but also invites you to nourish your body with wholesome, colorful ingredients that sing together in every bite. Whether served as a comforting side or a satisfying main, this salad is a delicious ode to seasonal simplicity and soulful eating-proof that harmony on your plate can brighten even the crispest of days.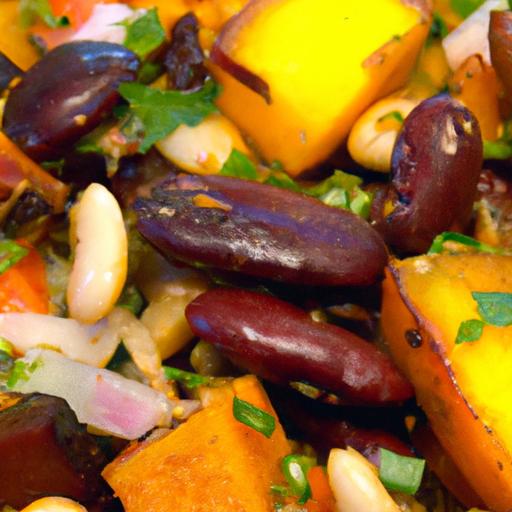
Cajun Shrimp Andouille Sausage Skillet is a fiery festivity of Southern flavors that brings warmth and boldness to your table in one vibrant dish. Rooted in the heart of Louisiana, this recipe marries smoky, spicy seasoning with the tender heat of perfectly cooked shrimp and sausage that awakens your palate. Each bite evokes the rich cultural heritage of Cajun cuisine-an exhilarating blend of history, spice, and comfort that’s both approachable and unforgettable.
Prep and Cook Time
Preparation: 15 minutes | Cooking: 20 minutes | Total: 35 minutes
Yield
Serves 4 hearty portions
Difficulty Level
Medium - perfect for home cooks seeking a flavorful adventure with straightforward steps
Ingredients
- 1 pound large shrimp, peeled and deveined
- 12 ounces Andouille-style smoked turkey sausage, sliced into 1/2-inch rounds
- 1 tablespoon olive oil
- 1 tablespoon butter
- 1 medium green bell pepper, diced
- 1 medium red bell pepper, diced
- 1 medium yellow onion, finely chopped
- 3 cloves garlic, minced
- 1 cup diced tomatoes (fresh or canned, no salt added)
- 1/2 cup low-sodium chicken broth
- 1 tablespoon Cajun seasoning blend (see method below)
- 1 teaspoon smoked paprika
- 1/2 teaspoon cayenne pepper (adjust to taste)
- Salt and freshly ground black pepper, to taste
- 2 tablespoons chopped fresh parsley, for garnish
- Cooked white rice or cauliflower rice, for serving
Crafting the Perfect Cajun Seasoning Blend for Bold Flavor
Combining aromatic spices creates the backbone of Cajun dishes. Blend 2 teaspoons smoked paprika, 1 teaspoon cayenne pepper, 1 teaspoon garlic powder, 1 teaspoon onion powder, 1 teaspoon dried oregano, 1 teaspoon dried thyme, 1 teaspoon black pepper, and 1 teaspoon salt to craft a homemade Cajun seasoning that brings warmth and complexity without overwhelming heat. This mix grounds the shrimp and sausage with signature Southern heat and savory depth.
Selecting the Best Shrimp and Andouille Sausage for Maximum Taste
Choose fresh or high-quality frozen large shrimp, peeled and deveined, for tender bites that soak up seasoning perfectly. Avoid pre-cooked shrimp to retain maximum flavor and texture. For sausage, opt for a smoked turkey-based Andouille-style sausage that offers a punch of smoky spice while remaining pork-free, aligning with dietary preferences without compromising authenticity. This balance ensures every mouthful bursts with bold Cajun character.
Step by Step Guide to Cooking a Flavorful Cajun Skillet Dinner
- Prepare the seasoning: In a small bowl, mix your Cajun seasoning blend with smoked paprika and cayenne pepper. Set aside.
- Heat the skillet: Add olive oil and butter to a large heavy skillet over medium-high heat until shimmering.
- Sear the sausage: Add sliced turkey Andouille-style sausage and sauté until golden brown and slightly crispy, about 5 minutes.Remove with a slotted spoon and set aside.
- Sauté the vegetables: In the same skillet, add diced bell peppers and onions.Cook until softened and fragrant, about 5 minutes, stirring occasionally to prevent sticking.
- Add garlic: Stir in minced garlic and cook 1 minute, until aromatic but not browned.
- Season and combine: Sprinkle the Cajun seasoning blend evenly over the vegetables.Stir for 1-2 minutes to toast the spices gently, deepening their flavor.
- Deglaze: Pour in chicken broth and diced tomatoes,scraping any browned bits from the pan. Simmer for 3-4 minutes to blend flavors and reduce slightly.
- Cook shrimp: Nestle the shrimp into the sauce, cover and cook for 4-5 minutes until the shrimp turn pink and opaque. Avoid overcooking for tender texture.
- Reintroduce sausage: Return the browned sausage to the skillet and stir gently to combine.Cook another 1-2 minutes to reheat the sausage and marry flavors.
- Finish and garnish: Adjust seasoning with salt and pepper to taste.Sprinkle chopped fresh parsley just before serving for color and brightness.
Tips for Serving and Pairing Your cajun Shrimp and Sausage Skillet
This skillet thrives when served hot over fluffy white rice or low-carb cauliflower rice to soak up the rich,spicy sauce. Garnish with extra parsley or thinly sliced green onions for a fresh contrast. For a visual treat, serve with lemon wedges on the side-squeezing fresh lemon juice adds an uplifting acidity that balances the smoky heat. Pair this dish with a crisp,chilled non-alcoholic sparkling citrus beverage or iced tea infused with mint to cleanse the palate and complement the bold flavors.
Chef’s notes
- For a smokier twist, add a pinch of chipotle powder to your Cajun seasoning blend.
- Feel free to swap bell peppers for poblano or jalapeño peppers if you want a bit more heat.
- To make this dish ahead, prepare the sauce and sausage components separately-combine and warm the shrimp just before serving to maintain perfect texture.
- For a gluten-free version, check that your sausage and broth are certified gluten-free.
nutritional Data (per serving)
| Calories | Protein | Carbs | Fat |
|---|---|---|---|
| 320 kcal | 35 g | 12 g | 12 g |

Explore more bold seafood recipes in our Spicy Seafood Collection and discover the history of Cajun cuisine with this detailed National Park service guide.
Q&A
Q&A: Savor the Flavor - Cajun Shrimp & Andouille Sausage Skillet
Q1: What makes this Cajun Shrimp & Andouille Sausage Skillet so flavorful?
A1: The magic lies in the bold cajun seasoning-an aromatic blend of paprika, garlic, onion, cayenne, and herbs-that perfectly complements the smoky spice of the andouille sausage and the sweet, tender shrimp. When these ingredients come together in one skillet, they create a harmonious explosion of Southern-inspired flavors.
Q2: Can I prepare this dish in under 30 minutes?
A2: Absolutely! This skillet meal is designed for speed and simplicity. The shrimp cook in just minutes, and the sausage adds instant smoky depth without lengthy prep. With a handful of fresh vegetables and Cajun spices, you’ll have a vibrant, satisfying dish on the table in no time.
Q3: What’s the secret to perfectly cooked shrimp in this recipe?
A3: Timing is everything! Shrimp cook quickly and become rubbery if overdone. Sauté them just until they turn pink and opaque-usually around 2-3 minutes per side. Getting this right ensures they’re tender and juicy, soaking up the skillet’s spicy, savory sauce.
Q4: What sides pair well with this skillet meal?
A4: This bold dish pairs beautifully with simple sides like fluffy white rice, creamy grits, or a crisp green salad to balance the spices. For a heartier meal, serve alongside roasted vegetables or buttery cornbread to soak up every last flavorful bite.Q5: How can I adjust the heat level if I prefer milder flavors?
A5: To tame the heat, reduce the cayenne pepper or swap it for smoked paprika. You can also add a splash of cream or a dollop of Greek yogurt at the end to mellow out the spices while keeping the dish rich and vibrant.Q6: Is this recipe suitable for meal prep or leftovers?
A6: Yes! This skillet holds up well when refrigerated and tastes just as delicious the next day. Store leftovers in an airtight container and reheat gently on the stovetop or microwave. The flavors deepen over time, making it a perfect make-ahead meal for busy days.
Q7: Can I swap the andouille sausage with other types of sausage?
A7: Definately! Choose any spicy, smoked sausage made from chicken, turkey, or beef to maintain the robust flavor without compromising the dish’s essence. The key is a sausage that offers that signature smoky kick that pairs perfectly with Cajun seasoning and shrimp.
Q8: What vegetables work best in this skillet?
A8: classic choices like bell peppers, onions, and celery add a crunchy, aromatic base typical of Cajun cooking. You can also toss in cherry tomatoes or spinach toward the end for freshness and color, creating a well-rounded, vibrant skillet.
Q9: How do I ensure the shrimp and sausage blend flavors without one overpowering the other?
A9: Start by seasoning and cooking the sausage to release it’s smoky oils, then add the aromatics and shrimp. This layering allows the shrimp to absorb the sausage’s essence without being overwhelmed. Stir gently and avoid overcooking to maintain balance and texture.
Q10: What complementary herbs or garnishes elevate this dish?
A10: Fresh parsley or green onions sprinkled on top add a luminous, herbaceous note that contrasts wonderfully with the deep, spicy flavors.A squeeze of fresh lemon juice just before serving also lifts the dish, adding a vibrant pop of acidity that ties everything together.
Dive into this Cajun Shrimp & Andouille Sausage Skillet and treat your taste buds to a soulful, spicy celebration of Southern comfort cuisine-all from one sizzling pan!
To Conclude
As the enticing aroma of Cajun spices mingles with the hearty sizzle of shrimp and andouille sausage, this skillet dish invites you to experience a flavor journey straight from the heart of Louisiana. Whether you’re seeking a weeknight winner or a show-stopping centerpiece for your next gathering, the Cajun Shrimp & Andouille Sausage skillet delivers bold, soulful taste with every bite.So next time you crave a meal that’s quick to prepare yet rich in tradition, remember-you don’t have to travel far to savor the vibrant, fiery flavors of Cajun cuisine right in your own kitchen.Bon appétit!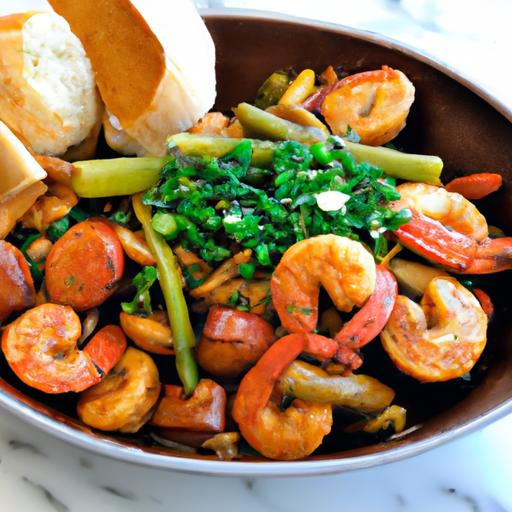
Choosing the Perfect Bread and Meats for Authenticity
The Ultimate Cuban Sandwich Recipe: Flavor in Every Bite begins with selecting the ideal bread and meats-a foundation that sets the tone for authenticity and depth.Traditionally, Cuban bread boasts a light, slightly crispy crust with a soft, airy interior that soaks up flavors without turning soggy. Seek out a fresh, artisan-style white sub roll with a thin crust and tender crumb to replicate that perfect balance.
When it comes to meats, opt for high-quality, lean cuts that deliver rich umami without overpowering the harmonized layers. Instead of typical pork-based fillings, choose smoked turkey breast and beef pastrami as a savory, smoky duo. these options maintain the sandwich’s classic spirit while respecting dietary preferences. Thinly slicing each meat enhances the texture and lets the flavors meld beautifully.
Mastering the Art of Pickles and Mustard for the Ideal Tang
The right tangy accents elevate The Ultimate Cuban Sandwich recipe: Flavor in Every Bite from good to unforgettable. Classic dill pickles sliced paper-thin create a crisp bite and bright acidity that cuts through the richness of meats and cheese. Homemade or store-bought, look for pickles with a balanced brine-neither too sweet nor too sour-to maintain authenticity.
Mustard is the powerhouse of flavor here; a spicy brown or Creole mustard offers the sharp, piquant kick that awakens every bite. Applying a generous but even layer ensures every mouthful carries that perfect punch of tang. For a creative twist, combine prepared mustard with a touch of honey to round out the sharpness without diluting its essence.
Layering Ingredients for Balanced Flavor and Texture
Layering is where artistry meets technique in The Ultimate Cuban Sandwich Recipe: Flavor in Every Bite. Start with a thin coat of mustard on the bottom slice of bread to infuse flavor from the base. Then build with alternating layers: smoked turkey, Swiss cheese, dill pickles, beef pastrami, and a final layer of mustard on the top slice to ensure flavor symmetry.
Balance is critical.The Swiss cheese adds creamy richness and a slight nuttiness, pairing perfectly with the acidity of pickles and sharpness of mustard.Press the layers gently as you assemble, allowing them to nest without overpowering the bread’s structure. This careful orchestration guarantees every bite is balanced between creamy, tangy, smoky, and tender elements.
Pressing Techniques to achieve the Perfect Crunch and melt
Achieving the sublime crunch and melt is the final step in mastering The Ultimate Cuban Sandwich Recipe: Flavor in Every Bite. use a sandwich press or a heavy cast-iron skillet weighted with a foil-wrapped brick to apply even pressure. Preheat your press or skillet to medium-high, then grill the sandwich for 3-5 minutes per side.
Pressing gently but firmly compresses the sandwich, melting the Swiss cheese thoroughly while crisping the bread to a golden-brown perfection. Turn carefully to avoid spilling the fillings, and peek frequently to prevent burning. The result is a symphony of textures-the crisp exterior yielding to molten cheese and tender meats-making every bite an experience of contrast and harmony.

Q&A
Q&A: The Ultimate Cuban Sandwich Recipe: Flavor in Every Bite
Q1: What makes a Cuban sandwich so iconic and beloved worldwide?
A1: The Cuban sandwich, or “Cubano,” is a masterclass in flavor harmony. Its iconic status comes from the perfect balance of rich, savory fillings combined with crisp, buttery bread and a tangy kick of mustard and pickles. each ingredient plays a vital role, creating layers of textures and tastes that deliver an unforgettable bite.
Q2: If traditional pork is off the table,what protein options keep the sandwich flavorful and authentic?
A2: While classic Cuban sandwiches frequently enough spotlight pork,there’s no shortage of alternatives that bring depth and character. Think tender roasted chicken, slow-cooked turkey breast, or even marinated tofu for a plant-based twist.The key is to ensure your protein is well-seasoned and juicy to maintain that satisfying mouthfeel Cuban sandwiches are known for.Q3: What kind of bread should I use to achieve that signature crunch and softness?
A3: Authentic Cuban bread is ideal-light, slightly sweet, with a crisp crust and fluffy interior. If you can’t find it, a good-quality French or Italian bread works nicely. Pressing the sandwich in a sandwich press or panini maker adds the essential crunch and melts the cheese just right, elevating the experience.
Q4: Are there must-have condiments that bring the sandwich’s unique flavor profile to life?
A4: Absolutely! Yellow mustard brings a bright zing that cuts through the richness, while tart dill pickles introduce a refreshing bite. These simple condiments add punch and balance, giving the Cuban sandwich its unmistakable character.
Q5: What cheese strikes the perfect balance between meltiness and flavor?
A5: Traditional Cuban sandwiches often use Swiss cheese for its smooth melt and mild nuttiness. You can also experiment with provolone or mozzarella for subtle variations. The cheese should complement rather than overpower, tying the components together in melty harmony.
Q6: How crucial is the sandwich pressing step, and can I replicate it at home without a panini press?
A6: Pressing the sandwich is essential-it toasts the bread to golden perfection, melts the cheese, and melds the flavors into one cohesive bite.no panini press? No problem! Use a heavy skillet or cast-iron pan with another weighted pan or foil-wrapped bricks on top. Just press down firmly and flip carefully to toast both sides evenly.
Q7: Can I customize the fillings to suit my taste without losing the sandwich’s Cuban essence?
A7: Definitely! The beauty of the Cuban sandwich lies in its versatility. Feel free to swap or add veggies like sautéed onions, roasted bell peppers, or even a hint of fresh cilantro for a unique twist. Just keep the essential components of mustard, pickles, cheese, and crisp bread to preserve the soul of the Cubano.
Q8: What side dishes complement the ultimate Cuban sandwich?
A8: Classic sides like sweet plantain chips, black bean salad, or a crisp green salad with lime vinaigrette elevate the meal beautifully. These sides provide fresh,vibrant contrasts that highlight the sandwich’s richness and keep your palate engaged.
Enjoy crafting your own Cuban masterpiece-every bite promises a journey of bold,bright,and buttery flavors that celebrate tradition with a twist!
Closing Remarks
As you wrap your hands around this ultimate Cuban sandwich,remember that every layer tells a story-of vibrant Cuban heritage,bold flavors,and culinary craftsmanship.Whether you’re savoring it at home or sharing it with friends, this recipe brings the soul of Cuba straight to your plate. So go ahead, take that first hearty bite, and let the symphony of ham, roast pork, pickles, mustard, and melted cheese transport you to the streets of Havana. Flavor in every bite isn’t just a promise-it’s a delicious journey waiting to unfold.
one-Pan Wonder: easy Sheet Pan Sausage and Peppers Recipe brings together the vibrant colors and bold flavors of perfectly roasted sausages paired with crisp, tender peppers – a meal that embodies simplicity and satisfaction. This dish is inspired by the Mediterranean tradition of combining savory, hearty sausages with fresh garden produce, making it a timeless classic for busy weeknights and casual gatherings alike.
Prep and Cook Time
- Planning: 15 minutes
- Cooking: 30 minutes
- Total Time: 45 minutes
Yield
Serves 4 generously
Difficulty Level
Easy – perfect for newcomers and seasoned cooks seeking a fuss-free dinner
Ingredients
- 1 lb chicken sausage links (preferably spicy or Italian style, sliced into 2-inch pieces)
- 3 large bell peppers (choose a mix of red, yellow, and orange for a vibrant presentation, sliced into strips)
- 1 large red onion (thinly sliced)
- 3 tbsp extra virgin olive oil
- 1 tsp smoked paprika
- 1 tsp garlic powder
- ½ tsp dried oregano
- Salt and freshly ground black pepper to taste
- Fresh parsley (chopped, for garnish)
- 1 lemon (zested and juiced)
- Optional: crushed red pepper flakes for added heat
Instructions
- Preheat your oven to 425°F (220°C). Line a large sheet pan with parchment paper or lightly grease it to prevent sticking.
- Prepare the sausage and vegetables: Arrange the sliced chicken sausage, bell peppers, and red onion evenly on the sheet pan. this ensures even roasting and caramelization.
- Season generously: Drizzle the olive oil over the sausage and peppers.Sprinkle with smoked paprika, garlic powder, oregano, salt, and black pepper. Toss everything with your hands or tongs untill the pieces are coated evenly.
- Roast: Place the sheet pan in the oven and roast for 25-30 minutes, stirring halfway thru. Look for golden edges on the sausage and peppers that have softened and slightly charred for maximum flavor.
- Add brightness: Once out of the oven,drizzle the lemon juice and zest over the top,adding a refreshing zing that complements the rich roasted flavors beautifully.
- Garnish and serve: Sprinkle freshly chopped parsley and, if desired, crushed red pepper flakes for some extra heat. Serve warm and enjoy the one-pan magic!
Tips for Success
- Choose high-quality chicken sausage: As this is the star protein, pick sausages with robust seasoning to keep the dish flavorful without overpowering the peppers.
- Use colorful bell peppers: A variety of colors not only brightens the plate but also adds subtle sweetness and textural contrast.
- Uniform slicing: Keeping sausage and vegetables similarly sized ensures even cooking and perfect caramelization.
- Make ahead: You can prep the sausage and veggies a day before, keep them covered in the fridge, and roast fresh when ready to save time.
- For extra crispiness: Swapping half the bell peppers for thinly sliced zucchini or eggplant adds layers of texture and complexity.
- Double the recipe: Sheet pans can be stacked in the oven if you need to serve a crowd; just rotate halfway through cooking for even results.
serving Suggestions
This flavorful sheet pan sausage and peppers dish pairs beautifully with a crusty artisan bread or a simple side of fluffy couscous, which soaks up the delicious juices. For a lighter option, serve alongside a crisp green salad dressed with lemon vinaigrette.
Consider garnishing each serving with roasted garlic aioli or a sprinkle of crumbled feta cheese for an extra touch of indulgence. Fresh herbs like basil or oregano can also elevate the aroma and presentation.

| Nutrient | Per Serving |
|---|---|
| Calories | 320 kcal |
| Protein | 22 g |
| Carbohydrates | 12 g |
| Fat | 18 g |
For more creative one-pan meals that simplify dinner without sacrificing flavor, check out our One-Pan Chicken and Vegetables Recipe.For further insight on sausage nutrition and selection, visit Healthline’s expert guide.
Q&A
Q&A: One-Pan Wonder – Easy Sheet Pan Sausage and Peppers Recipe
Q1: What makes this recipe a “one-pan wonder”?
A1: The magic lies in its simplicity and minimal cleanup. Everything – sausages, peppers, onions, and seasonings – roasts together on a single sheet pan. This not only melds flavors beautifully but also saves time on washing dishes, making it perfect for busy weeknights or effortless entertaining.
Q2: What types of sausages work best in this recipe?
A2: Any hearty, flavorful sausages that aren’t pork-based shine here. Think chicken, turkey, beef, or plant-based sausages with robust seasoning. Their natural juices mingle with roasted veggies, infusing the whole pan with savory goodness.
Q3: Can I customize the veggies in the recipe?
A3: Absolutely! while classic bell peppers and onions are star players, feel free to add zucchini, cherry tomatoes, or mushrooms. These add different textures and flavors, allowing you to tailor the dish to your favorite seasonal produce or pantry staples.
Q4: How can I make sure the sausages cook evenly with the vegetables?
A4: Cut the vegetables into evenly sized pieces and arrange everything in a single layer on the pan.Starting at a higher oven temperature, usually around 425°F (220°C), helps the sausages brown nicely while roasting the veggies to tender, caramelized perfection.
Q5: Is this recipe suitable for meal prep?
A5: Definitely! This dish keeps wonderfully in the fridge for up to 4 days and reheats beautifully. You can pack it into containers for quick lunches or dinners. Bonus: leftovers taste even better as the flavors continue to meld.
Q6: What sides pair well with sheet pan sausage and peppers?
A6: Since this meal is hearty and colorful on its own, simple sides work best. Think fluffy rice, creamy polenta, crusty bread, or a fresh green salad to balance the richness of the roasted sausages and peppers.Q7: can this recipe be made gluten-free or vegan?
A7: Yes! Choose gluten-free sausages and make sure any seasoning blends don’t contain hidden gluten. For a vegan twist, plant-based sausages paired with a drizzle of olive oil and your favorite herbs make an equally satisfying sheet pan feast.
Q8: How do I add extra flavor without complicating the recipe?
A8: Use bold spices like smoked paprika, garlic powder, and Italian herbs sprinkled over everything before roasting. A squeeze of fresh lemon juice or a sprinkle of fresh parsley after baking adds brightness and freshness without extra fuss.
With this one-pan wonder, dinner is a breeze-big on flavor, low on effort, and a guaranteed crowd-pleaser!
In Conclusion
There you have it-a simple, savory solution that brings bold flavors and minimal cleanup to your weeknight table. This easy sheet pan sausage and peppers recipe proves that delicious dinners don’t have to be complicated. With just one pan and a handful of ingredients, you can create a hearty, colorful meal that satisfies both your taste buds and your time constraints. So next time you’re craving something fuss-free yet full of flavor, remember this one-pan wonder-your new go-to for effortless, crowd-pleasing comfort food.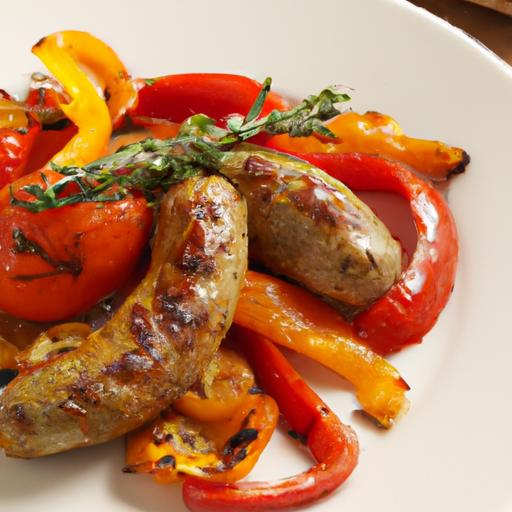
Fiery Thai Basil Chicken is more than just a beloved street food from the bustling corners of Bangkok-it’s a culinary journey into Thailand’s vibrant fusion of bold flavors, where the searing heat of chilies meets the crisp, aromatic hint of fresh Thai basil. This dish perfectly embodies the essence of thai cuisine: a harmonious balance that excites the palate while remaining approachable for home cooks eager to master authentic Bangkok street flavors.

Prep and Cook Time
- Planning: 15 minutes
- Cooking: 10 minutes
- Total: 25 minutes
Yield
Serves 4 hearty portions, ideal for lunch or dinner alongside steamed jasmine rice.
Difficulty Level
Easy to Medium – perfect for home cooks looking to explore Thai spices and herbs with confidence.
Ingredients
- 500g boneless chicken thighs, thinly sliced
- 3 tbsp vegetable oil
- 5 cloves garlic, minced
- 3-4 bird’s eye chilies, finely chopped (adjust for heat preference)
- 1 large shallot, thinly sliced
- 2 tbsp light soy sauce
- 1 tbsp oyster sauce (vegetarian oyster sauce as an option)
- 1 tbsp fish sauce
- 2 tsp palm sugar or brown sugar
- 1 cup fresh Thai basil leaves (holy basil preferred for authentic flavor)
- Optional: 1 red bell pepper, thinly sliced for color and sweetness
Instructions
- Heat the vegetable oil over medium-high heat in a large wok or skillet until shimmering but not smoking.
- Add the minced garlic, chopped bird’s eye chilies, and sliced shallots.Sauté for 1-2 minutes until fragrant and the shallots start to soften, taking care not to burn the garlic.
- Increase the heat to high and add the sliced chicken. Stir-fry vigorously,breaking up any clumps. Cook until the chicken is opaque and starting to brown, about 5-6 minutes.
- mix in the light soy sauce, oyster sauce, fish sauce, and palm sugar. Toss continuously to coat the chicken evenly. The mixture should glisten and become slightly saucy.
- Add the red bell pepper slices if using, and cook for an additional 2 minutes to soften.
- Turn off the heat and gently fold in the fresh Thai basil leaves, allowing their herbal aroma to infuse through the dish without wilting excessively.
- Serve promptly over steaming jasmine rice, making sure to spoon up the vibrant sauce and aromatics with each portion.
Tips for Success
- For authentic Fiery Thai Basil Chicken, using fresh holy basil is key. If unavailable, Thai basil or even sweet basil can provide a lovely herbal note.
- Balancing heat: Start with fewer bird’s eye chilies if you’re sensitive to spice-remember, you can always add more after tasting.
- Chicken thighs</offer more tenderness and a deeper flavor than breasts, making them ideal for this speedy stir-fry.
- If you want to prepare ahead,chop all aromatics and marinate the chicken in the soy-fish sauce mixture for 10-15 minutes to boost flavor.
- Use a high smoke point oil like vegetable or canola for fast, hot cooking-essential to achieve that signature wok sear.
Serving Suggestions
present your dish on a large platter or individual bowls topped with a generous handful of extra Thai basil leaves for visual contrast and freshness. Pair with fragrant jasmine rice or sticky rice to soak up the flavorful sauce. A side of crisp cucumber slices or pickled vegetables can offer a cooling counterpoint. For drinks, consider an ice-cold Thai iced tea or a refreshing lime soda to quell the heat while complementing the herbal tones.
| Nutrient | Per Serving (approx.) |
|---|---|
| Calories | 320 kcal |
| Protein | 35 g |
| Carbohydrates | 8 g |
| fat | 15 g |
Discover how to cook perfect Thai jasmine rice to complement your meal. For more on the cultural roots of Thai food, explore the insights from Thailand’s official tourism site.

Q&A
Q&A: Fiery Thai Basil Chicken – A Bold Taste of Bangkok’s Streets
Q1: What makes Fiery Thai Basil Chicken a beloved dish in Bangkok?
A1: Fiery Thai Basil Chicken, or pad Krapow Gai, captures the essence of Bangkok’s bustling street food scene with its vibrant, punchy flavors. The marriage of spicy chilies,aromatic fresh basil,and savory soy-based sauces creates a bold,unforgettable taste that’s both comforting and electrifying – a true reflection of Thailand’s colorful culinary culture.
Q2: How do the ingredients come together to create its signature flavor?
A2: At the heart of this dish is minced or chopped chicken quickly stir-fried with garlic and fresh Thai chilies, delivering a fragrant heat that tingles the palate.Adding oyster sauce, soy sauce, and a little sugar balances savory, salty, and sweet notes. But the superstar is Thai holy basil-its peppery, slightly minty aroma that elevates this dish from simple stir-fry to a sensory delight.
Q3: Can you customize the heat level in Fiery Thai Basil Chicken?
A3: Absolutely! The dish thrives on its spicy kick, but it’s easy to adjust. For subtle warmth,reduce the number of thai bird’s eye chilies or substitute with milder peppers. Conversely,to turn up the heat,add extra chilies or use chili paste. The beauty of this street-style dish lies in its flexibility to suit your personal spice tolerance.
Q4: What’s the best way to serve Fiery Thai Basil Chicken?
A4: Traditionally, it’s served piping hot over steamed jasmine rice, allowing the rice to soak up every bit of the savory, spicy sauce. A fried egg with crispy edges on top adds a rich, creamy counterpoint to the heat, making each bite a harmonious play of textures and flavors-simple, satisfying, and full of character.
Q5: Are ther any key tips for cooking this dish authentically at home?
A5: Yes! Use fresh Thai holy basil rather than sweet basil to nail that authentic aroma.Also, stir-fry quickly over high heat to keep the chicken juicy and the basil vibrant. Prep all ingredients beforehand because this dish comes together fast-like the street vendors’ versions in Bangkok’s lively markets!
Q6: Can this dish be made with other proteins?
A6: While chicken is classic, similar techniques work beautifully with ground turkey, chicken breast strips, or even tofu for a vegetarian twist. The essential elements are the fiery chilies and fresh holy basil, which bring the unmistakable signature flavor no matter the protein.
Q7: What drinks or sides complement Fiery Thai Basil Chicken without overpowering it?
A7: To keep the bold flavors front and center, opt for light, cooling sides like cucumber salad tossed in lime and a pinch of sugar. Jasmine rice is the ideal staple to mellow the spice. Refreshing beverages like iced lemongrass tea or coconut water provide a soothing balance to the dish’s heat.
Q8: Why is Fiery Thai Basil Chicken considered an icon of Thai street food culture?
A8: Simple yet bold, this dish embodies the fast-paced, flavorful spirit of Bangkok’s street vendors who serve up satisfying meals at lightning speed. With humble ingredients transformed into an explosion of taste, it’s a dish that tells the story of everyday Thai life-accessible, spirited, and unforgettable.
Closing Remarks
As the bold flavors of fiery Thai basil chicken linger on your palate, you’ve tasted more than just a dish-you’ve experienced a vibrant slice of Bangkok’s bustling street life.This humble yet powerful recipe captures the heart of Thai cuisine: a perfect harmony of heat, sweetness, and aromatic herbs that awaken the senses and tell a story with every bite. Whether you’re a seasoned foodie or a curious cook, bringing this dish to your table is an invitation to explore the rich culinary tapestry of Thailand, where every meal is a journey and every flavor, a revelation. so go ahead-embrace the spice,savor the basil’s fragrance,and let this fiery dish transport you to the vivid streets where bold tastes reign supreme.